Classic Ice Cream Cake
Classic Ice Cream Cake  |  Lemon & Mocha

Classic Ice Cream Cake! Yes! This is the recipe that has been missing from Lemon & Mocha for far too long. As you all know, myself and my family are all obsessed with ice cream. And let’s be honest, most people are obsessed with ice cream. So when you tell people the cake you made is not just a cake, but an ice cream cake, you are guaranteed to get an overly enthusiastic response.
Classic Ice Cream Cake  |  Lemon & Mocha

Other than my Perfect Chocolate Chips Cookies and my Perfect Chocolate Cupcakes, ice cream cakes are the dessert I have made the most. I was debating titling this recipe Classic Birthday Ice Cream Cake, but this cake is too delicious and versatile to be relegated to only birthdays. Family cookouts, graduation parties, 4th of July, that random Tuesday when you got an ice cream cake craving – all valid celebrations for this cake.
Classic Ice Cream Cake  |  Lemon & Mocha

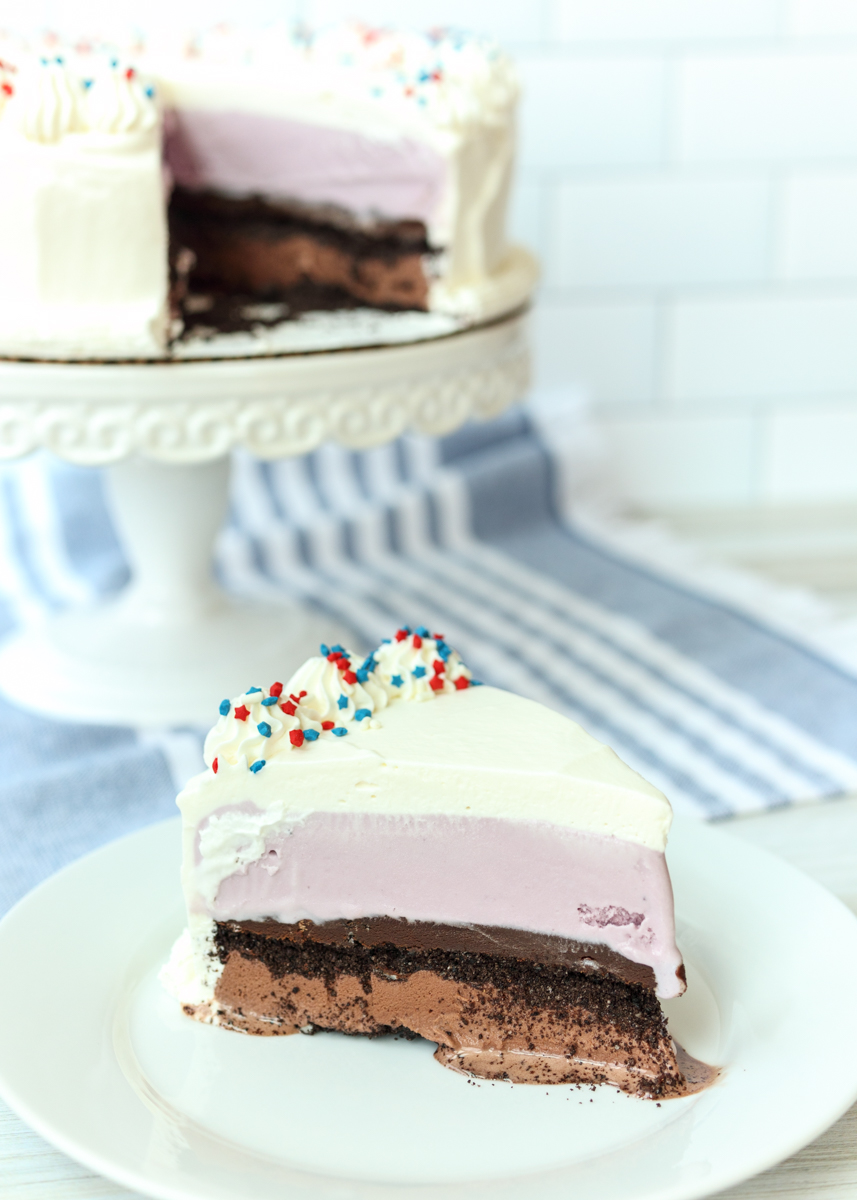
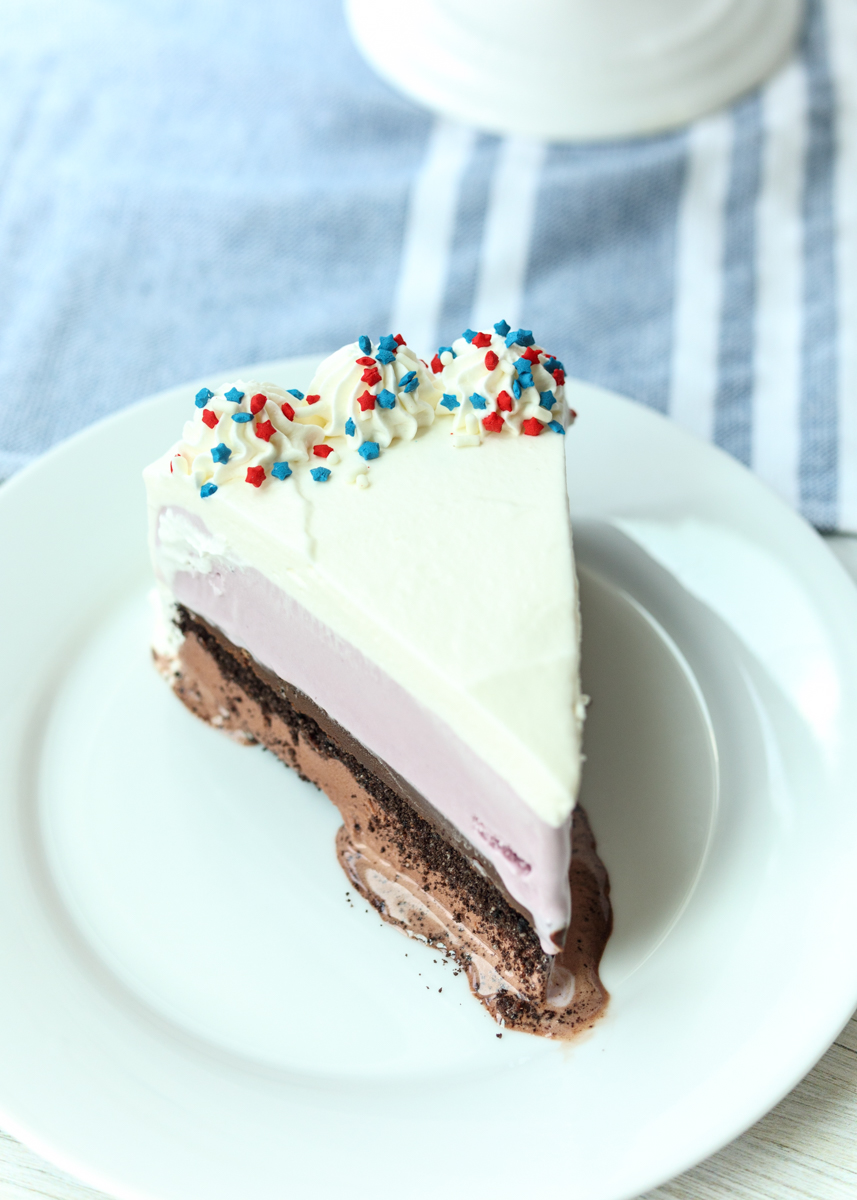
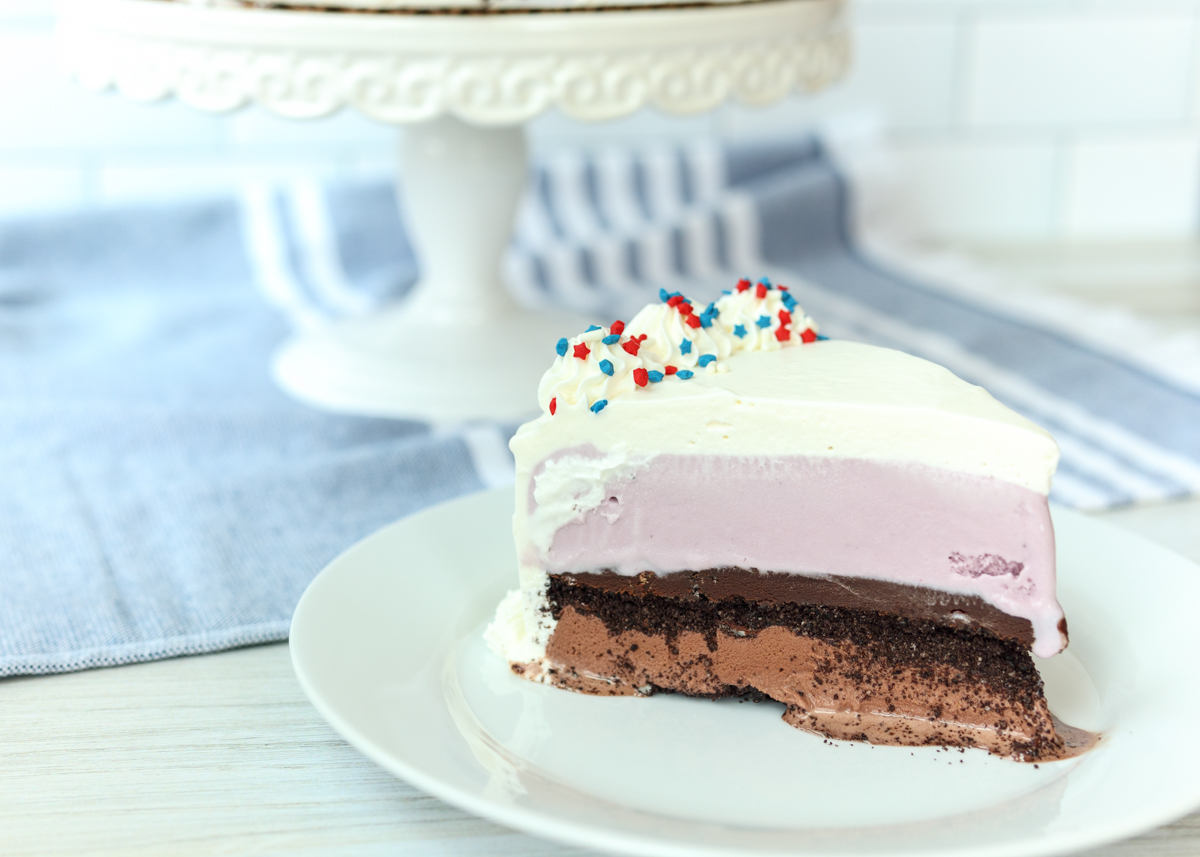
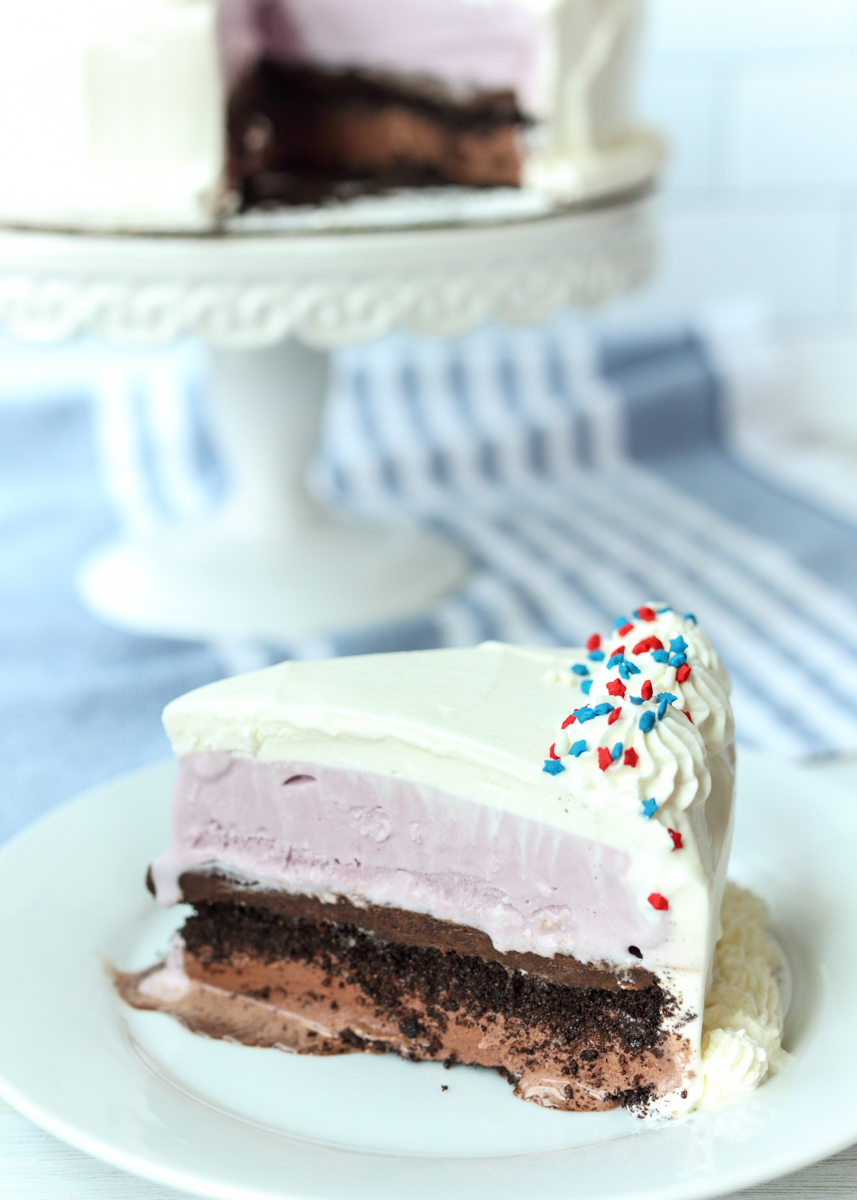
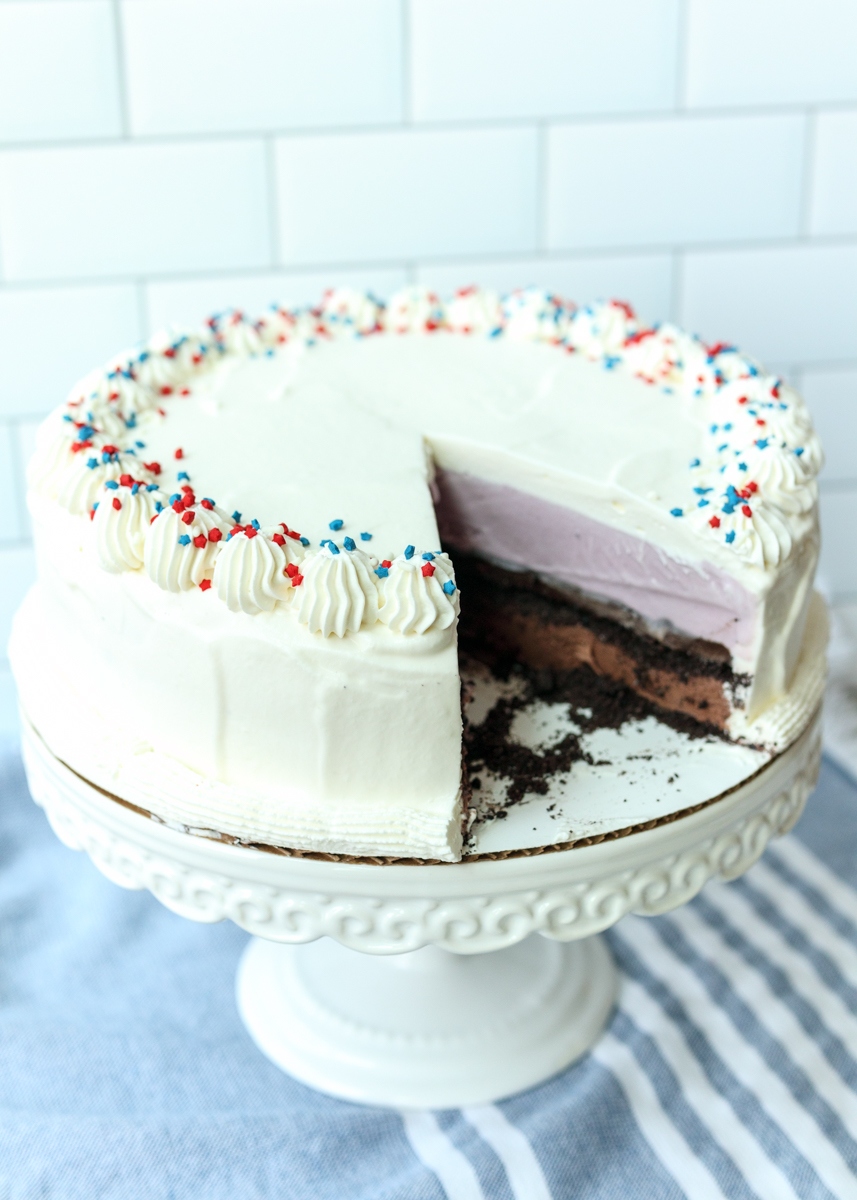
I’ve shared plenty of ice cream pie recipes on here before, from the decadent Hot Fudge Brownie Sundae Ice Cream Pie to the flavor-packed Pumpkin Pecan Ice Cream Pie to the fan favorite Stracciatella Chocolate Hazelnut Gelato Pie, and while those are all great specialty options, this recipe is for a full cake version and is called classic for a reason. We have a bottom crunch layer followed by two layers of ice cream that sandwich together another crunch layer and a sauce layer. The whole cake is then frosted with whipped cream, just like you would get at your neighborhood ice cream shop or Dairy Queen.
Classic Ice Cream Cake  |  Lemon & Mocha

The beauty of this cake, aside from it being a definite crowd-pleaser (although that might be a bad thing if you were expecting leftovers!), is that you can customize it to your favorite ice cream flavors, preferred crunch ingredient and ideal sauce component. My Dad had a big birthday over the weekend (70!) and since he is the ultimate ice cream fanatic I had to bust out this ice cream cake. I went fairly traditional, using Oreo cookie crumbs for the crunch layer, chocolate ganache for the sauce layer and chocolate and black raspberry ice cream. The combination was pure perfection! What is your ideal ice cream cake combination?
Classic Ice Cream Cake  |  Lemon & MochaWhat flavors of ice cream should I use?
Whatever flavors you prefer! You will need 1.5 quarts of each flavor. You could go traditional with vanilla and chocolate or mix it up with cookies and cream and peanut butter cup!

What should I use for the crunch layer?
Oreo cookie crumbs and graham cracker crumbs are my two favorites. I like to use Oreo cookie crumbs when I’m using chocolate in the cake and graham cracker crumbs when I’m having a more vanilla or fruit-forward flavored ice cream cake. Speculoos cookie crumbs, crushed pretzels and chocolate chip cookie crumbs are other great options. This is a great layer to adapt based on the season as well, such as gingersnap cookies in the fall or peppermint cookies in the winter. Whatever you use, make sure they are crumbs and not chunks.

What should I use for the sauce layer?
Chocolate ganache is my go-to since everyone loves it. It has a great fudgy texture in the ice cream cake. Ganache sounds fancy, but it’s easy to make: heat cream then stir in chocolate chips and butter until melted and smooth. You could make a peanut butter version by using peanut butter chips instead. Or go in a completely different direction and use marshmallow topping.
Classic Ice Cream Cake  |  Lemon & MochaWhat size pan should I use?
I use a 9-inch springform pan that I line with two pieces of plastic wrap to make it even easier to take the cake out. The springform pan is nice because it is deep and you’re able to take off the ring for easy removal; a regular 9-inch cake pan will not be deep enough. Alternatively if you use a 9-inch by 3-inch round cake pan then it should be deep enough.

How do I make the ice cream layers smooth?
I was making ice cream cakes for years before I stumbled on this little trick: beat your ice cream to make it spreadable without making it melty. I use the paddle attachment on my stand mixer. If you try to scoop right from the ice cream container into the cake pan you will get a combination of ice cream that is both too melted and too hard to be smoothed and packed in properly. You can certainly do it that way, I just wouldn’t recommend it. Beating the ice cream is the best way to ensure all the ice cream will fit in the pan and you will have smooth and packed ice layers when you cut into the cake.

How do I frost the cake with whipped cream?
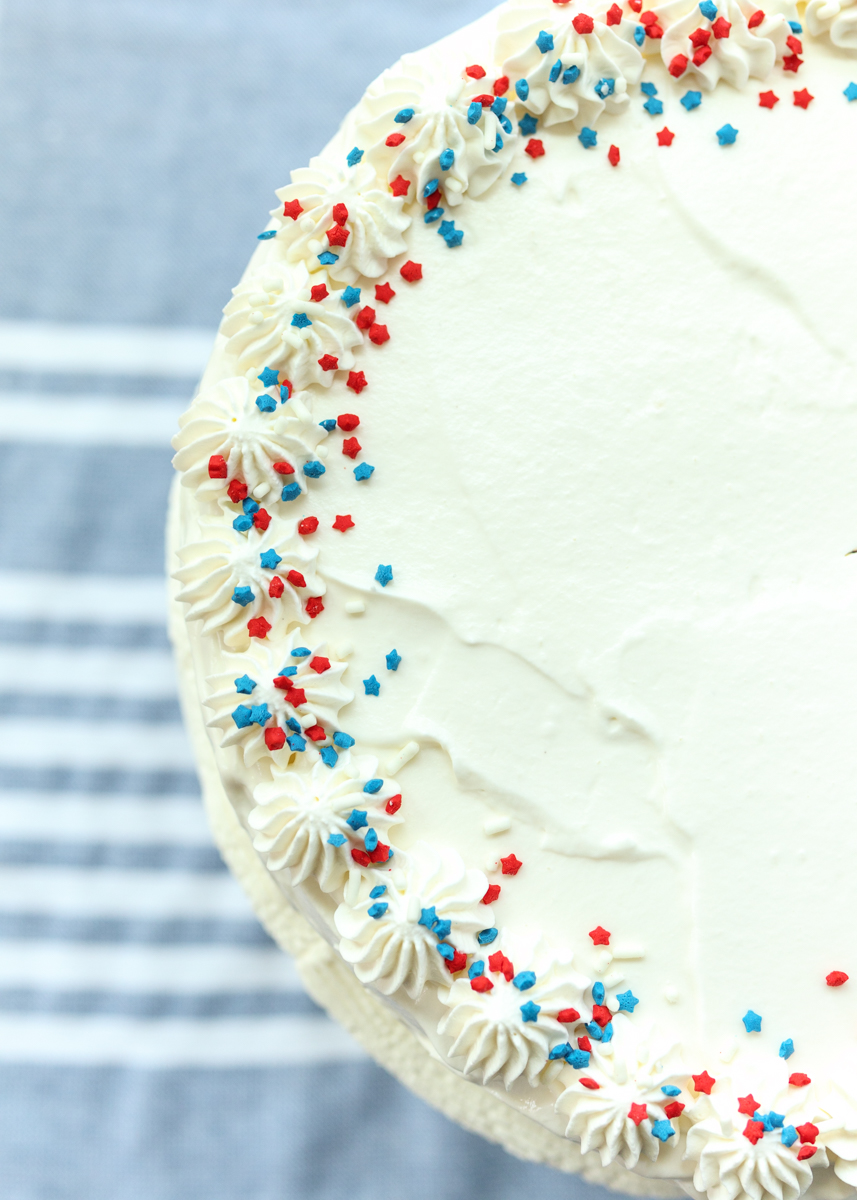
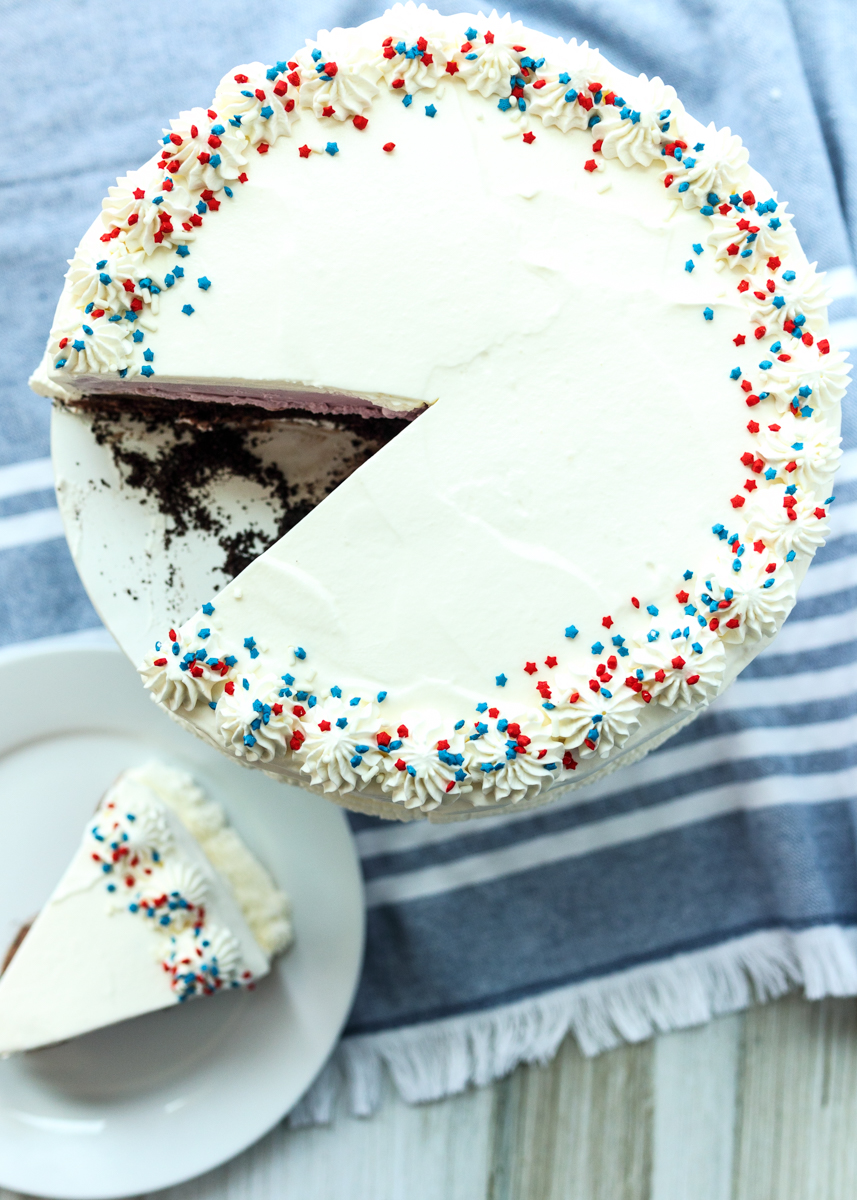
Frosting with whipped cream can be a little fussy so I’ve taken special care to write up a detailed step-by-step in the recipe. It’s not complicated; I’ve just found there are certain steps you need to follow if you want it looking like the ice cream cakes you get at your local shop. After you do it once you will be a pro for life! I used a Wilton #22 star tip for the piping. If you don’t need it looking picture perfect you can skip all those steps and just pile a whole bunch of whipped cream on the top of your cake. It will still taste just as good!
Classic Ice Cream Cake  |  Lemon & Mocha

Classic Ice Cream Cake
 
Yield: 8-10 servings
Ingredients
  • 2⅓ cups Oreo cookie crumbs (about 18 Oreos)
  • 1½ quarts chocolate ice cream
  • 2½ cups heavy cream, divided
  • 1⅓ cups semisweet chocolate chips
  • 2 tablespoons butter
  • 1½ quarts black raspberry ice cream
  • 1 cup powdered sugar
  • 1½ teaspoons vanilla extract
  • Sprinkles, for decorating
Directions
  1. Line a 9-inch springform pan with plastic wrap so it goes up and over the sides. I use 2 pieces. Spread 1 cup of the Oreo cookie crumbs into the lined springform. Use the flat bottom of a small measuring cup to press down firmly into an even layer.
  2. Scoop the container of chocolate ice cream into the bowl of a stand mixer then beat with your paddle attachment until smooth and spreadable. Use a rubber spatula to spoon over the cookie crumb layer and spread into an even layer. Put in the freezer.
  3. Make the chocolate ganache. Heat ½ cup of the heavy cream in a small saucepan over medium heat until just steaming. Reduce heat to low and add the chocolate chips. Stir until melted then add the butter. Stir until the butter has melted and the ganache is smooth and shiny. Remove from the heat and let cool. Once the ganache has cooled (doesn’t need to be room temperature, just not too warm), take the ice cream cake from the freezer and add the remaining 1⅓ cups Oreo crumbs. Spread into an even layer, pressing down slightly. Pour the cooled chocolate ganache over top and return the cake to the freezer.
  4. Once the ganache has mostly set, scoop the container of black raspberry ice cream into the bowl of a stand mixer then beat with your paddle attachment until smooth and spreadable. Use a rubber spatula to spoon over the chocolate ganache layer and spread into an even layer. Put in the freezer and let set until firm, at least 2 hours or overnight.
  5. Make the whipped cream. Place a metal mixing bowl or the metal bowl of a stand mixer in the freezer along with the metal beaters or beater for 5-10 minutes. Remove and add the remaining 2 cups of heavy cream (make sure your cream is cold), powdered sugar and vanilla. Beat on medium-high until stiff peaks form. If you just want to frost the top of the cake, follow the directions in the note at the bottom of the recipe. If you want to frost the cake with the whipped cream like in the photos, keep reading.
  6. Take the cake out of the freezer and open the ring of the springform pan. Use the plastic wrap to lift up the cake; carefully remove the plastic wrap and transfer the cake to a cake board or platter (that will still fit in your freezer). Working quickly, cover the top and sides of the cake with a crumb coat of the whipped cream. This means you put a light layer all over the cake, but there will be ice cream and cookie crumbs in it. This will help give you a smooth surface for the next layer. Return to the freezer until mostly firm (and store the whipped cream, still in the metal bowl, in the fridge). When the crumb coat is firm, remove from the freezer and use an offset spatula to apply a second coat of the whipped cream on the top and sides, smoothing as you go. Return to the freezer. At this point you will probably need to re-whip your whipped cream in order for it to be stiff enough to pipe. Re-whip the whipped cream on medium-high speed until stiff peaks form. Add the whipped cream to a piping bag fit with your preferred piping tip. I used a Wilton #22 star tip. Take the cake from the freezer and pipe stars all along the top border. Then pipe a decorative line around the bottom edge of the cake where it meets the cake board or platter. Decorate with sprinkles and store in the freezer until ready to serve. The cake can usually be cut right out of the freezer with a sharp knife.
Notes
- This recipe calls for the entire Oreo cookie including the creme filling.
- You can make the ganache ahead of time if you prefer. Store in the fridge until ready to use and then gently heat in the microwave until smooth and pourable before using.
- If you just want to frost the top of the cake, follow these directions: Pile the whipped cream on top and leave in the freezer until ready to serve. When ready to serve, open the ring of the springform pan. Use the plastic wrap to lift up the cake; carefully remove the plastic wrap and transfer the cake to a cake board or platter.

Some of the links above are affiliate links, which means I may receive a small commission for my referral if you purchase something. This does not affect the retail cost of the item. Thank you for supporting Lemon & Mocha!

Chicken Coconut Sticky Rice Bowls with Mango Puree

Chicken Coconut Sticky Rice Bowls with Mango Puree  |  Lemon & Mocha

Do you like cooking out of your comfort zone? To me, cooking out of my comfort zone is when I cook with an ingredient or technique I haven’t used before, or cooking something I normally only order at a restaurant. I usually resist it, but sometimes I take the chance and it’s not only easy, but crazy delicious.

Chicken Coconut Sticky Rice Bowls with Mango Puree  |  Lemon & Mocha

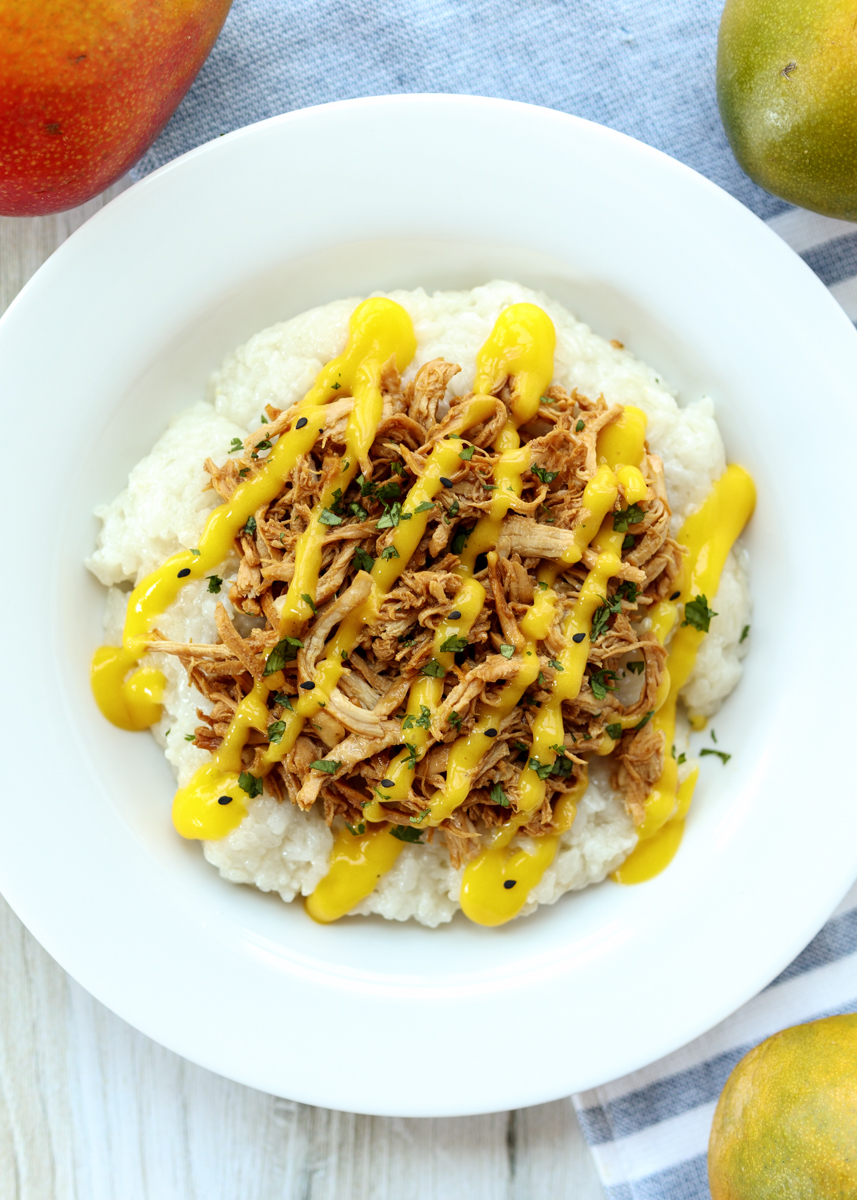
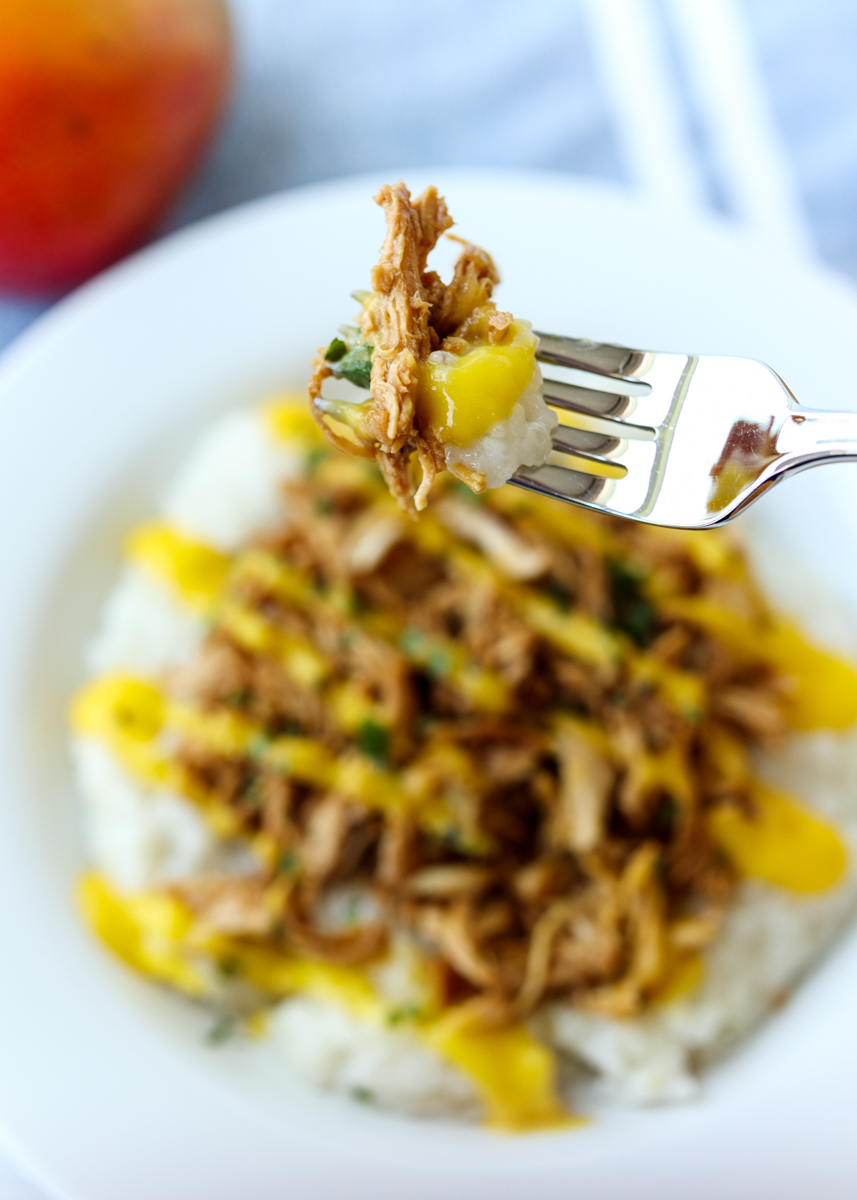
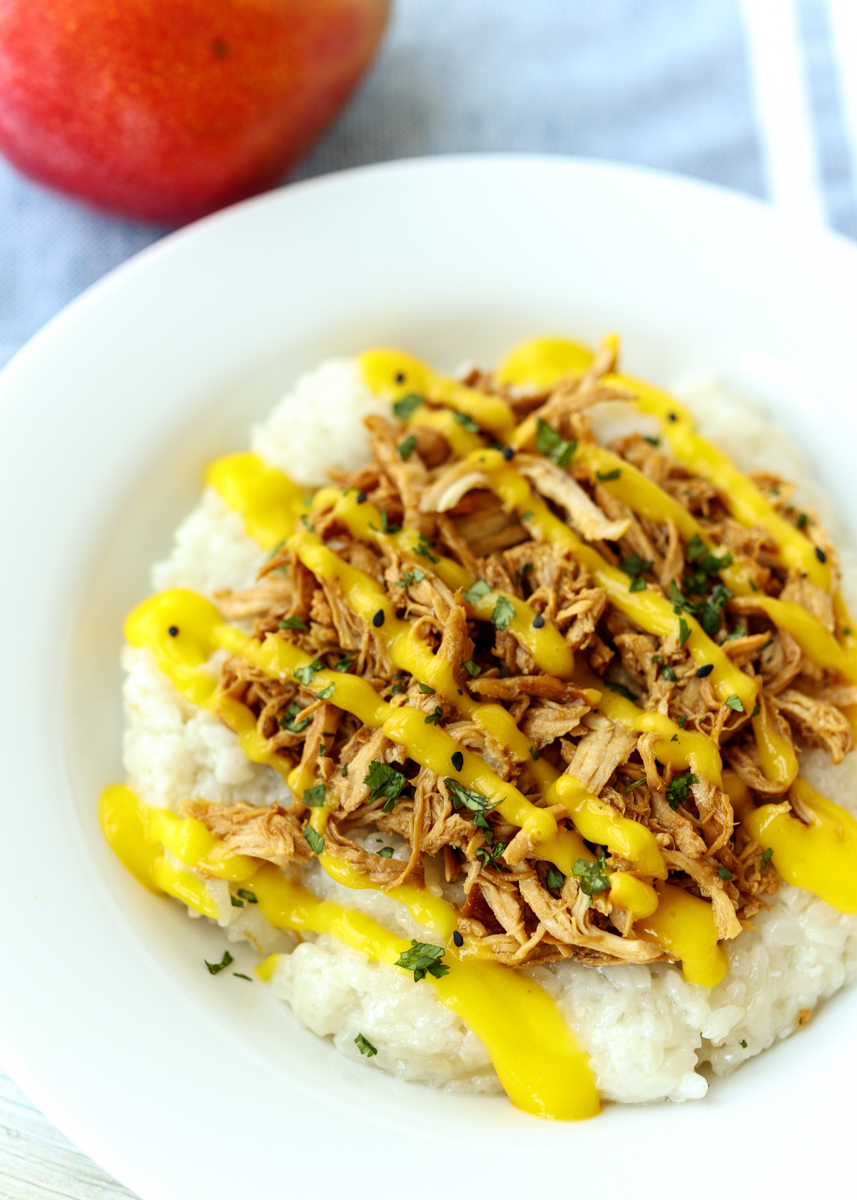
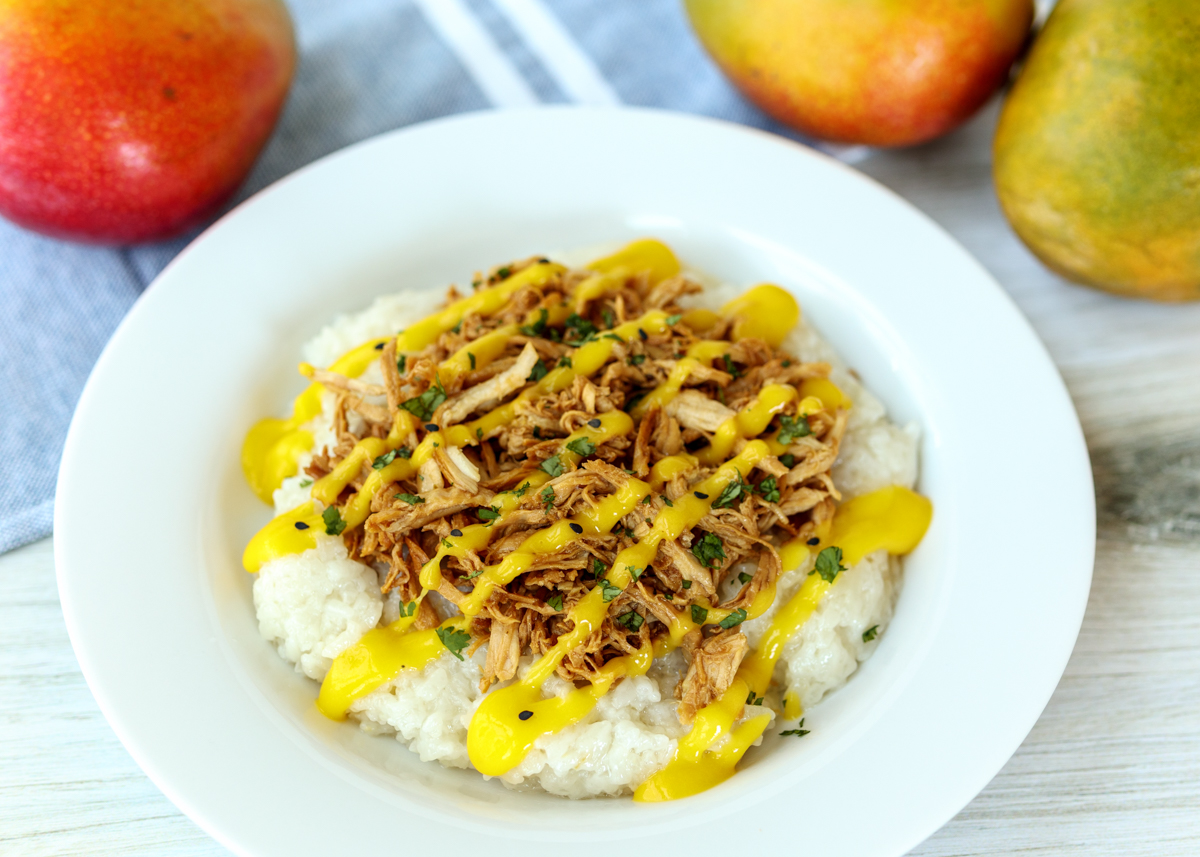
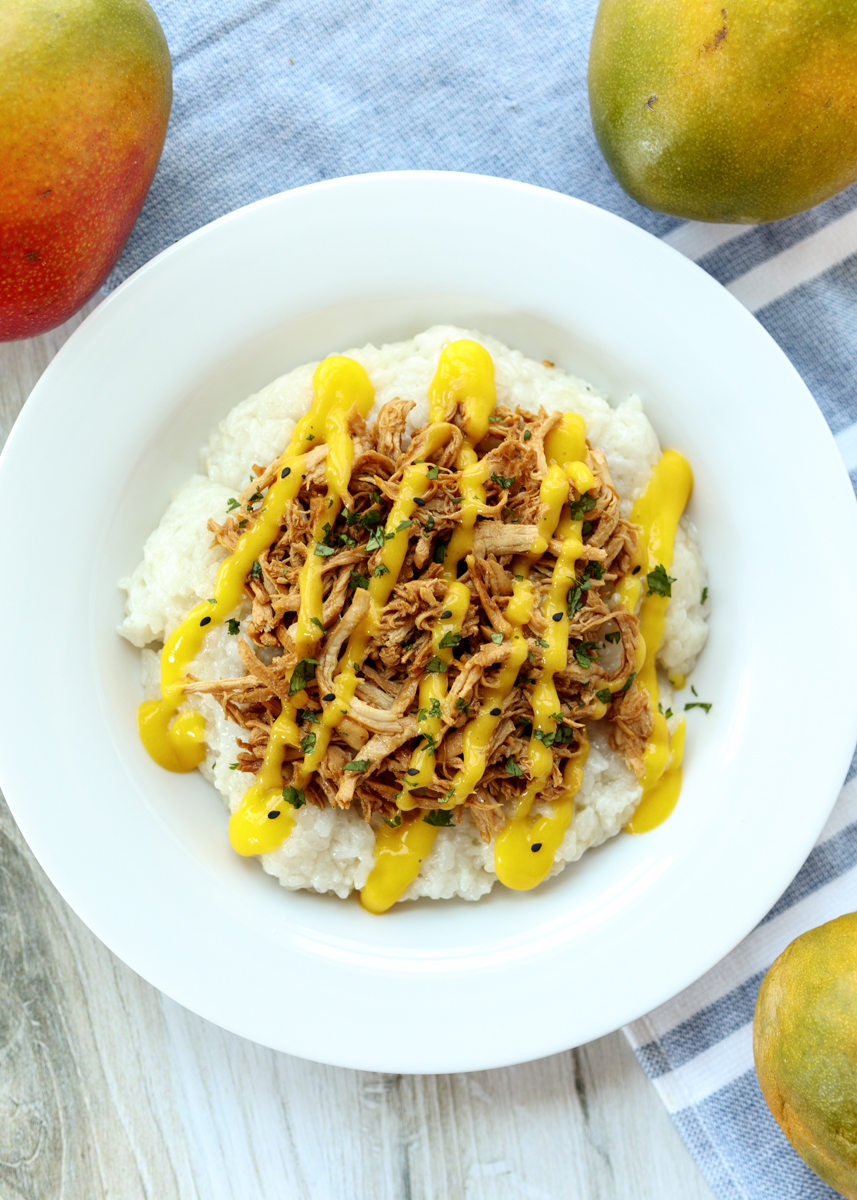
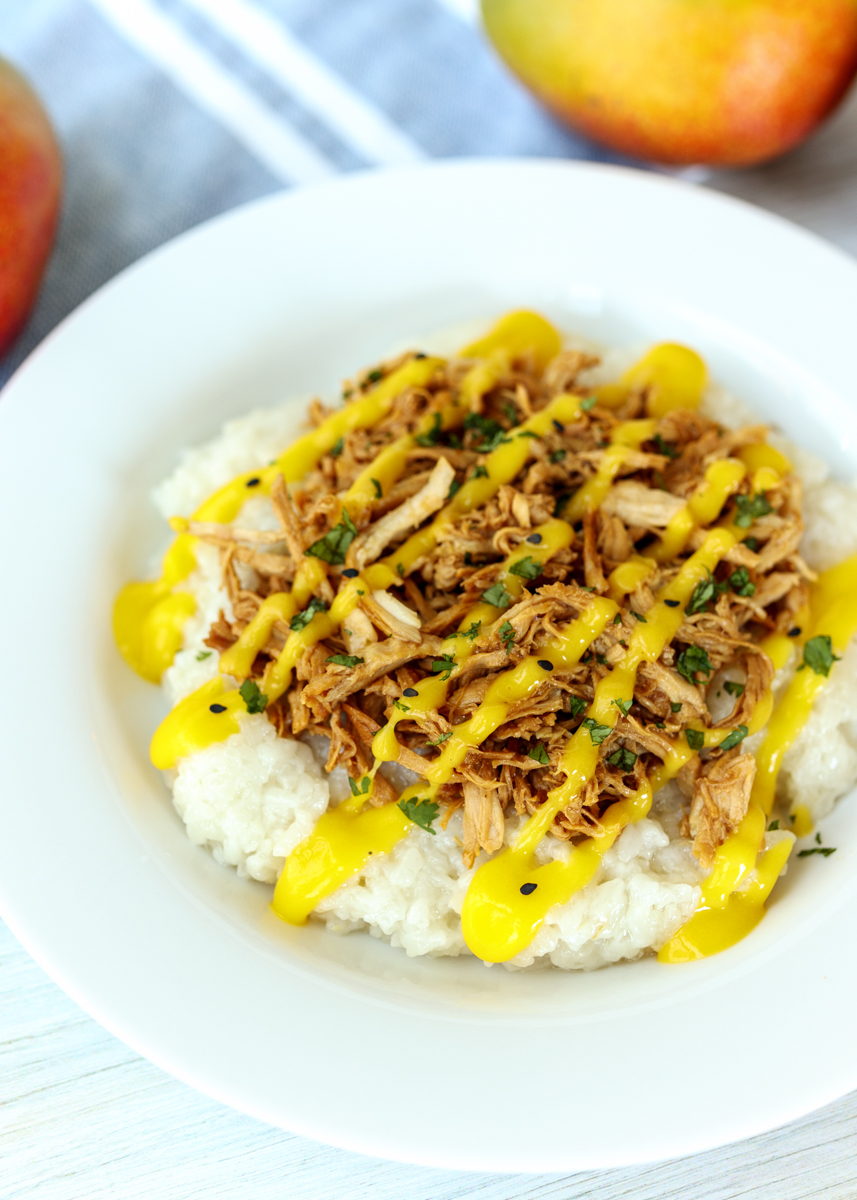
So what exactly is this meal? Creamy coconut sticky rice piled high with savory chicken and fresh mango puree. Each bite is like a comforting explosion of sweet and salty flavors balancing each other perfectly.

Chicken Coconut Sticky Rice Bowls with Mango Puree  |  Lemon & Mocha

I’ve had sticky rice plenty of time at restaurants, but I’ve never thought to make it at home. Sticky rice is different than say sticky sushi rice; sticky rice, which is also called sweet rice or glutinous rice, is very, very sticky and a little sweet. Oddly, even though it is called glutinous rice there is no gluten in it. We’re cooking it in coconut milk so it soaks up all that creaminess and richness.

Chicken Coconut Sticky Rice Bowls with Mango Puree  |  Lemon & Mocha

The chicken is cooked right in a skillet and the soy sauce adds a saltiness that pairs really well with the sticky rice. The final component is a simple mango puree. I say simple because it’s literally fresh (or thawed frozen) mangoes blended until smooth with a little salt and pepper.

Chicken Coconut Sticky Rice Bowls with Mango Puree  |  Lemon & Mocha

You’re going to want to be very generous with your mango puree serving and make sure you drizzle it over every nook and cranny of your Chicken Coconut Sticky Rice Bowl. Matt couldn’t believe the sauce was just mango and proceeded to use the leftovers on everything he could find in the fridge. I hope you enjoy it as much as we did!

Chicken Coconut Sticky Rice Bowls with Mango Puree  |  Lemon & Mocha

Chicken Coconut Sticky Rice Bowls with Mango Puree
 
Yield: 2-3 servings
Ingredients
  • 1 cup glutinous or sweet rice
  • 1¼ cups water
  • 1 large boneless skinless chicken breast
  • 1 tablespoon vegetable oil
  • 1 clove garlic, minced
  • 1-inch piece ginger, grated
  • 1 tablespoon hot sauce (I used Trader Joe’s Green Dragon Sauce)
  • 3 tablespoons low sodium soy sauce
  • 2 tablespoons sesame oil
  • 1 14-ounce can unsweetened coconut milk
  • 3 mangoes
  • Salt and pepper
  • Sesame seeds, for garnish
  • Chopped cilantro, for garnish
Directions
  1. Soak the rice in the water for 30-60 minutes. Then, add the rice, soaking liquid and the coconut milk to a small medium saucepan. Bring to a boil, then reduce to low, cover halfway to allow steam to escape and simmer for 20 minutes or until the liquid is absorbed.
  2. While the rice is cooking, make the chicken. Season the chicken. Heat the vegetable oil in a skillet over medium-high heat then sear the chicken on both sides. Reduce the heat to low and add the garlic, ginger, hot sauce, soy sauce and sesame oil. Cover the skillet and continue to cook on low heat until the chicken reaches 165 degrees F, about 20 minutes. Remove the chicken from the pan, leaving the sauce. Shred the chicken then return to the sauce and mix well.
  3. While the chicken is cooking, make the mango puree. Peel and pit the mangoes. Puree in a high-speed blender with a little salt and pepper until smooth. To plate the meal, scoop some sticky rice into each bowl then top with the chicken, sesame seeds, chopped cilantro and plenty of mango puree.

Recipe adapted from Stuffed: The Ultimate Comfort Food Cookbook.
Some of the links above are affiliate links, which means I may receive a small commission for my referral. This does not affect the retail cost of the item. Thank you for supporting Lemon & Mocha!

Grilled Avocado Stuffed with Mango Salsa

Grilled Avocado Stuffed with Mango Salsa  |  Lemon & Mocha

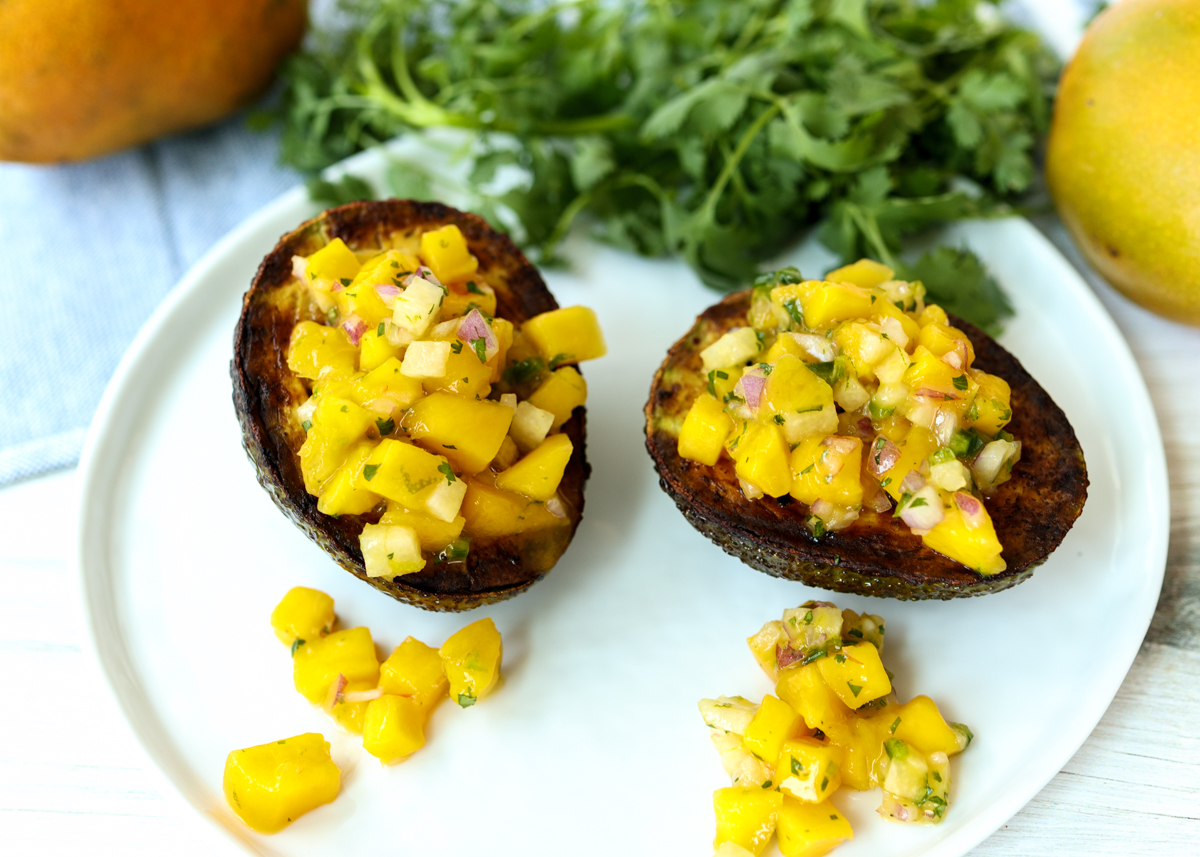
I never thought a warm avocado sounded appetizing, much less crave-worthy. Then a few years ago I got fish tacos at Border Cafe, which came served alongside a grilled avocado stuffed with mango salsa, and I was a complete convert. As in, every time we’ve gone to Border Cafe since, which is often, I get the same dish just so I can have the grilled avocado with mango salsa. Okay, okay, the fish tacos are really awesome as well, but the grilled avocado is the real draw.

Grilled Avocado Stuffed with Mango Salsa  |  Lemon & Mocha

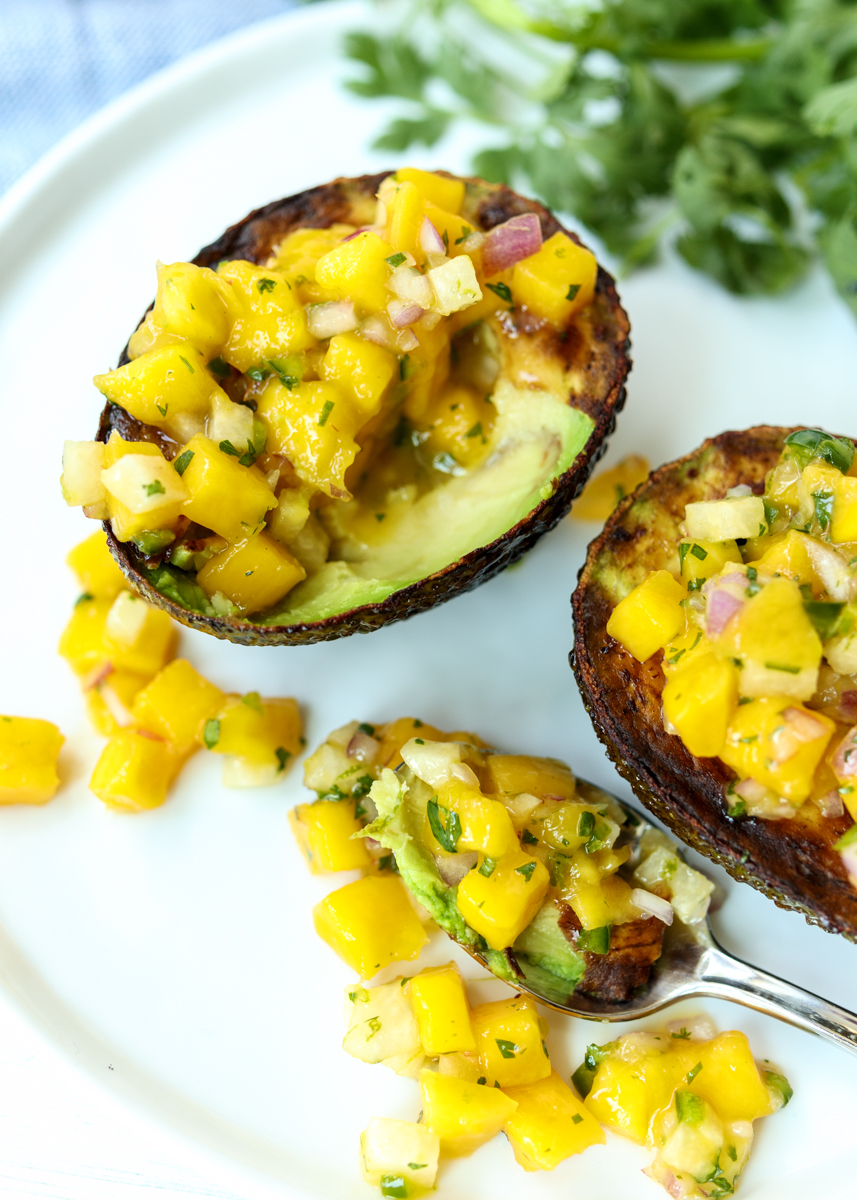
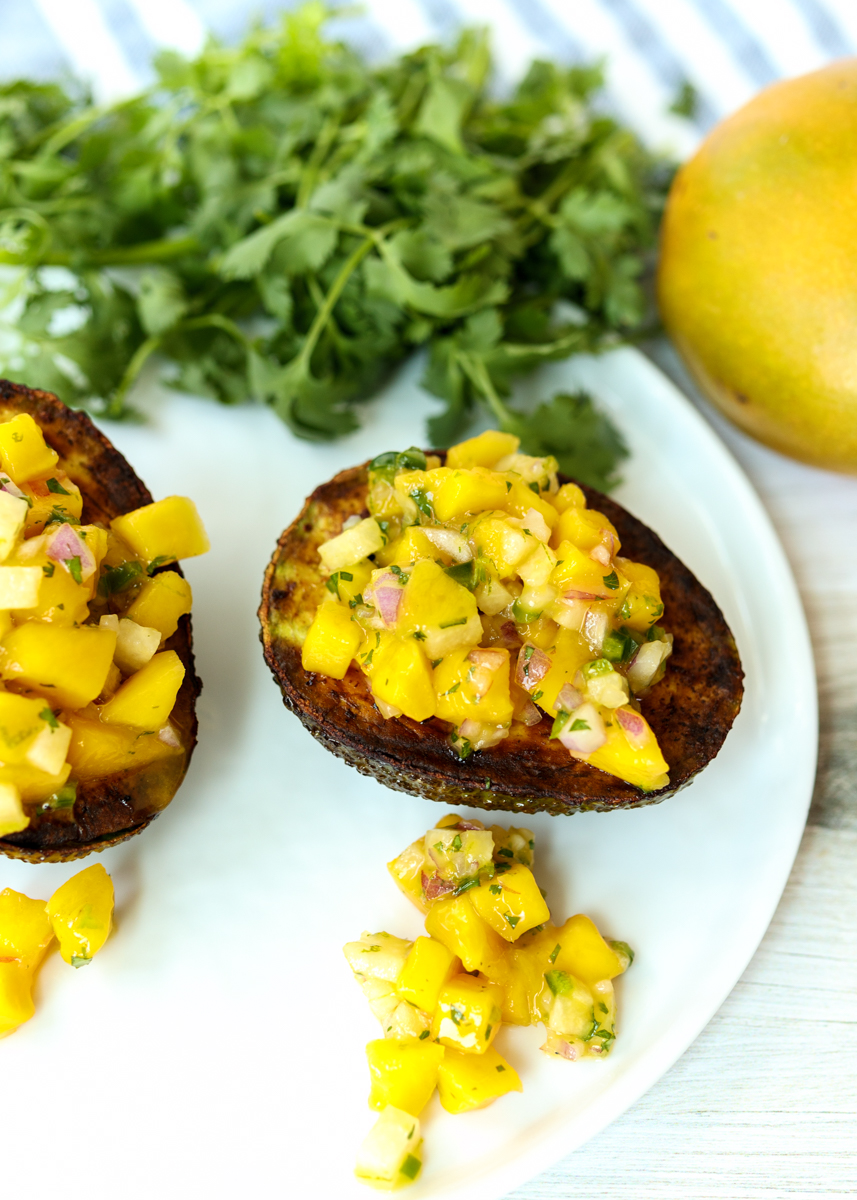
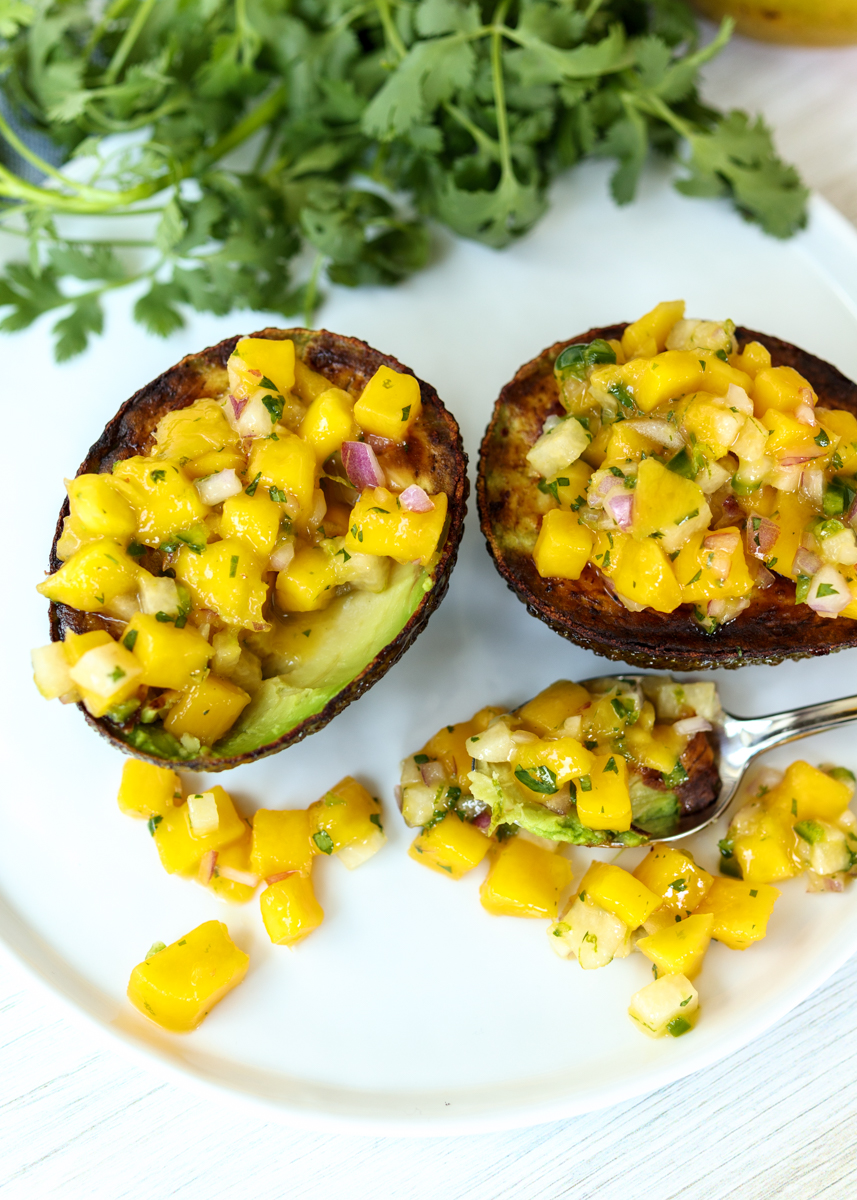
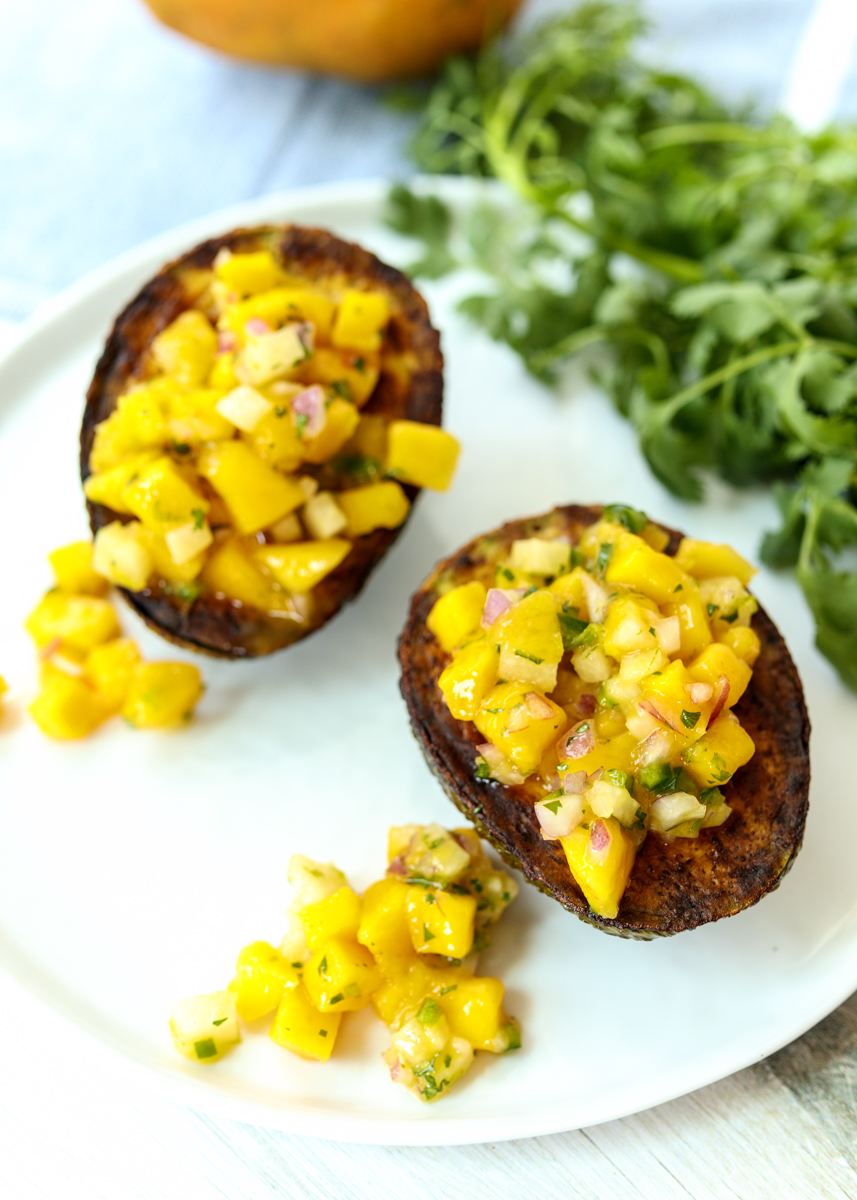
After years of having it at the restaurant I realized I needed to try making it at home. I mean, it’s literally just half an avocado that has been grilled and topped with citrus-packed mango salsa. I say “just” as though it isn’t the most magical combination you never knew you needed in your life until that first bite – which it is! My version doesn’t taste exactly like the original, especially since we all know I’m not a fan of spicy foods, but the essence of it is the same.

Grilled Avocado Stuffed with Mango Salsa  |  Lemon & Mocha

I wanted a bit of crunch in the salsa since mango and avocado are both creamy so I added jicama. Even though jicama looks kind of like a potato, it’s crispy, juicy and a little sweet like an apple. It added the perfect textural element to the salsa. I also added classic Mexican flavors like lime juice, lime zest, cilantro and jalapeño.

Grilled Avocado Stuffed with Mango Salsa  |  Lemon & Mocha

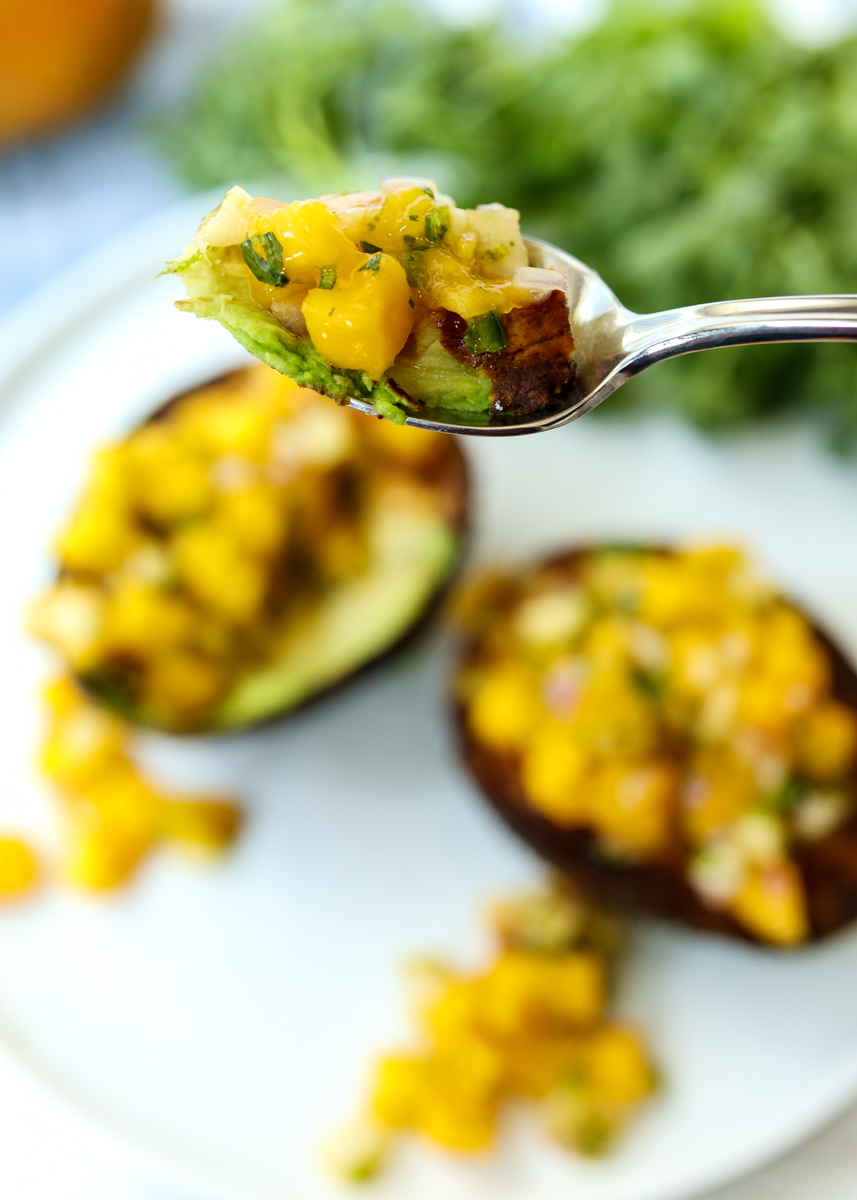
The punchy and sweet salsa spooned up with a big bite of the warm, grilled avocado is all you need in a summer meal. I’m not sure exactly what is so good about a grilled avocado, but the top gets a little charred while the inside stays creamy as always. Make sure you are using fully ripe avocados for this dish; no hard avocados allowed!

Grilled Avocado Stuffed with Mango Salsa  |  Lemon & Mocha

These Grilled Avocados Stuffed with Mango Salsa could be served with all sorts of dishes, particularly any type of grilled fish, tacos or grilled steak, pork or chicken. I know I basically just named all the proteins, but avocado and mango go with so many of them! I served them with something a little unique, which I will be sharing with you all next week. Enjoy and have a great weekend!

Grilled Avocado Stuffed with Mango Salsa  |  Lemon & Mocha

Grilled Avocado Stuffed with Mango Salsa
 
Yield: 4 stuffed avocado halves
Ingredients
  • 1 finely diced ripe mango, about 1¼ cup
  • ⅓ cup peeled and diced jicama
  • ¼ cup minced red onion
  • ¼ cup cilantro, chopped (use parsley if you don’t like cilantro)
  • ½ jalapeño, seeds removed and finely chopped (leave seeds if you like spicy food)
  • 2 tablespoons lime juice
  • Zest from ½ lime
  • ¼ teaspoon salt
  • 2 avocados, halved and pits removed
  • Olive oil, for drizzling
Directions
  1. In a medium mixing bowl, combine the mango, jicama, red onion, cilantro, jalapeño, lime juice, lime zest and salt. Keep in the fridge until ready to serve.
  2. Heat grill or grill pan to medium-high heat. Lightly brush the flesh of the avocado halves with olive oil then grill, flesh side down, for 3-5 minutes. Remove from the heat and immediately fill with the mango salsa and serve.


Quinoa Spinach and Greens Salad with a Roasted Garlic Lemon Vinaigrette

Quinoa Spinach and Greens Salad with a Roasted Garlic Lemon Vinaigrette  |  Lemon & Mocha

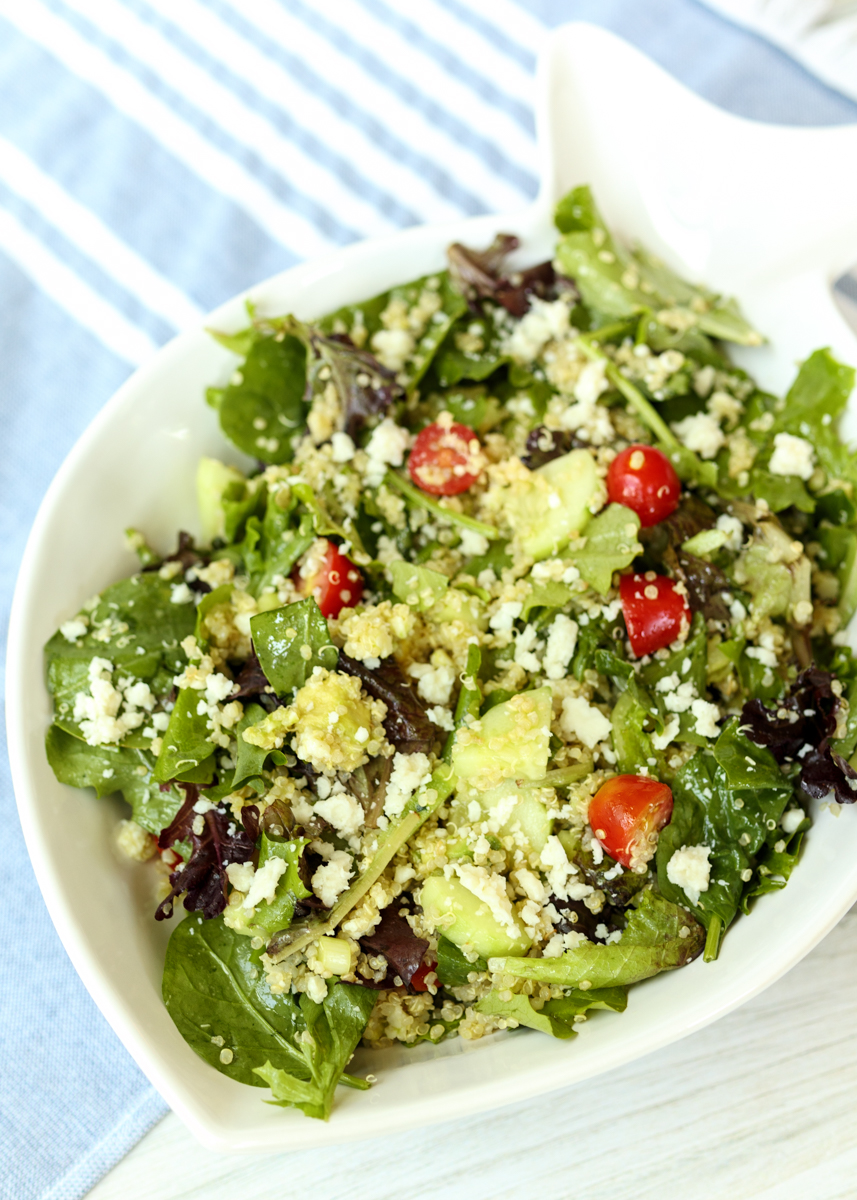
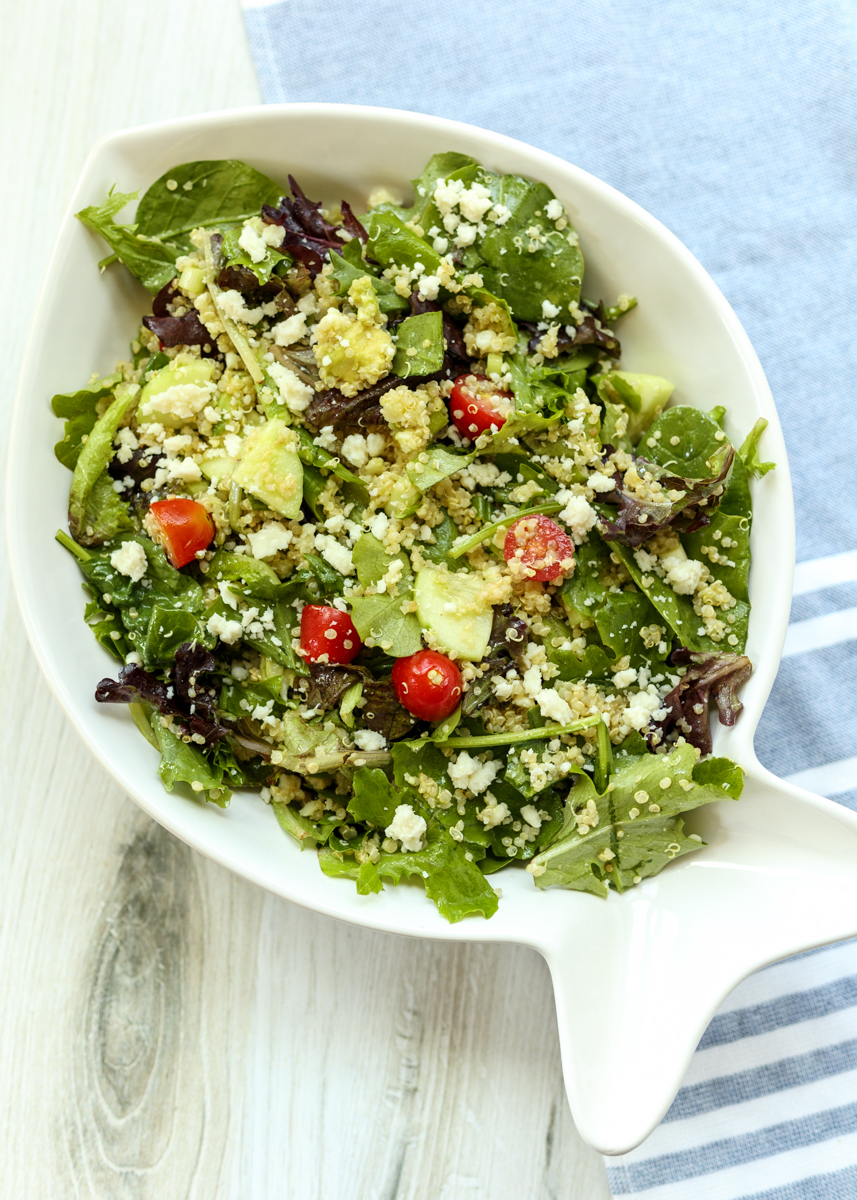
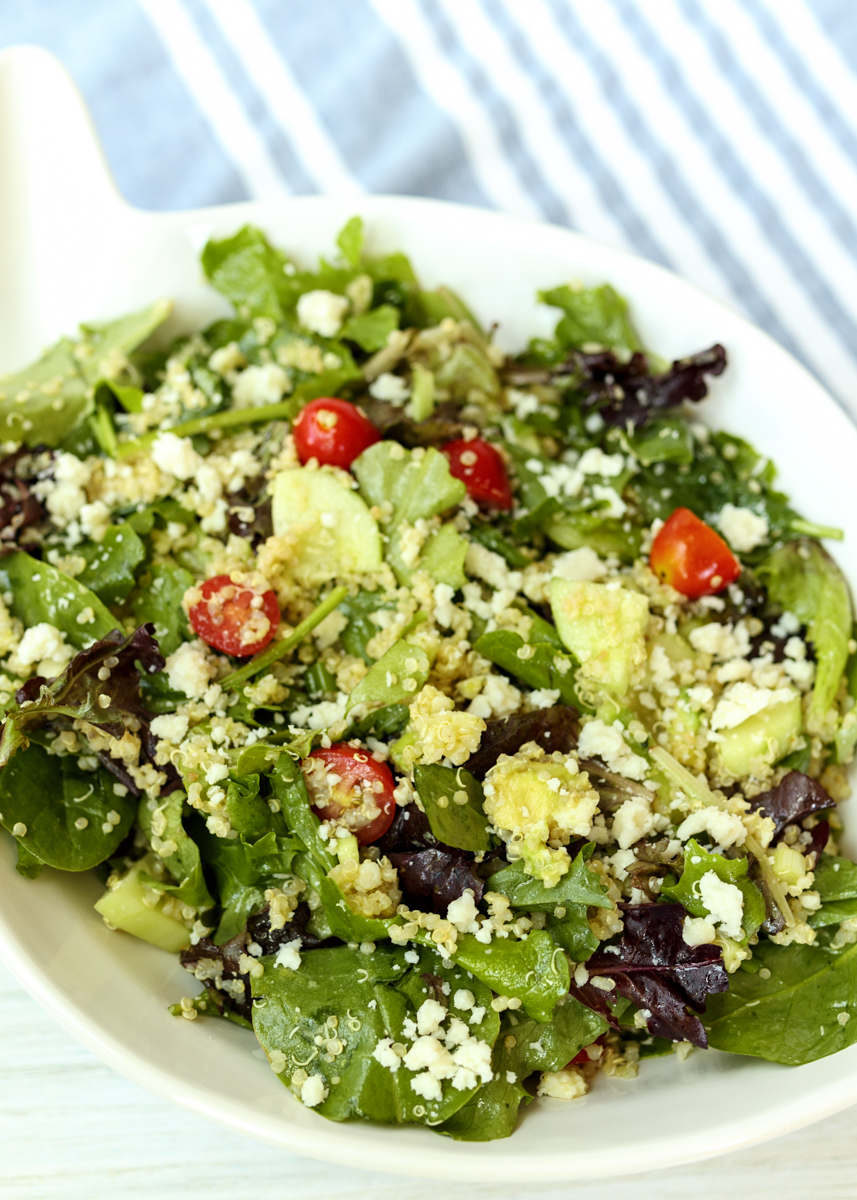
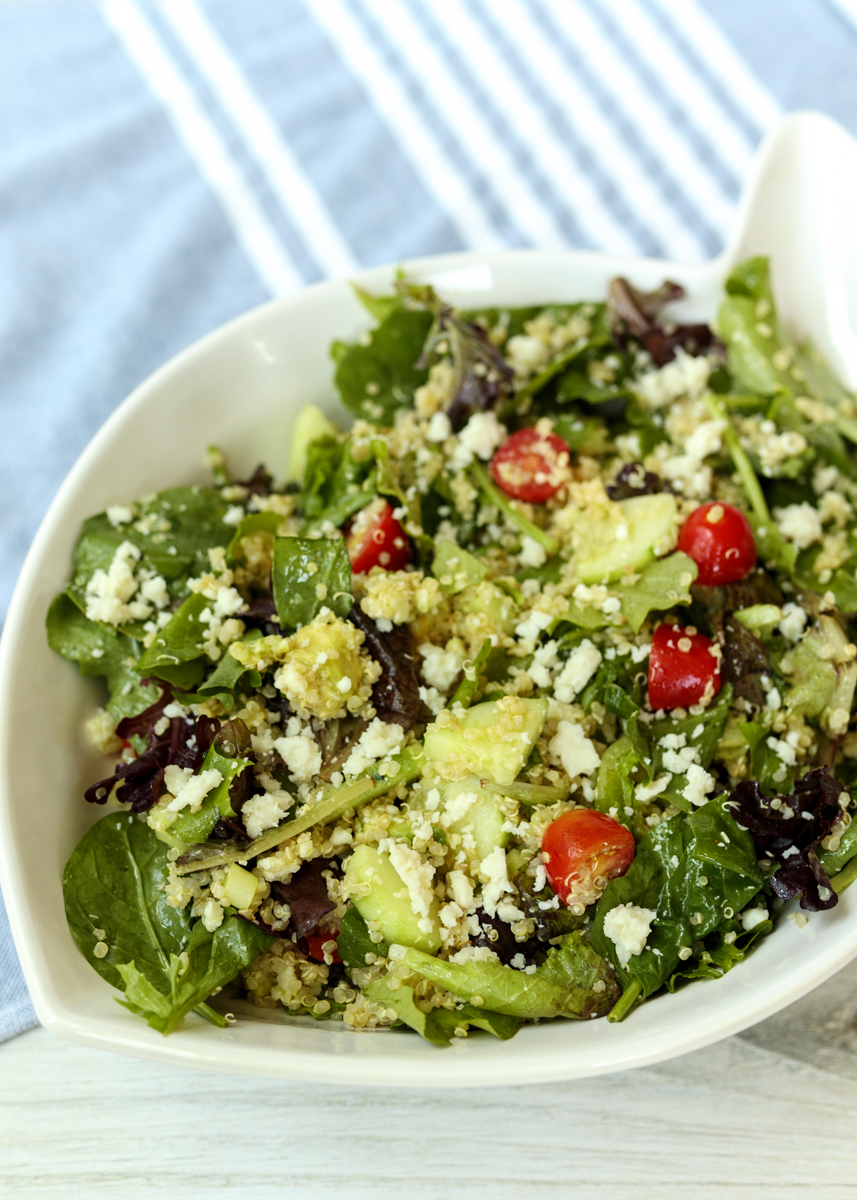
Do you ever eat something and immediately start craving it again after the meal is over? This happens to me often, but with a salad? Very unlike me, I know, but I got completely hooked on the fresh lightness of this Quinoa Spinach and Greens Salad with a Roasted Garlic Lemon Vinaigrette.

Quinoa Spinach and Greens Salad with a Roasted Garlic Lemon Vinaigrette  |  Lemon & Mocha

Diane made a version last summer for her mom’s, my Nina’s, birthday. We had a big cookout at Nina’s house and for some reason I kept getting drawn to additional servings of Diane’s salad. Maybe it was the zesty dressing, maybe it was the salty feta cheese or maybe it was just that it felt heartier than a normal, plain salad because of the quinoa. Either way, about a week later I set out to try and recreate my version of it. It’s actually a fairly basic salad, but everything together makes for a satisfying summer side dish.

Quinoa Spinach and Greens Salad with a Roasted Garlic Lemon Vinaigrette  |  Lemon & Mocha

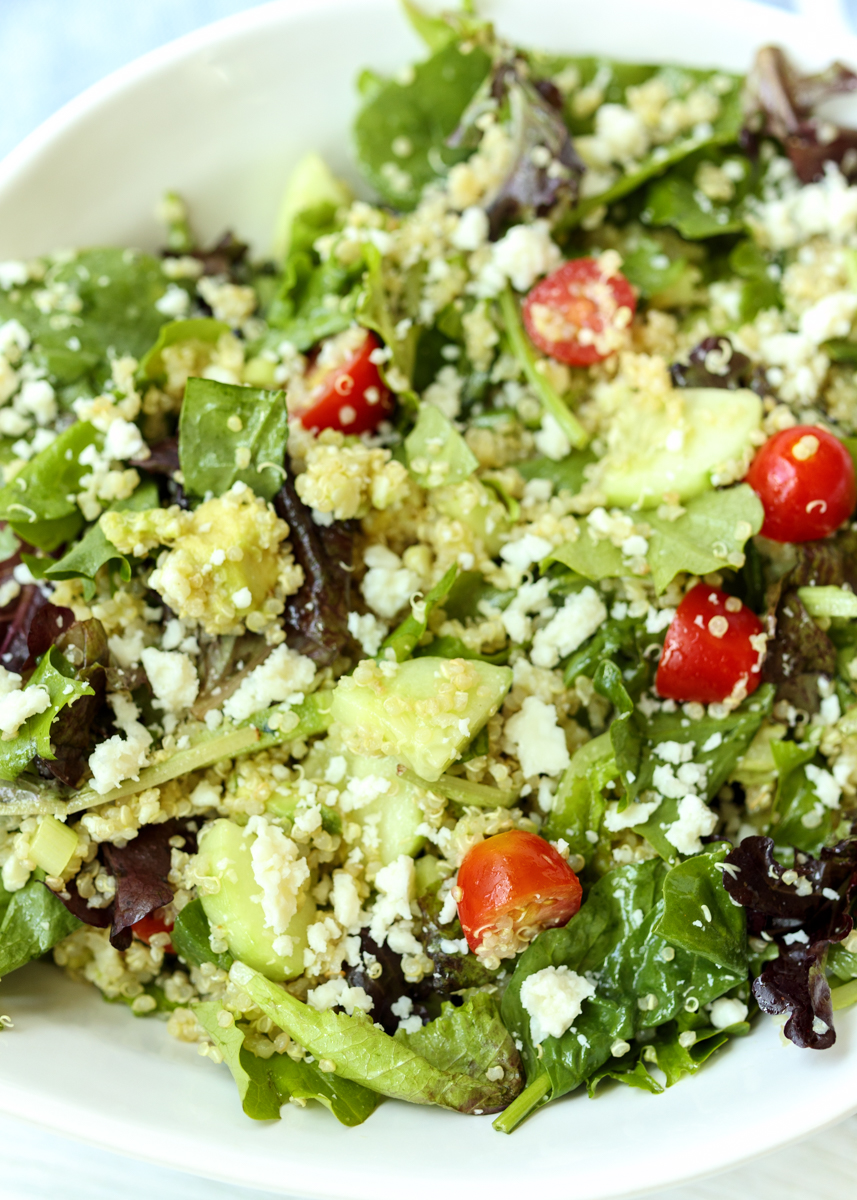
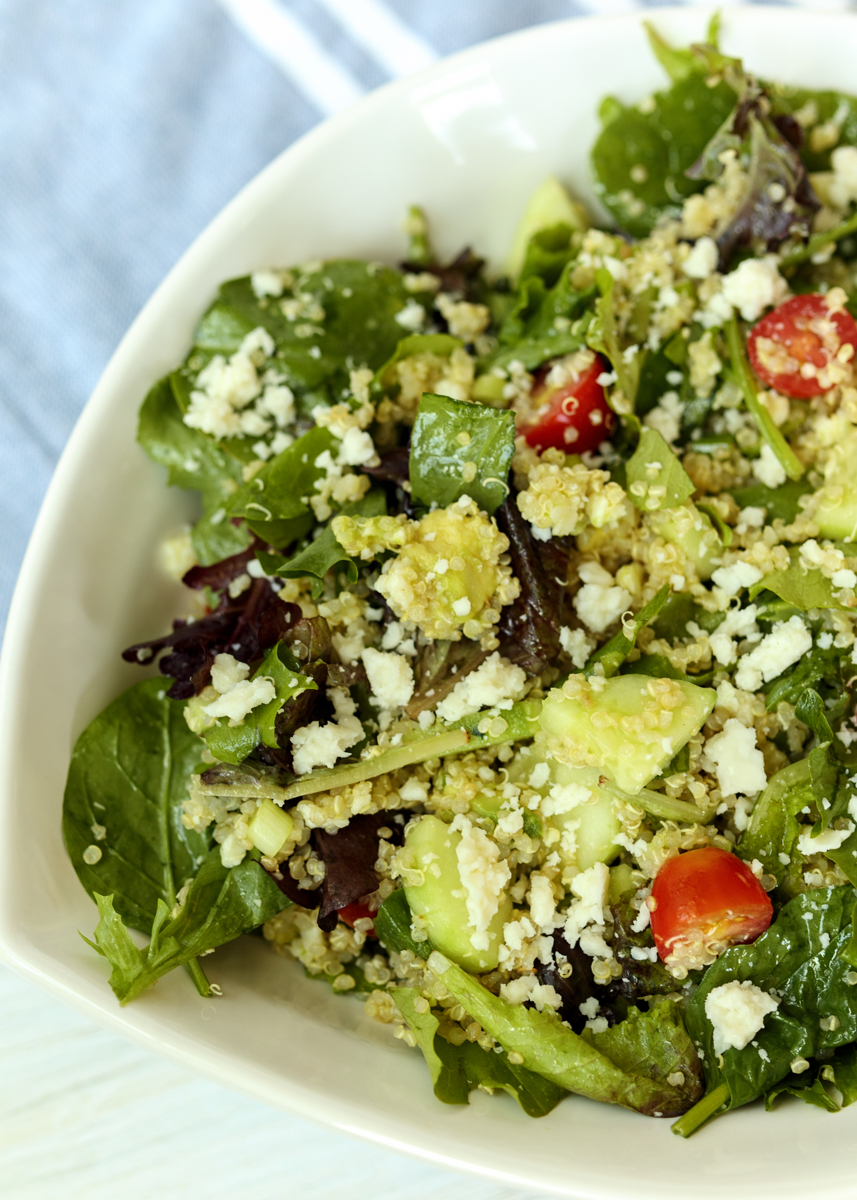
I like using a mix of spinach leaves and spring mix greens. You can usually buy this already combined in one package at the grocery store; my store calls it the 50/50 mix. Then we add on some quinoa, which adds protein and great texture. Tomatoes, cucumbers and scallions are next, along with some creamy avocado and crumbled feta cheese. Now, onto the simple roasted garlic and lemon vinaigrette. I say simple because it’s just olive oil, roasted garlic, lemon juice, Dijon mustard and honey blended together.

Quinoa Spinach and Greens Salad with a Roasted Garlic Lemon Vinaigrette  |  Lemon & Mocha

Although the recipe only calls for one clove of garlic, you have a couple options. You can follow the instructions below to just roast a single clove, which will do the trick for this recipe and take less time. But, if you have more time then you can follow the additional directions for a whole bulb of roasted garlic – perfect for slathering on warm, crusty bread or tossing into a pasta dish.

Quinoa Spinach and Greens Salad with a Roasted Garlic Lemon Vinaigrette  |  Lemon & Mocha

Vinaigrettes are especially easy to adjust to your personal preferences so feel free to play around with the lemon and garlic amounts until you find your perfect version. Enjoy!

Quinoa Spinach and Greens Salad with a Roasted Garlic Lemon Vinaigrette  |  Lemon & Mocha

Quinoa Spinach and Greens Salad with a Roasted Garlic Lemon Vinaigrette
 
Yield: 4-6 servings
Ingredients
  • ⅔ cup uncooked quinoa (or 2 cups cooked)
  • ¼ cup olive oil
  • 2 tablespoons lemon juice
  • 1 teaspoon lemon zest, optional
  • 1½ teaspoon Dijon mustard
  • 1 teaspoon honey
  • 1 clove garlic, roasted (see note)
  • 6 cups spinach and spring mix (either 6 cups total of the 50/50 blend or 3 cups of each)
  • ½ pint grape tomatoes, halved
  • ½ cup cucumber, peeled and diced
  • 1-2 scallions, sliced
  • ½ avocado, diced
  • ⅓ cup feta crumbles, plus more if desired
  • Salt and pepper
Directions
  1. Combine ⅔ cup uncooked quinoa with 1⅓ cups water in a medium saucepan. Bring to a boil, cover and reduce to a simmer for 15 minutes. Remove from the heat and let cool; the quinoa should be cooked and the water should be absorbed.
  2. In a liquid measuring cup, whisk together the olive oil, lemon juice, lemon zest, Dijon and honey. Mash and chop up the roasted garlic clove and whisk into the dressing. Alternatively, you could blend everything together in a blender. Season with salt and pepper.
  3. In a mixing bowl, toss together the spinach and spring mix, cooked quinoa, tomatoes, cucumber and scallions. When ready to serve, add the avocado, feta, dressing and toss to combine. Add more feta on top if desired.
Notes
To roast 1 clove of garlic: Place unpeeled clove of garlic on a small square of aluminum foil. Lightly drizzle with olive oil then wrap up in the foil. Bake at 375 degrees for 10 minutes. Let cool then peel/pop out of the clove of garlic.
To roast a bulb of garlic: Cut the top off the head of garlic so that almost all the cloves are exposed. Place the head of garlic in a little square of aluminum foil and curve up the sides. Lightly drizzle the garlic with olive oil then season with salt and pepper. Seal up the foil to make a little packet. Roast for 35 minutes then let cool. Once it's cool enough to handle, squeeze out the roasted garlic cloves.


Blue Cheese Crusted Steak

Blue Cheese Crusted Steak  |  Lemon & Mocha

I still remember the day Matt and I bought our cast iron pan. Of course I do, it’s a food-related memory! We were in our very first apartment right out of college and Matt had seen someone online make steak in a cast iron pan. They seared it on the stove-top then finished it off in the oven resulting in a charred outside and juicy, tender inside.

Blue Cheese Crusted Steak  |  Lemon & Mocha

When Matt gets convinced he wants to make something it usually happens right away, much unlike my years and years worth of recipes piled up, so we walked to the nearest hardware store and bought the cast iron pan. Thankfully we didn’t have to walk far because this thing is heavy! Matt cooked us up some steaks and they were pure perfection. All these years later we’ve gotten a little fancier with our cooking and now prefer to sous vide our steaks, but this recent recipe had me go back to our cast iron steak roots.

Blue Cheese Crusted Steak  |  Lemon & Mocha

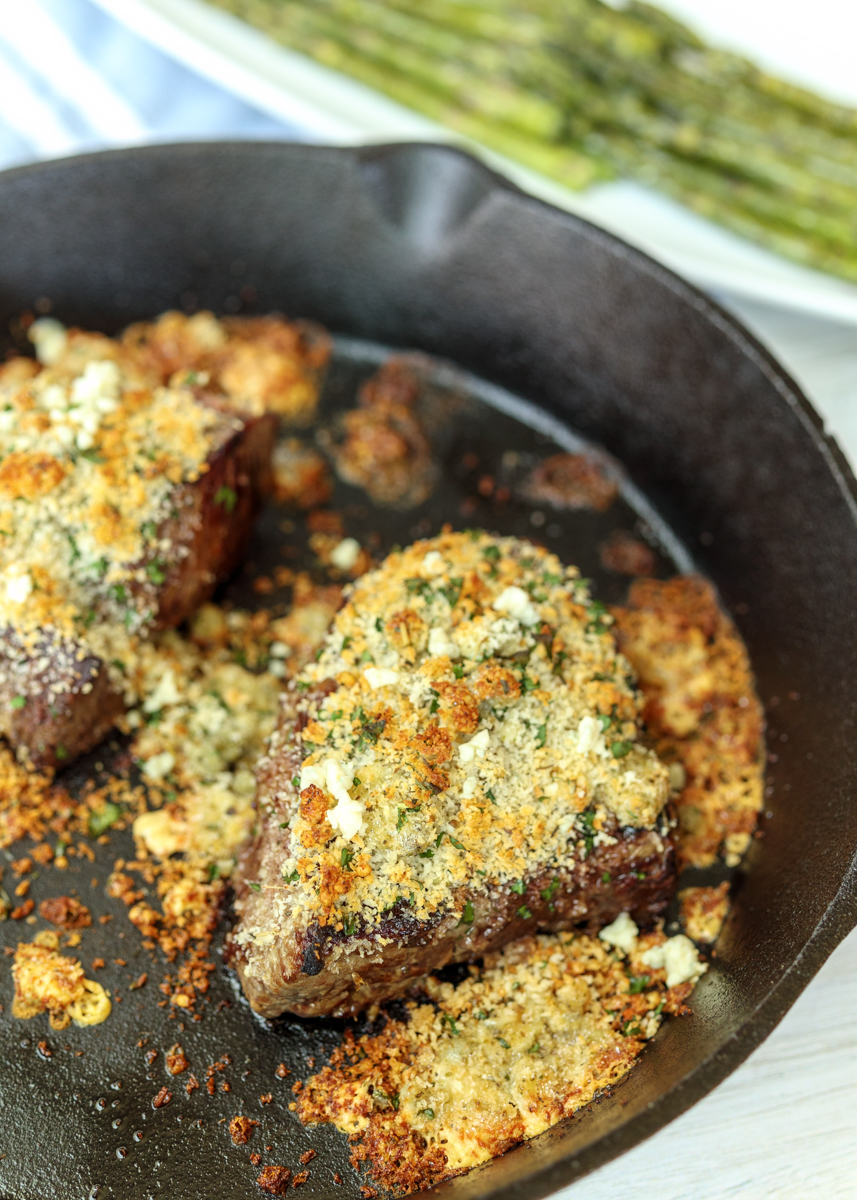
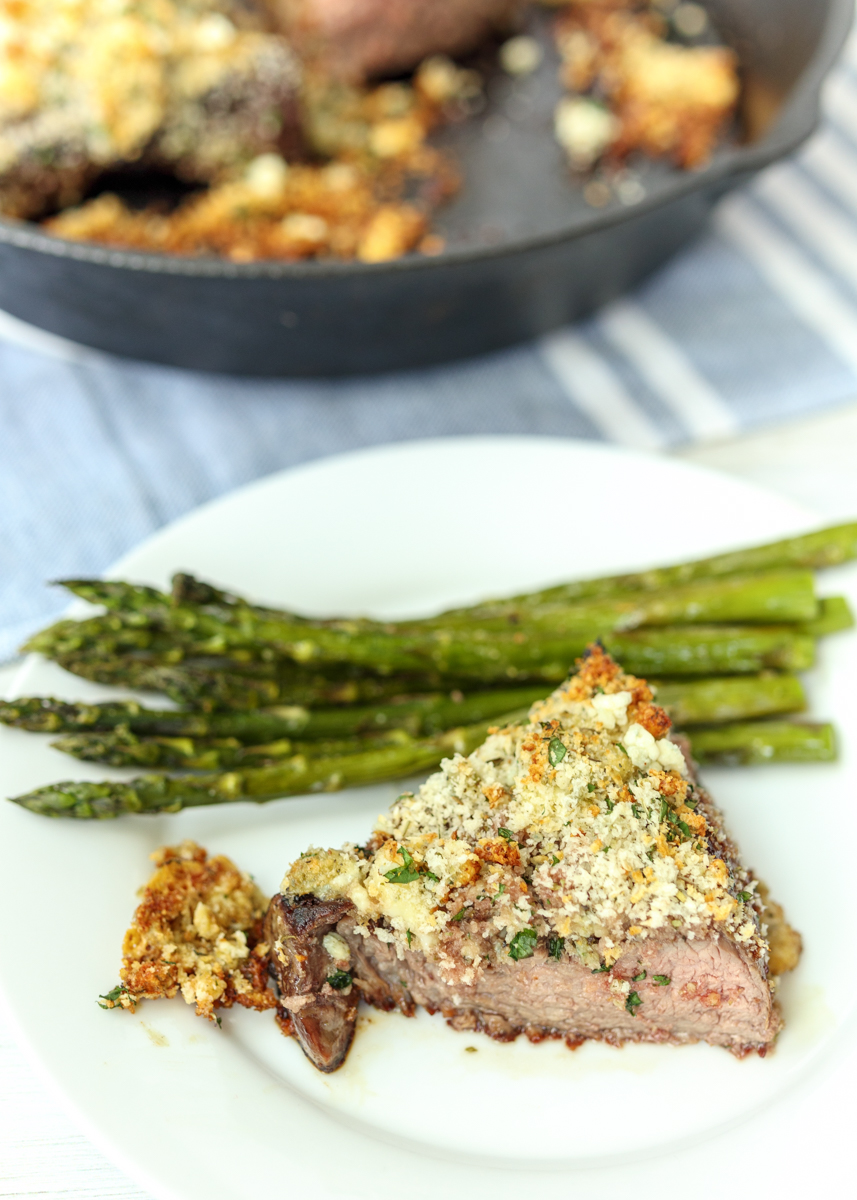
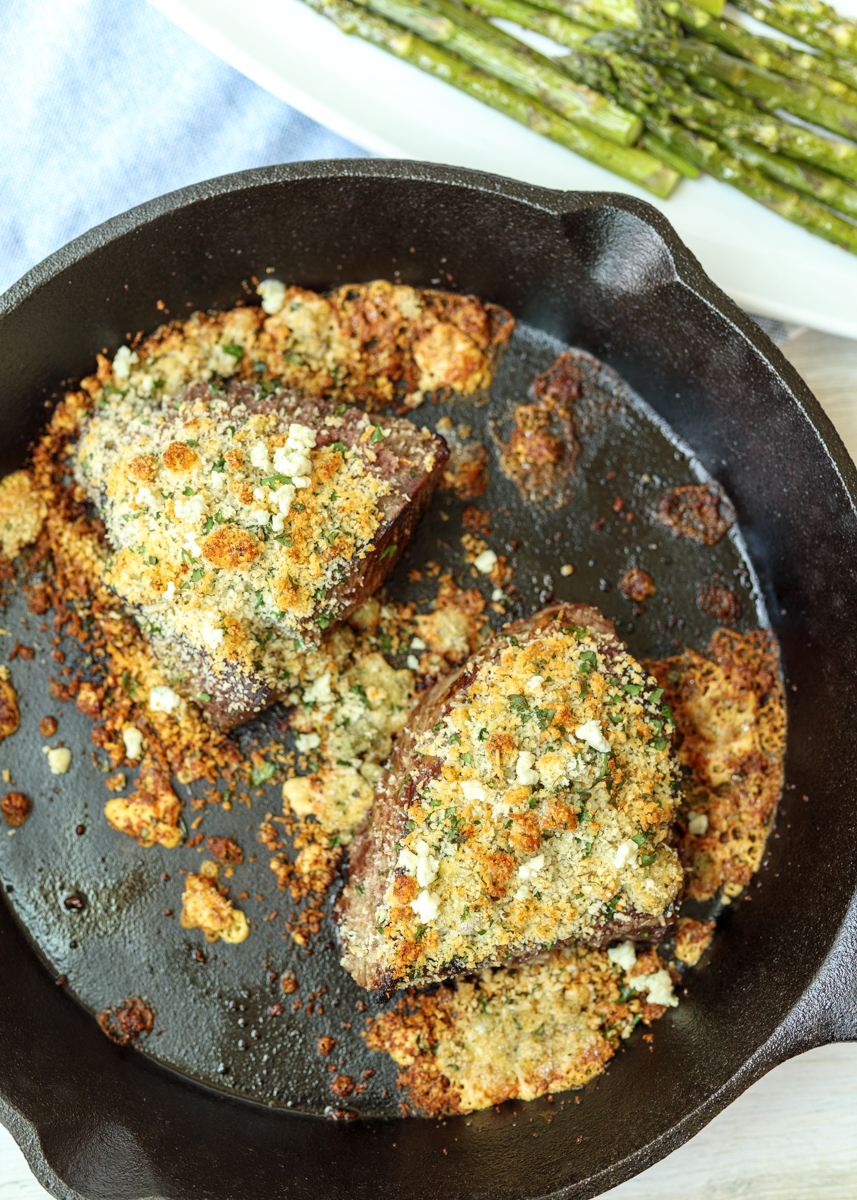
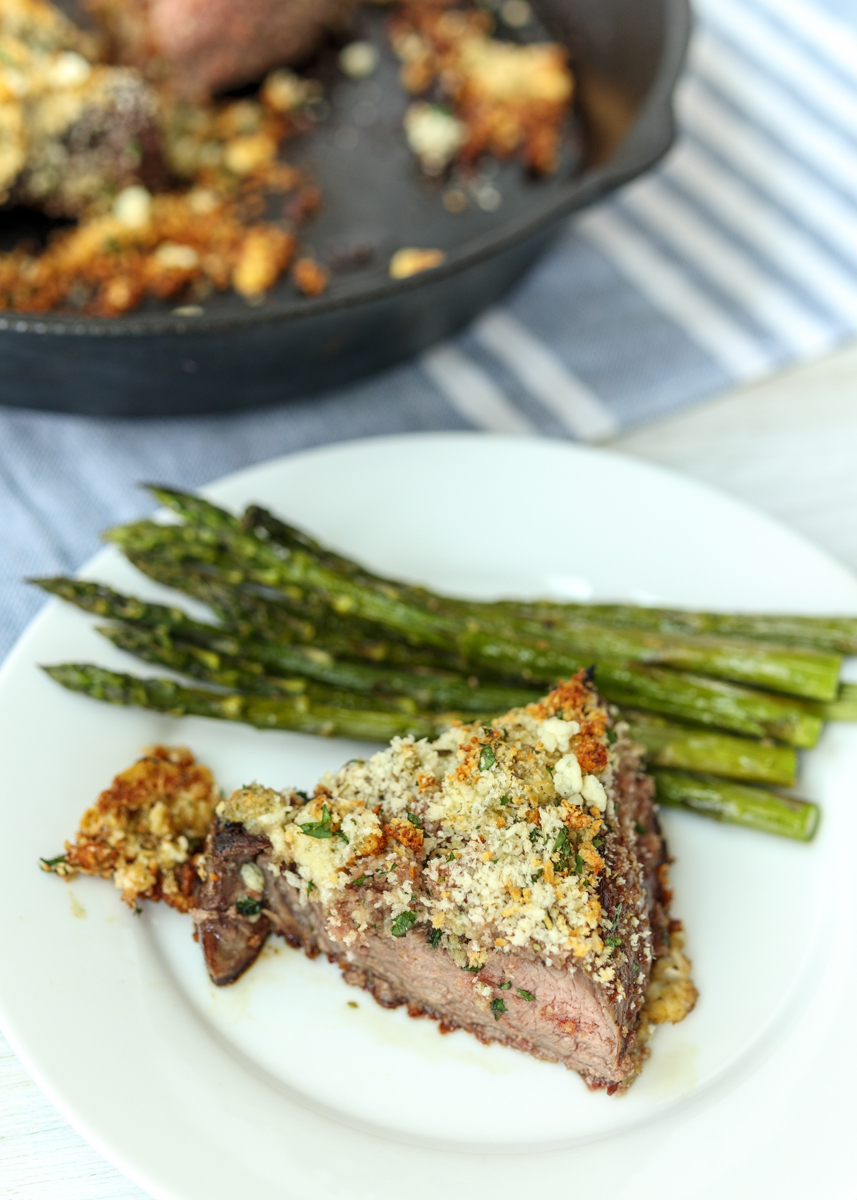
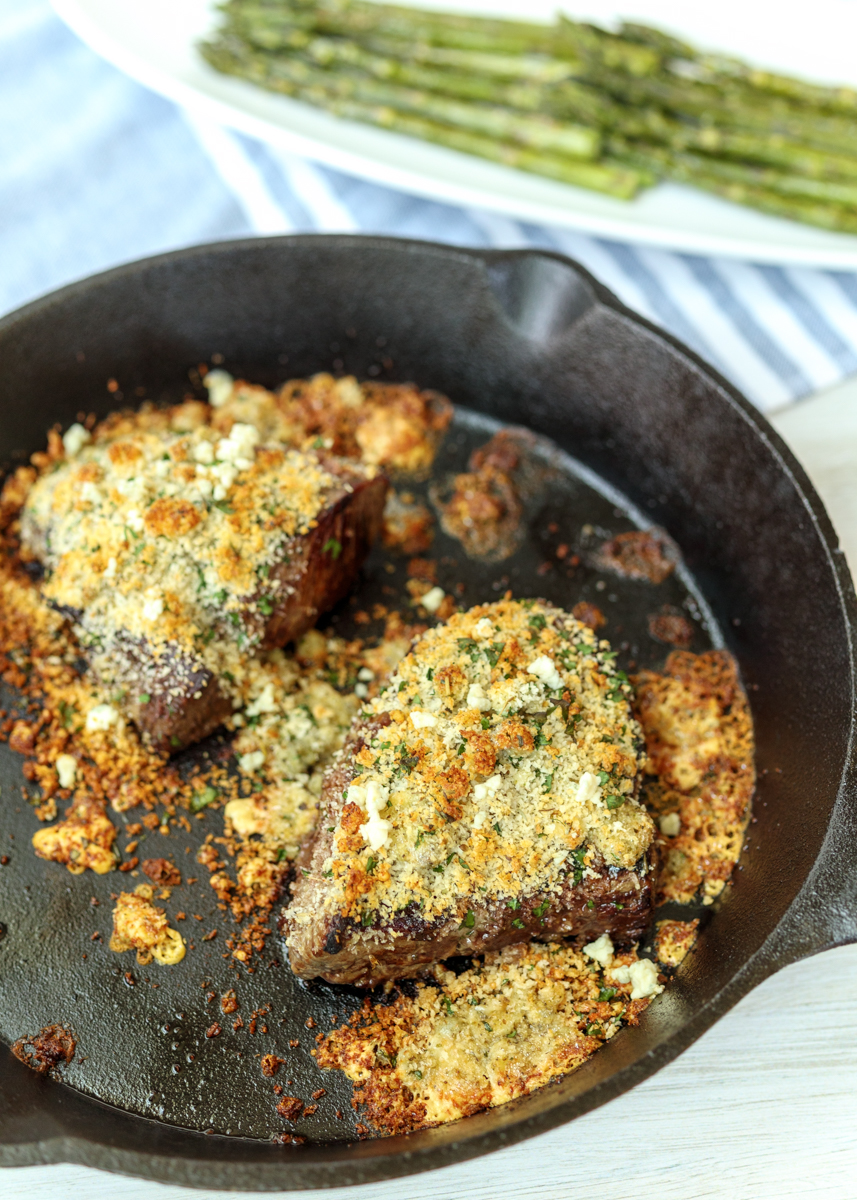
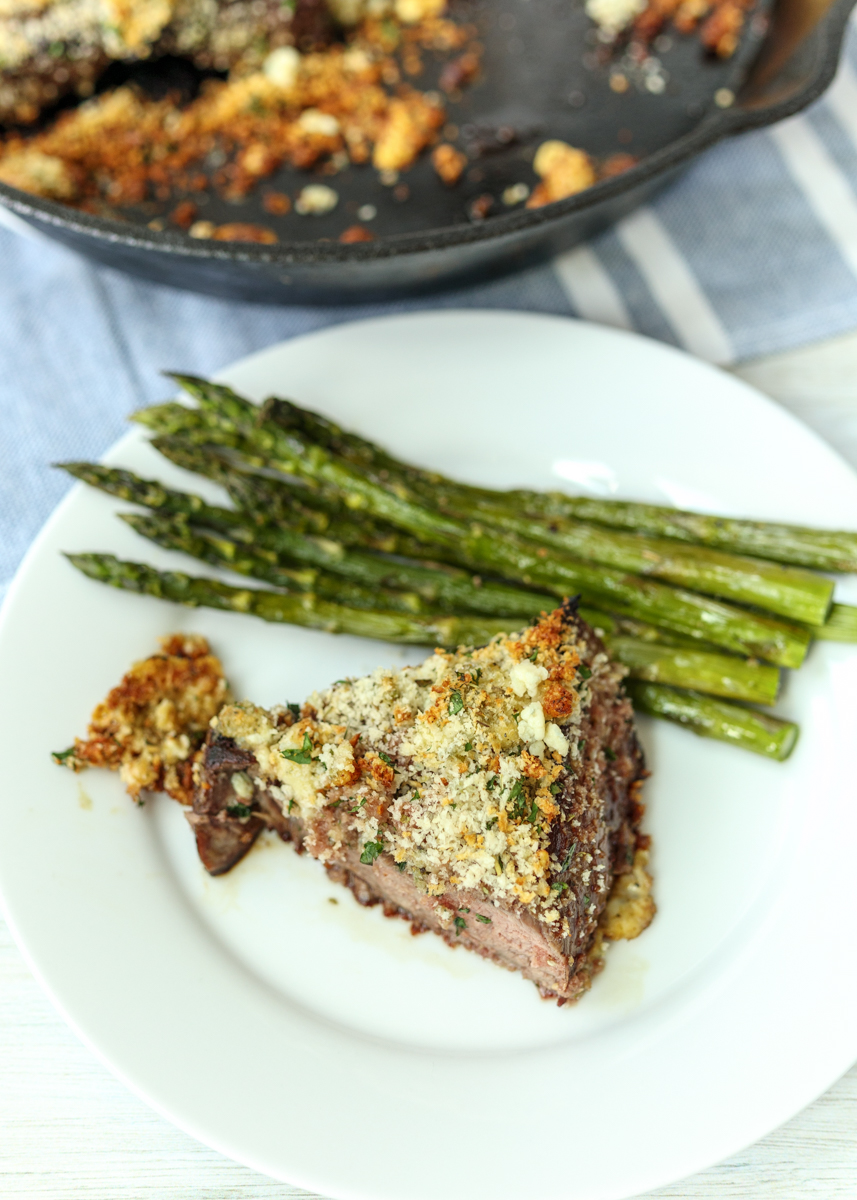
This recipe came from my favorite little cookbook, “Cook This, Not That!” and was one we hadn’t tried before. It’s incredibly simple: steak is cooked then topped with a panko breadcrumb and blue cheese mixture that gets crispy and bubbly in the oven.

Blue Cheese Crusted Steak  |  Lemon & Mocha

We already know blue cheese and steak is a winning combination from my Grilled Steak with Creamy Gorgonzola Sauce recipe and the crunch from the breadcrumbs adds great texture and flavor. Matt and I gobbled this down for dinner and even had the leftovers the next day for lunch – we couldn’t wait for dinner. I told you we’ve been living the good life with our meals!

Blue Cheese Crusted Steak  |  Lemon & Mocha

I have a delicious salad side that made a great meal alongside this steak and I’ll share it with you all later this week. In the meantime, enjoy this recipe and the rest of your Monday!

Blue Cheese Crusted Steak  |  Lemon & Mocha

Blue Cheese Crusted Steak
 
Yield: 4 servings
Ingredients
  • ½ cup panko breadcrumbs
  • ¼ cup crumbled blue cheese
  • 2 tablespoons chopped fresh parsley
  • ¼ teaspoon Italian seasoning
  • 1 tablespoon olive oil
  • 4 sirloin or tenderloin steaks (4-6 ounces each)
  • Salt and pepper
Directions
  1. Preheat oven to 450 degrees.
  2. In a small bowl, combine the panko, blue cheese, parsley and Italian seasoning. Set aside.
  3. In a large cast iron pan or oven safe pan (see note) heat the oil over medium-high heat. Season the steaks all over with salt and pepper then sear the meat for 2 minutes on each side. Remove the steaks from the heat and top with the panko mixture. Transfer the steaks to the oven to finish cooking, about 6 minutes. For medium, the internal temperature should be 140 degrees F. Let rest for at least 5 minutes before serving.
Notes
If you don’t have an oven safe pan, cook on the stove-top in sauté pan then transfer to a baking sheet or baking dish for the oven step.

Recipe from Cook This, Not That!.
Some of the links above are affiliate links, which means I may receive a small commission for my referral. This does not affect the retail cost of the item. Thank you for supporting Lemon & Mocha!