Recipes

Summer Roasted Veggie Pesto Pasta Salad with Burrata
Summer Roasted Veggie Pesto Pasta Salad with Burrata  |  Lemon & Mocha

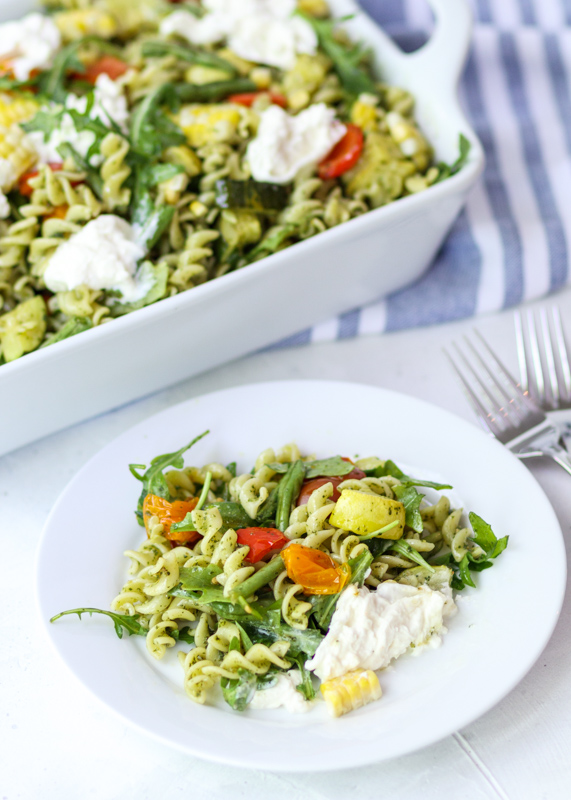
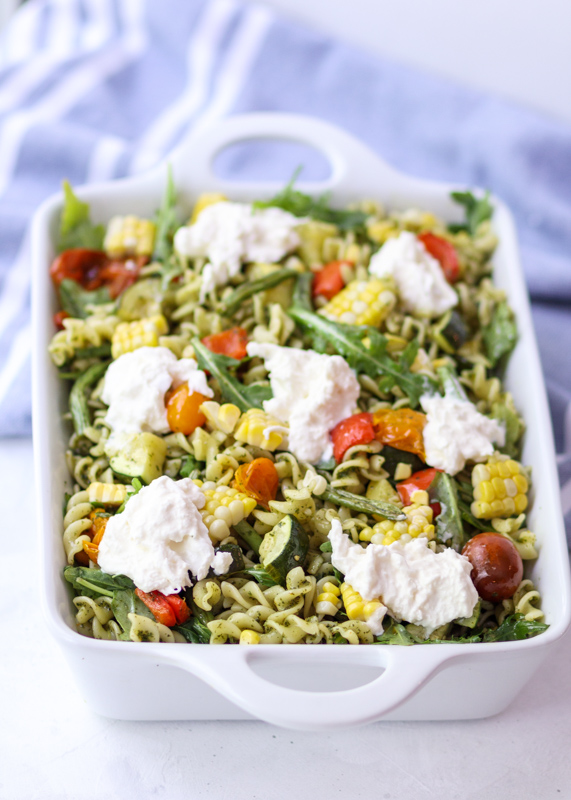
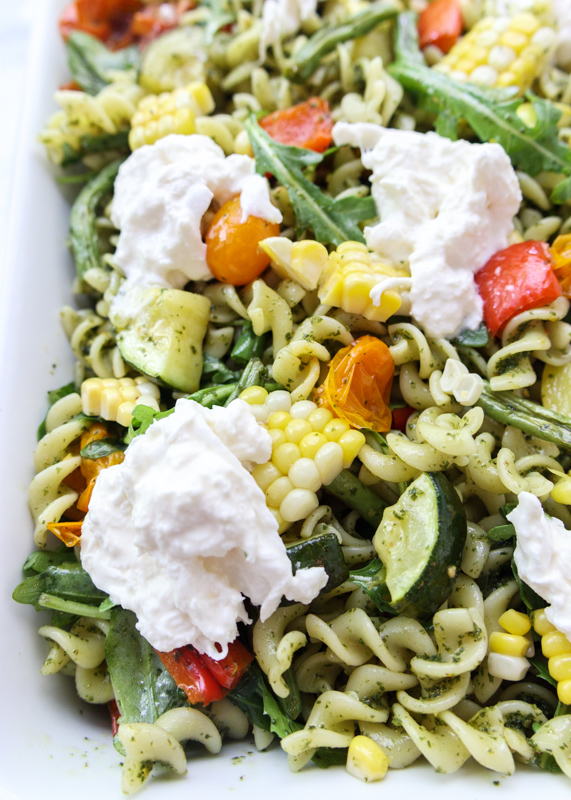
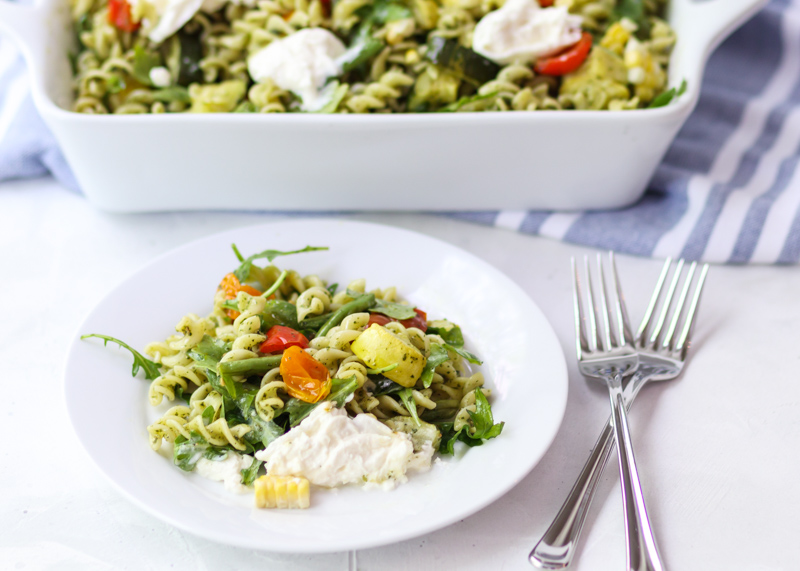
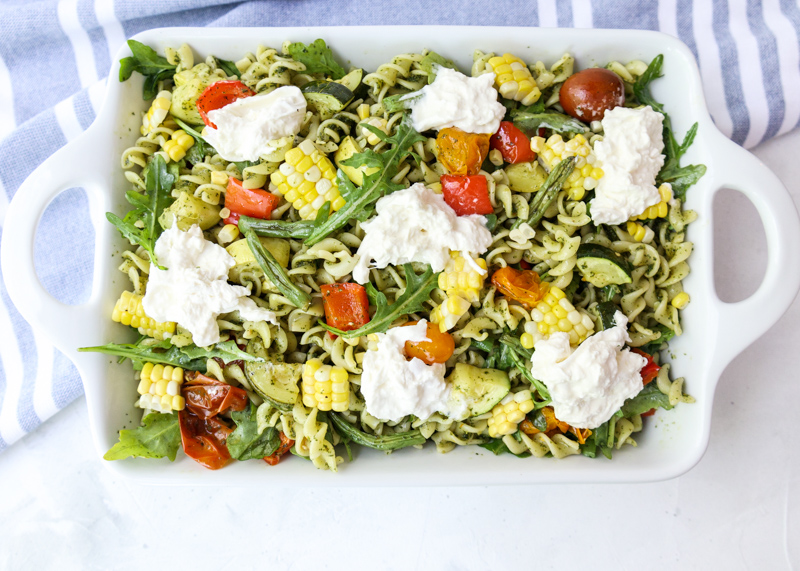
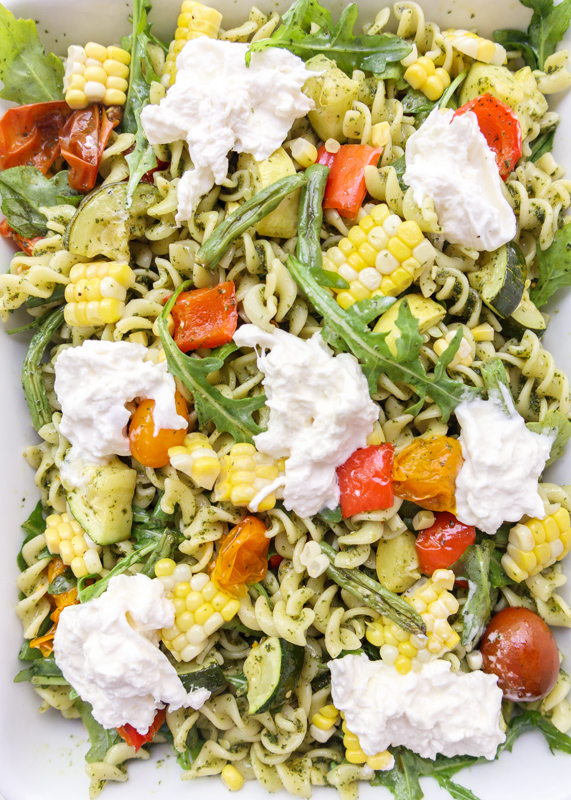
I’m starting my 4th of July recipe posts early so that you can have lots of delicious backyard barbecue inspiration ready to go. Also, summer barbecue season is in full swing and is it really a barbecue if there isn’t pasta salad? I love cooking seasonally so I wanted to pack as many seasonal veggies as I could into this Summer Roasted Veggie Pesto Pasta Salad with Burrata. We have red bell peppers, yellow squash, zucchini, cherry tomatoes, green beans, corn and arugula – like I said, all the veggies!
Summer Roasted Veggie Pesto Pasta Salad with Burrata  |  Lemon & Mocha

The best part is that all the vegetables, except the arugula, are roasted, which concentrates their flavor and sweetness. It also gives them a nice caramelization taking your pasta salad to the next level. And if you want to be at the top level then you have to toss your pasta salad with a lemony pesto and creamy burrata cheese! How amazing does that sound? If you’ve never had burrata it’s basically mozzarella’s cooler sibling and is soft on the inside. You can find in the grocery store near the fresh mozzarella, but if you can’t find any you could substitute fresh mozzarella or even goat cheese.
Summer Roasted Veggie Pesto Pasta Salad with Burrata  |  Lemon & Mocha

Pasta salads tend to either fall in the creamy macaroni category or the Italian dressing camp, so I love switching it up and using the pesto to dress and flavor the pasta and veggies. I tried to keep this as simple as possible by roasting everything at the same temperature for the same amount of time.
Summer Roasted Veggie Pesto Pasta Salad with Burrata  |  Lemon & Mocha

While making this recipe I also discovered my new favorite way to make corn! I love grilled corn, but it takes a fair amount of prep work, while boiling corn seems to take forever and doesn’t add any flavor. Baking corn is the way to go! I shucked the corn, lightly drizzled with olive oil, seasoned with salt and pepper then wrapped in aluminum foil before popping in the oven along with the other vegetables. The corn came out tender and full of flavor.
Summer Roasted Veggie Pesto Pasta Salad with Burrata  |  Lemon & Mocha

If you are looking for other pasta salad ideas, Diane’s Orzo Pasta Salad is another favorite of mine! How do you like your pasta salad? Are you team creamy macaroni, team Italian dressing, or something completely different?
Summer Roasted Veggie Pesto Pasta Salad with Burrata  |  Lemon & Mocha

Summer Roasted Veggie Pesto Pasta Salad with Burrata
 
Yield: 10-12 servings
Ingredients
  • 1 pound short pasta
  • 1 red pepper
  • 1 yellow squash
  • 1 zucchini
  • 1 cup grape or cherry tomatoes
  • 1 cup halved green beans
  • 1 ear corn
  • 2 cups arugula
  • ¾ cup pesto
  • ⅓ cup olive oil
  • ½ lemon, zested and juiced
  • ¼ teaspoon salt
  • Fresh ground pepper
  • 6 ounces burrata
Directions
  1. Preheat the oven to 400 degrees F.
  2. Prep the veggies. Cut the red pepper into a large dice. Cut thick rounds of the yellow squash and zucchini then quarter. Place the cut red pepper, cut yellow squash, cut zucchini, tomatoes and cut green beans on a full sheet pan (18”x 26”) then lightly drizzle with olive oil. Toss to coat then season with salt and pepper. Spread out the veggies so they aren’t overlapped or on top of each other. Remove the husk and silk from the ear of corn. Get a piece of aluminum foil large enough to wrap the corn in then place the ear of corn in the center slightly turning up the edges. Lightly drizzle with olive oil then season with salt and pepper. Tightly wrap the ear of corn. Place the baking sheet and the wrapped corn on the middle rack of your oven and let cook for 25 minutes, or until the veggies are nicely roasted. Set aside.
  3. While the vegetables are roasted, boil the pasta to al dente according to the package instructions. Once cooked, rinse with cold water and strain. Once cooled slightly and dry, put in a large mixing bowl. When the cooked vegetables have slightly cooled add them to the mixing bowl, using a sharp knife to carefully cut the kernels of corn off the ear.
  4. In a small bowl, whisk together together the pesto, olive oil, lemon zest and juice, salt and some fresh ground pepper. Pour over the pasta and the vegetables. Stir to combine. Taste and adjust salt and pepper according to taste. Place in the serving dish. Top with the burrata, breaking off chunks to spread on top.


Pistachio Semifreddo with a Nutella Magic Shell Topping

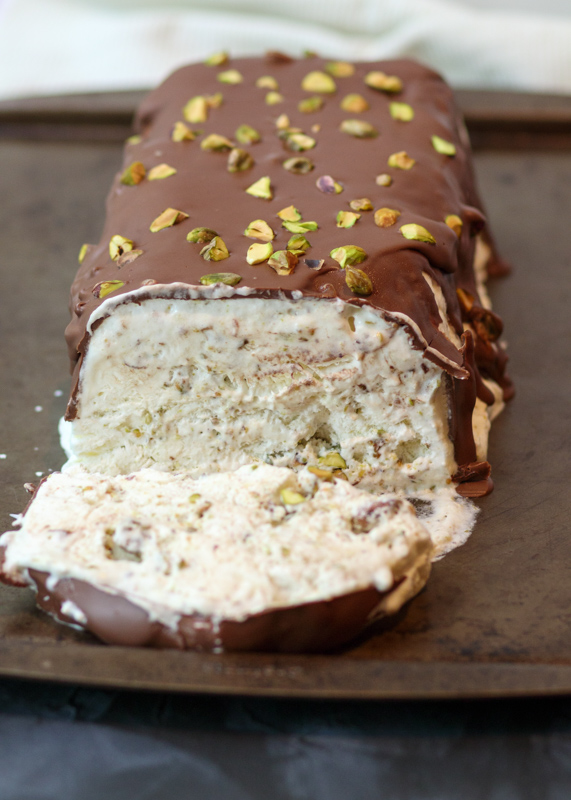
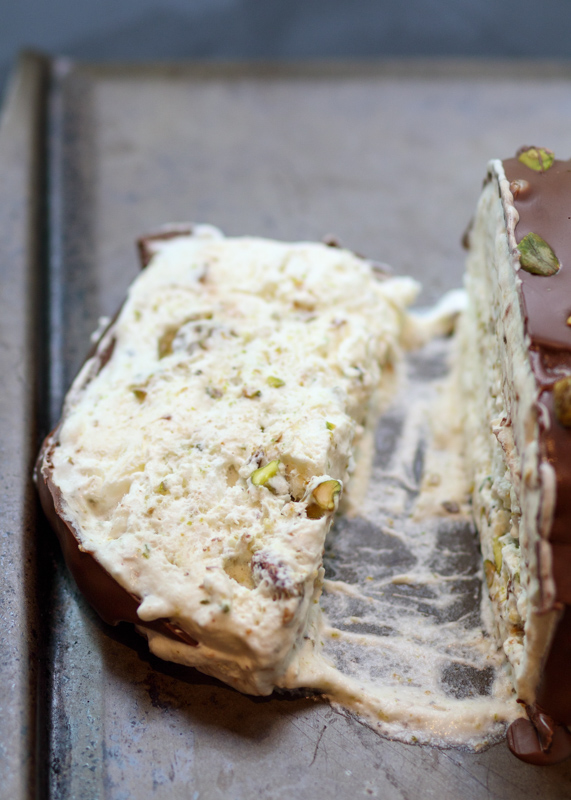
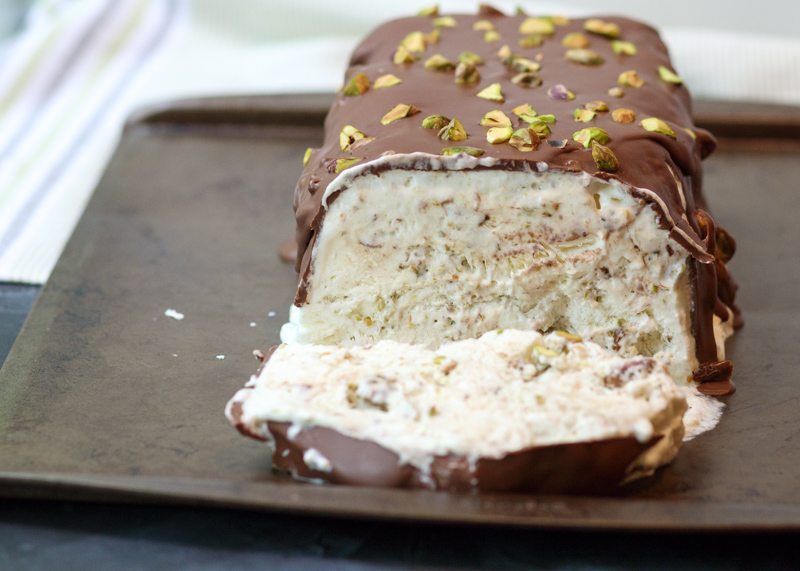
Pistachio Semifreddo with a Nutella Magic Shell Topping  |  Lemon & Mocha

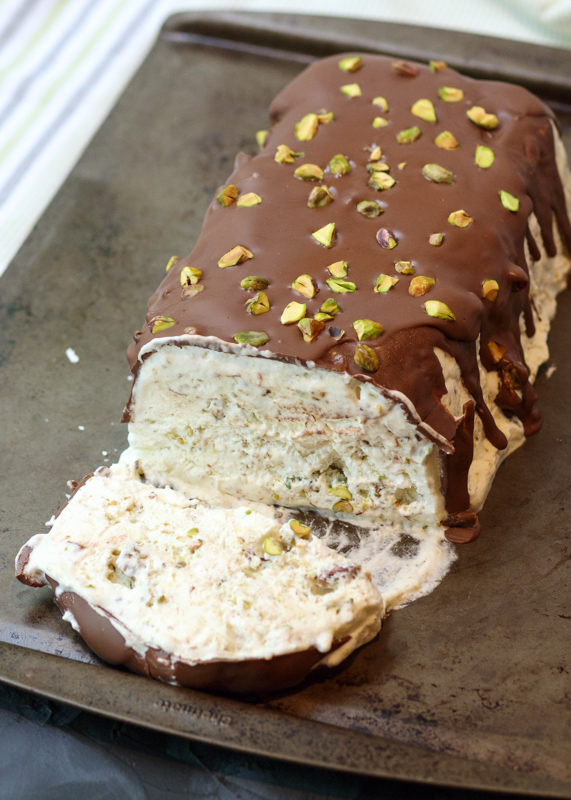
I know, I know. It’s early in the morning and you’re already drooling over a dessert. I’m sorry, but I had to share this one, especially just in time for Father’s Day on Sunday! I kind of consider this an all-parent dessert since I actually made and photographed it for Mother’s Day with the intention of posting it for Father’s Day. I have to work ahead over here so I’m often doing odd things like celebrating 4th of July in June or Christmas in September. This Pistachio Semifreddo with Nutella Magic Shell Topping would be good for any occasion, but I made it with my Dad in mind.

Pistachio Semifreddo with a Nutella Magic Shell Topping  |  Lemon & Mocha

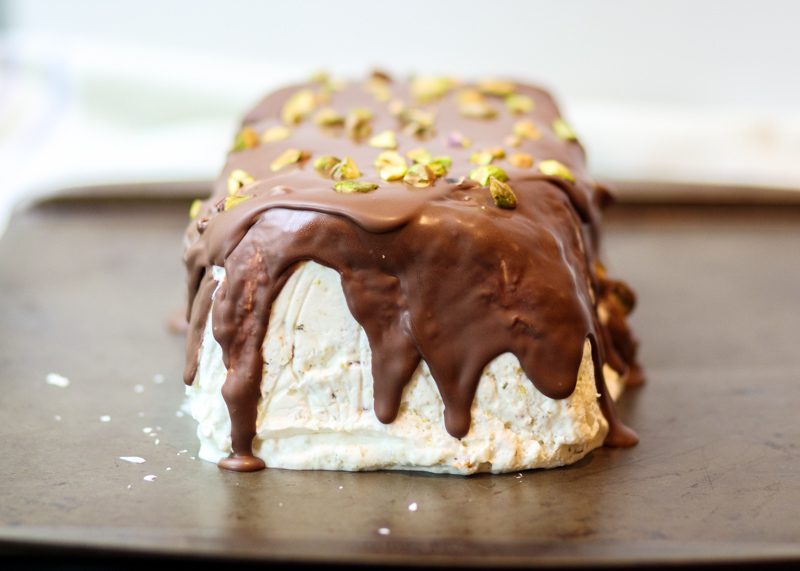
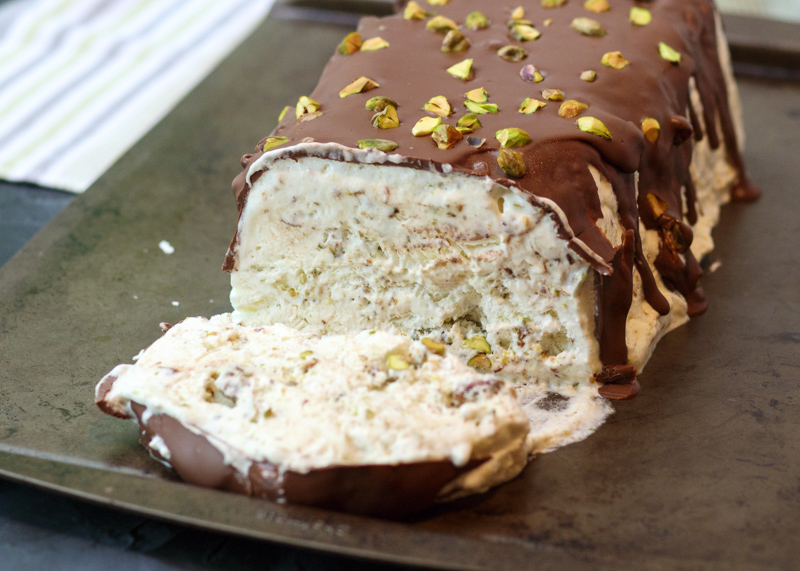
My Dad loves ice cream, but I’ve made him so many ice cream desserts over the years that I wanted to try something different. I’ve also always wanted to try a semifreddo, which to me tastes like ice cream mixed with whipped cream that’s been semi-frozen. The creaminess of the semifreddo with the crunch from the pistachios was an addictive combination. It would be delicious if you just left it at that. But I could never, ever in good conscience discourage you from topping the pistachio semifreddo with this Nutella magic shell! Adding coconut oil to the Nutella makes it act like that amazing magic shell topping you can buy in the bottle where the topping hardens when it touches the ice cream. This Nutella topping starts to harden as soon as you pour it over the semifreddo and will harden to completion if you just pop it in the the freezer for a little bit. Whacking off big hunks of the hardened Nutella to eat with the creamy semifreddo felt downright sinful. And so, so good.

Pistachio Semifreddo with a Nutella Magic Shell Topping  |  Lemon & Mocha

The recipe seems like a lot of steps, but it’s actually fairly simple. A lot of the comments on the original recipe were from people who said they don’t cook or bake often and they were surprised at how easy it actually was to make. You are basically whipping a meringue base, whipping a whipped cream and folding them together with the chopped pistachios. Then it goes into the freezer for at least eight hours so you will definitely want to plan ahead.

Pistachio Semifreddo with a Nutella Magic Shell Topping  |  Lemon & Mocha

You all know I love my food memories so of course I have some to share about my Dad and pistachio ice cream. The first is that my Dad’s company always had an ice cream sundae party every summer – and still do! My Dad is retired, but they still do the ice cream parties. Back when there weren’t as many people they would have everyone vote on the flavors by marking their vote on a printout of the flavors from the local ice cream shop. My Dad and another guy who worked there loved the pistachio ice cream and somehow that flavor would always win even though everyone else made fun of them for liking an “old man” flavor. I will always think of it as an “old man” flavor even though now I love it. I guess that makes me an old man? Anyways, my second memory I want to mention is when I got accepted to Boston College my Dad and I went to visit the campus that weekend. Of course we had to check out the closest ice cream shop, which is White Mountain Creamery. Funny enough, I don’t remember what flavor I got, but I remember my Dad got the pistachio ice cream. I was so happy in that moment being on a high from excitement to go to Boston College sitting there eating ice cream with my Dad.

Pistachio Semifreddo with a Nutella Magic Shell Topping  |  Lemon & Mocha

Now even though I made this dessert with my Dad in mind it kind of backfired on me. For those of you that don’t know, my Dad can be very picky. He’ll eat everything, but he will finish the meal saying that it was good, but he prefers his classic favorites. This was one of those times. He liked it, but thought it was a little too sweet for him and wanted it to be ice cream – haha – but everyone else had seconds so I think it’s safe to say that 98% of your guests will go nuts for it. I hope you all have a wonderful weekend and make lots of delicious food memories with your loved ones! Happy Father’s Day to all the awesome Dads out there, especially my Dad, Lee, and my father-in-law, Floyd!

Pistachio Semifreddo with a Nutella Magic Shell Topping  |  Lemon & Mocha

Pistachio Semifreddo with a Nutella Magic Shell Topping
 
Yield: 8-10 servings
Ingredients
for the semifreddo
  • 1½ cups shelled pistachios
  • ½ cup granulated sugar, divided
  • 6 egg whites
  • 2 cups heavy cream, kept in the fridge until ready to use
  • ¼ teaspoon almond extract
for the Nutella magic shell
  • 1 cup Nutella
  • ⅓ cup coconut oil
Directions
for the semifreddo
  1. Line an 8½” by 4½” loaf pan with plastic wrap so it hangs over all the sides then set aside. Roughly chop ¼ cup of the pistachios and set aside.
  2. Pulse ¾ cup pistachios with 2 tablespoons of the sugar until the pistachios are finely chopped. Add the remaining ½ cup pistachios and pulse a few times until the pistachios are very roughly chopped and large chunks still remain. Set aside.
  3. Whip the egg whites in the bowl of a stand mixer or in a large bowl with a hand mixer on medium speed until there are soft peaks. This mean the peak is just barely holding its shape and would flop if you lifted the beater. Increase the speed to high and add ¼ cup plus 2 tablespoons of the sugar a little at a time. Once the sugar has been added continue to beat until the egg whites are holding stiff peaks. This means the peaks hold their shape completely straight even when beaters are lifted.
  4. In a different bowl of a stand mixer or in a large bowl with a hand mixer, beat the cold cream and the almond extract on medium speed. Carefully increase the speed to high and beat until you have stiff peaks. Carefully fold the egg white mixture into the cream mixture, then gently fold in the pistachio mixture. Pour and scoop into the prepared loaf pan. It will probably go over the top of the pan. Just keep adding and smooth to create an even surface on top. Lightly cover with plastic wrap and freeze for 8 hours.
  5. Remove the semifreddo from the freezer. Invert onto a serving dish (or plate/container that will fit in your freezer if you aren’t serving right away) and carefully remove the pan and plastic wrap. Top with the Nutella magic shell. Look harden slightly then sprinkle the reserved chopped pistachios on top. Return to the freezer until ready to serve. Let soften slightly before serving
for the Nutella magic shell
  1. Microwave the Nutella and coconut oil in a small microwave safe bowl until melted. I start at 30 seconds, stir then continue microwaving and stirring at 15 second intervals. Once the mixture is melted and smooth let cool slightly at room temperature before using.
Notes
This recipe contains uncooked egg whites, which may be a concern if salmonella is a problem where you live.
Using a metal mixing bowl for the egg whites and heavy cream makes a big difference, especially if you can chill them in the freezer, along with the metal beaters, before using. If your egg whites or cream isn’t coming to peaks it may be that your ingredients or bowl wasn’t cold enough so I always chill mine.

Semifreddo recipe slightly adapted from Epicurious.

Healthy Open-Faced Chicken Salad Sandwiches

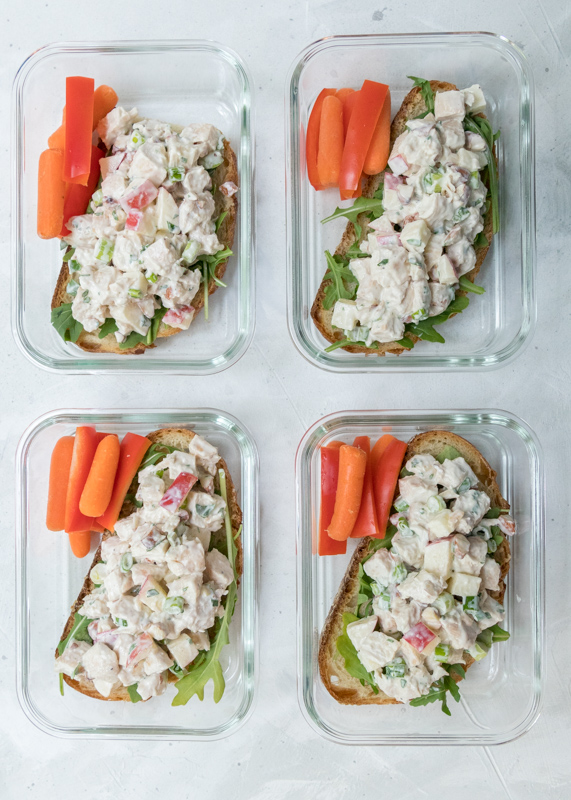
Healthy Open-Faced Chicken Salad Sandwich  |  Lemon & Mocha

How many posts have I started with, “I’m so excited to share this with you!”? I think that’s okay though because I only ever share recipes here that I think you NEED in your life so it makes sense for me to always be excited! These Healthy Open-Faced Chicken Salad Sandwiches have me really excited for several reasons, but mostly because the chicken salad is just damn delicious! Now, as many of you know, I am mayonnaise obsessed. At least half of you are probably cringing right now (I know Matt is!), but I’ve just always been hooked. Mayonnaise and healthy don’t exactly go together so I challenged myself to make a mayo-free chicken salad that wouldn’t make me miss the mayo at all. Well, as mayo-free as possible – I did throw in just one little tablespoon of mayo (which is less than a teaspoon per serving). Sorry, I can’t help it!

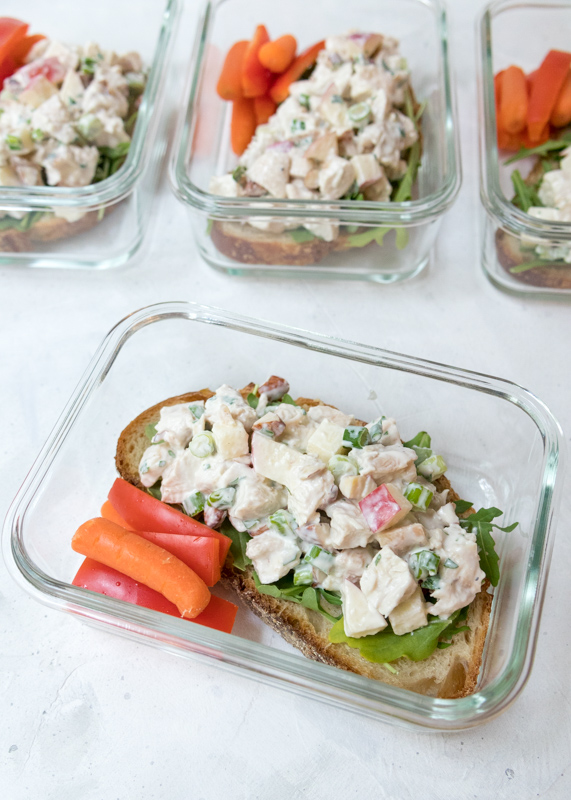
Healthy Open-Faced Chicken Salad Sandwich  |  Lemon & Mocha

I was completely prepared to hate this chicken salad. I thought with subbing in plain Greek yogurt that would be all I would taste and that it would be okay, but not a solid substitute for the classic. I was so wrong and I’m so excited about it! I didn’t miss all the mayo one bit! The apple cider vinegar, Dijon, parsley and scallions give this chicken salad so much flavor and the crunch from the apple and the almonds keeps it from being anything but boring.

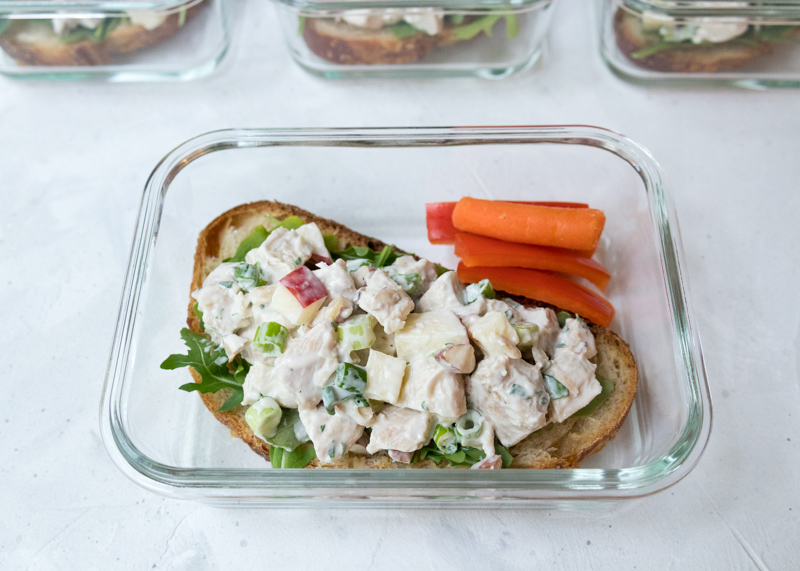
Healthy Open-Faced Chicken Salad Sandwich  |  Lemon & Mocha

Another reason this chicken salad has so much flavor packed in is that I used grilled chicken. I love grilling chicken in the summertime and this sandwich is the perfect reason to throw a few extra chicken breasts on your grill. Matt hates chicken salad because he doesn’t like mayo and even he was chowing down on these!

Healthy Open-Faced Chicken Salad Sandwich  |  Lemon & Mocha

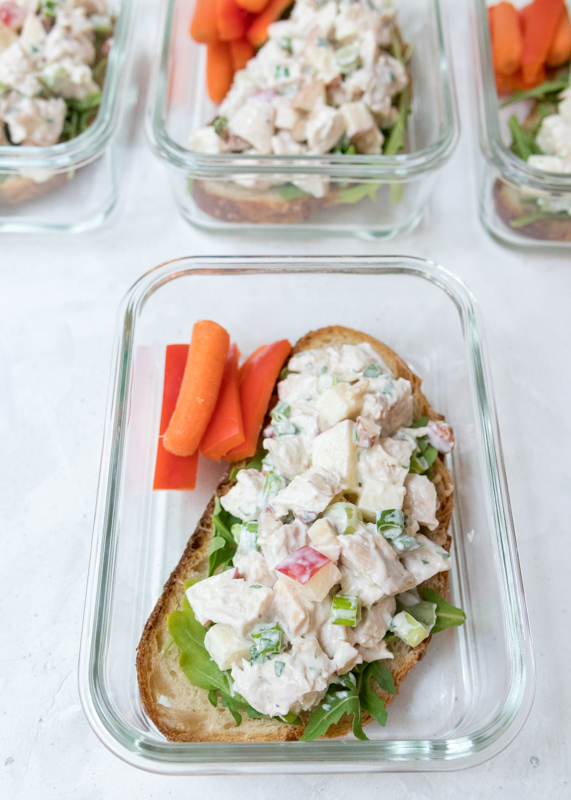
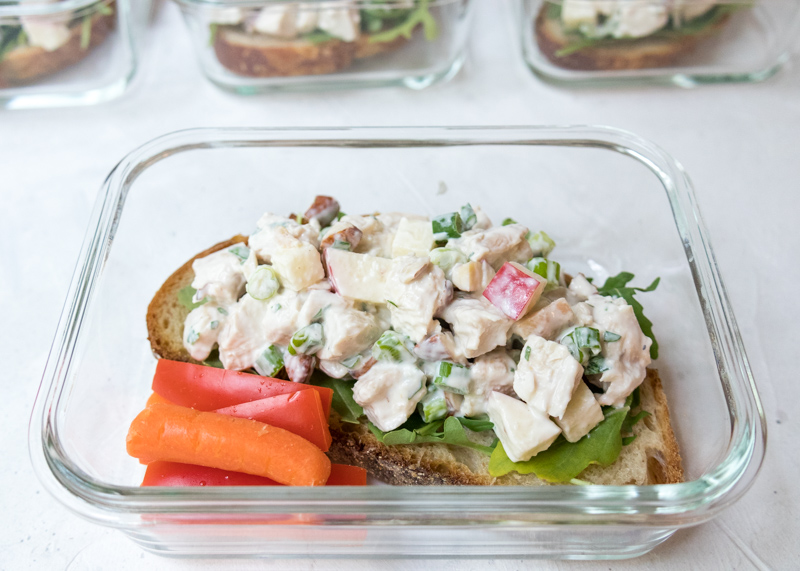
The chicken salad tastes great on its own or on a green salad, but my favorite way to eat it is as these Open-Faced Chicken Salad Sandwiches. I love using locally baked sourdough bread as a healthier option. I am allergic to oats and most multigrain breads have rolled oats, oat flour or oat fiber in them. Although sourdough is similar to white bread in terms of calories and carbs, it is usually made with no sweeteners or oils, doesn’t require extra preservatives and is higher in protein. A lot of people also find it much easier to digest due to the lactic acid present as a result of the baking process. I also love how it’s soft and chewy with a bit of a tanginess to it. It holds up really well to this chicken salad and tastes so good with a little bit of fresh arugula for some added green veggies. I hope you enjoy this one! If you try a recipe, don’t forget to let me know how it was in the comments – I love hearing from you all!

Healthy Open-Faced Chicken Salad Sandwich  |  Lemon & Mocha

Healthy Open-Faced Chicken Salad Sandwich
 
Yield: 4 servings
Ingredients
for the chicken salad
  • 1 pound boneless skinless chicken, grilled, about 2.5 cups cooked
  • ½ cup diced apple
  • ¼ cup chopped almonds
  • ¼ cup sliced scallions
  • ⅓ cup plain nonfat Greek yogurt
  • 1 tablespoon mayonnaise
  • 1 teaspoon apple cider vinegar
  • ½ teaspoon Dijon mustard
  • ¼ teaspoon salt
  • Fresh ground pepper
  • 1½ tablespoons fresh chopped parsley
for the sandwich
  • 4 slices sourdough bread
  • 1 cup arugula
  • Carrot and red pepper slices for serving, optional
Directions
for the chicken salad
  1. Dice the chicken. Toss in a medium mixing bowl with the diced apple, chopped almonds and sliced scallions. Add the yogurt, mayonnaise, vinegar, Dijon, salt, pepper and parsley. Stir well to combine.
for the sandwich
  1. Put the sourdough bread on 4 plates or in 4 meal prep containers. Divide the arugula between the 4 slices of bread. Top with the chicken salad, dividing between the 4 slices of arugula topped bread. Add carrot and red pepper slices to container, if using.


Smoked Gouda Beer Burgers

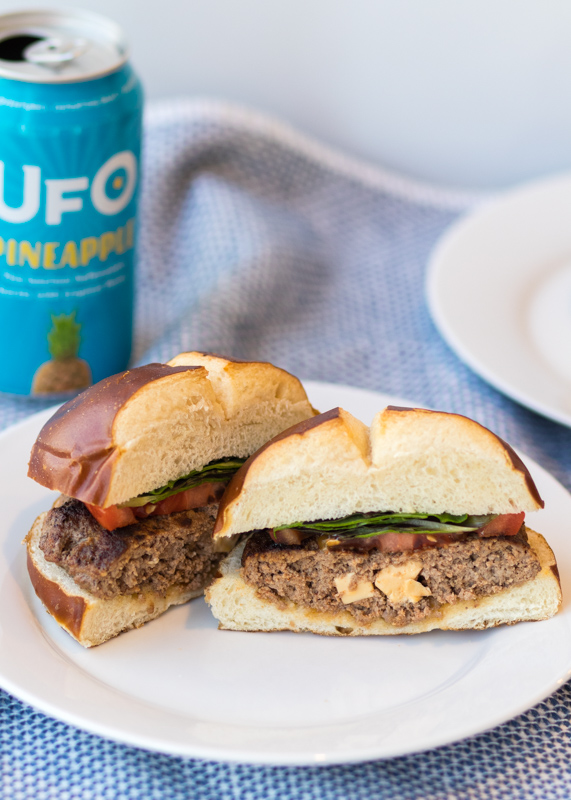
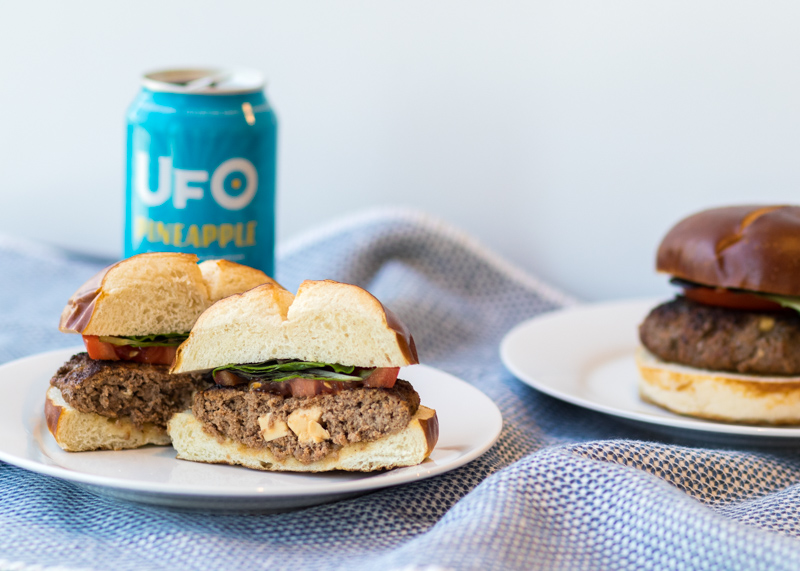
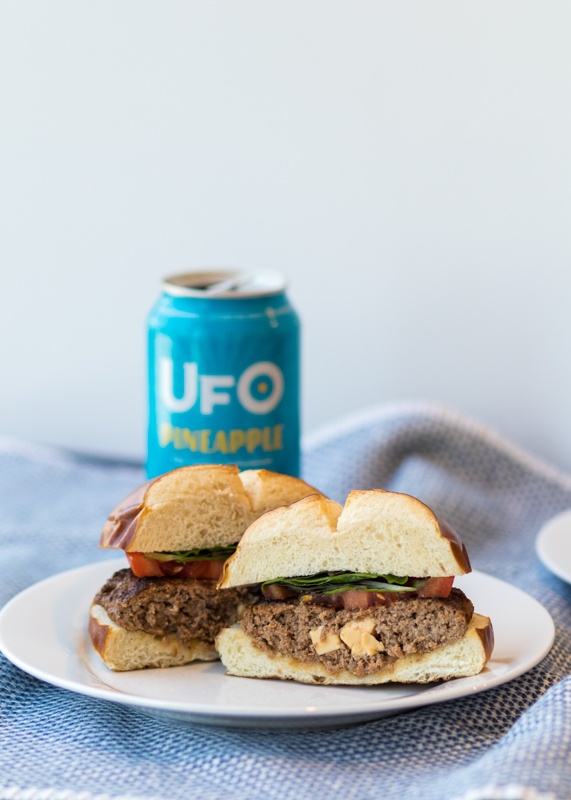
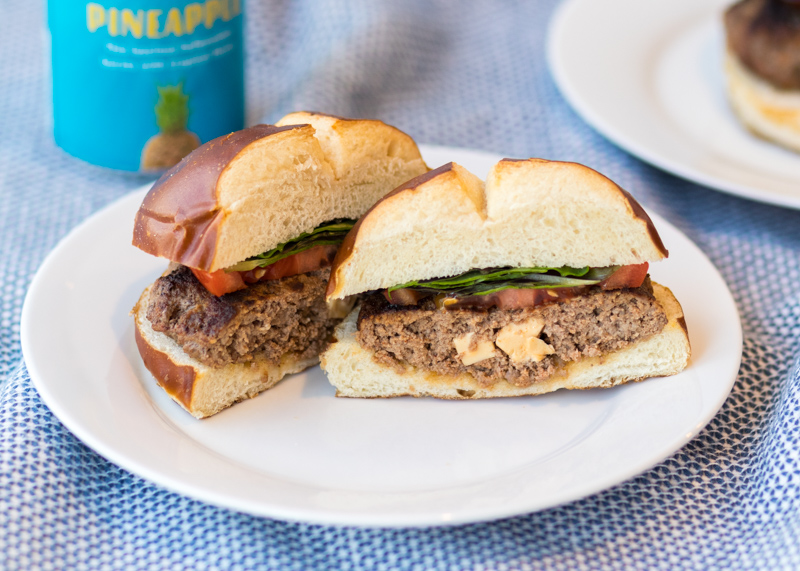
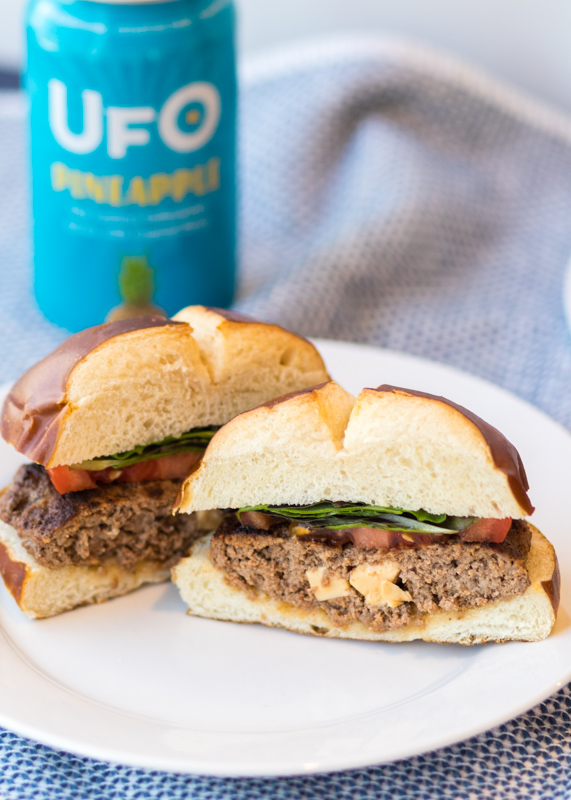
Smoked Gouda Beer Burgers  |  Lemon & Mocha

I cannot express to you how juicy, cheesy and flavorful these burgers are! Last week we were talking about tried and true recipes and this is another one I’ve been making since 2008. Although these Smoked Gouda Beer Burgers aren’t in Matt’s and my rotation, that’s only because we try to eat somewhat healthy and don’t want to be eating cheese-stuffed burgers weekly. However, when we’re in the mood for a burger both of us instantly think about these huge smoky burgers. Especially with the beer involved they just scream summertime and standing out by your grill with a drink in hand.

Smoked Gouda Beer Burgers  |  Lemon & Mocha

Instead of melting the cheese on top, the burger meat is loaded with chunks of smoked gouda cheese. They create melted and gooey pockets of cheese in the burger, but the chunks are just big enough to not completely melt and still maintain their rich smoky flavor. The smoky flavor gets even more pronounced by the addition of smoked paprika in the burger seasoning. The beer, Worcestershire sauce and other seasonings also add to the richness and depth of flavor in these burgers.

Smoked Gouda Beer Burgers  |  Lemon & Mocha

I suggest letting the burgers firm up a little in the fridge after you make the patties otherwise you risk them falling apart with the cheese and liquid ingredients added to the meat. These ingredients are what make the burger so juicy though so I definitely wouldn’t skip anything! Pretzel buns are perfect for this burger because you want something that’s going to stand up to the bold flavors, just like Uncle Rob’s Tailgate Filet Sandwiches with Whiskey Marinade.

Smoked Gouda Beer Burgers  |  Lemon & Mocha

These Smoked Gouda Beer Burgers would be the ultimate dish for Father’s Day or the burger-lover in your life. I think it’s especially fitting to be posting these Father’s Day burgers today because it is my father-in-law, Floyd’s birthday! In addition to being caring and always willing to go above and beyond to lend a hand, my father-in-law loves burgers. So what better way to celebrate? I hope you enjoy these and make them for someone special this weekend!

Smoked Gouda Beer Burgers  |  Lemon & Mocha

Smoked Gouda Beer Burgers
 
Yield: 6 burgers
Ingredients
  • 2 pounds 85% lean ground sirloin
  • ⅓ pound smoked gouda, cut into ¼-1/2” chunks
  • ¼ cup grated onion, about ⅓ of an onion
  • 1 tablespoon Worcestershire sauce
  • 2 teaspoons dijon mustard
  • 2 teaspoons smoked paprika
  • ½ teaspoon garlic powder
  • ½ teaspoon ground coriander
  • Salt and pepper
  • 4 ounces beer
  • 1½ tablespoons vegetable oil
  • 6 pretzel buns
  • Lettuce and tomato, for serving
Directions
  1. In a large bowl add the ground sirloin, diced gouda, grated onion, Worcestershire sauce, dijon, smoked paprika, garlic powder, ground coriander, salt and pepper. I used about 6 grinds each of our small salt and pepper grinders. Mix with your hands until roughly combined, try not to over-mix. Add the beer and mix into the burger. Form the burger meat into 6 patties. Lightly press your thumb into the center of the burger so the center is thinner than the edges. When burgers cook they bulge into the middle so this ensures an even patty. Place the patties on a plate or platter, cover then refrigerate for about 10 minutes. You can skip this step, but your burgers are more likely to stay together if they have a chance to firm up a little in the fridge.
  2. Heat your grill or grill pan to medium-high heat. Lightly brush the burgers with the vegetable oil then grill for 4-5 minutes on each side for a medium done burger. Do not press down on the burger with your spatula while it is cooking or flip other than the one time. This is how burgers lose their juiciness! Bobby Flay recommends an internal temperature of 145 degrees F for a perfect burger, which comes out medium, although the USDA recommends 160 degrees F for ground beef. We always follow Bobby Flay’s recommendation, but cook to whatever temperature you prefer or are comfortable with.
  3. Remove from the heat and serve on the pretzel buns with the lettuce, tomato and condiment of choice. I recently had these with some pesto mayo and it was SO good!

Recipe slightly adapted from Rachel Ray.

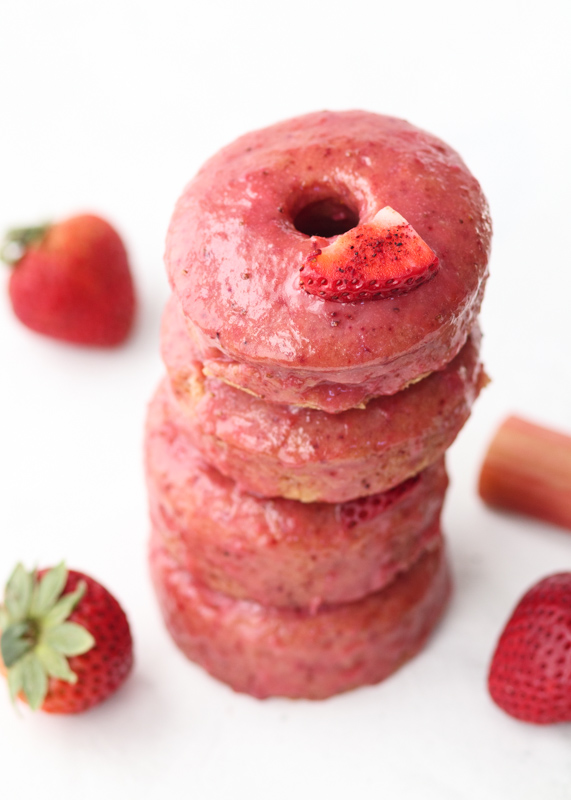
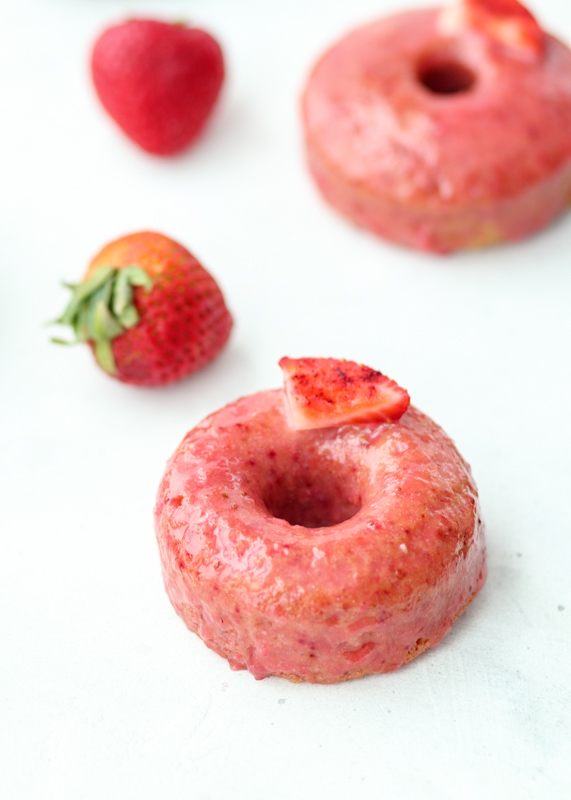
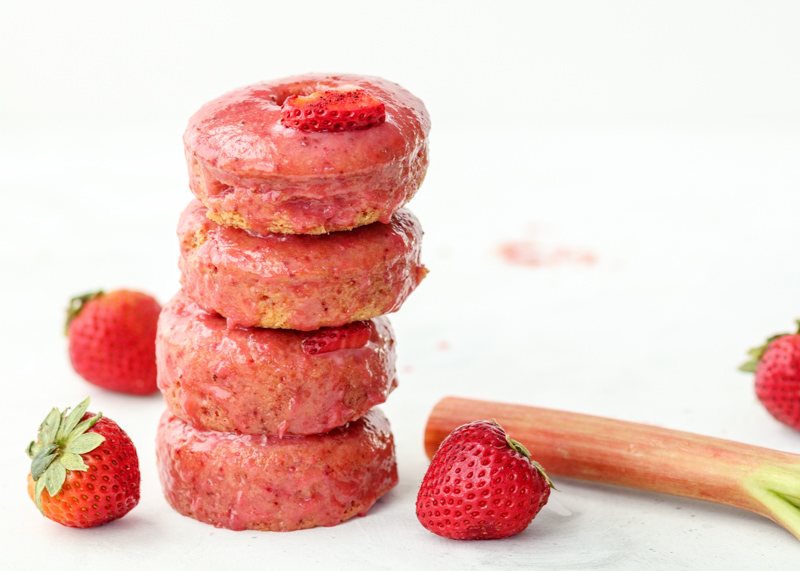
Beet Donuts with a Brown Butter Strawberry Rhubarb Glaze

Beet Donuts with a Brown Butter Strawberry Rhubarb Glaze  |  Lemon & Mocha

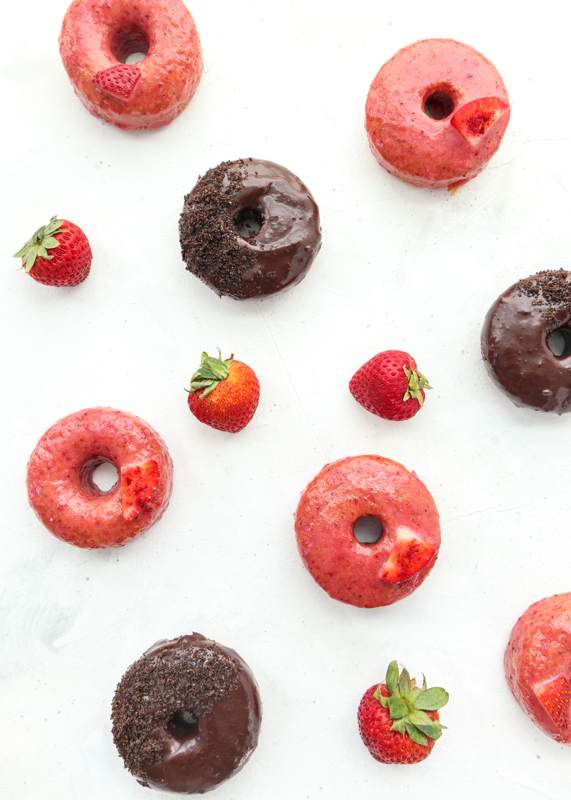
You guys (and gals)! I made donuts! Cute, little, glazed baked donuts! This was my first time making baked donuts and I am so happy with how they came out. When I go to a donut shop I prefer the fried old fashioned donuts over the cake ones, but if I’m making them myself I would rather not fry them. I was skeptical of baked donuts, but they are so delicious I can’t believe I waited so long to try them. These are light, spongey and a perfect breakfast, or anytime, treat.

Beet Donuts with a Brown Butter Strawberry Rhubarb Glaze  |  Lemon & Mocha

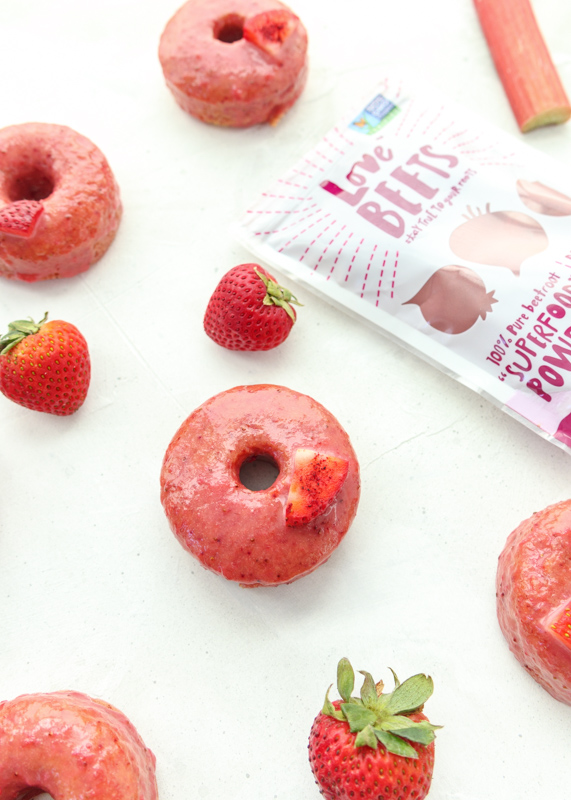
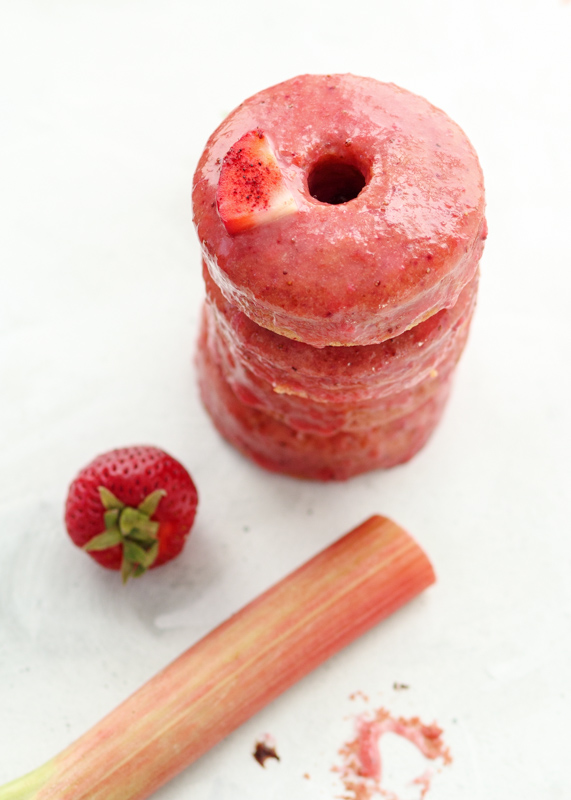
The inspiration for these donuts came from two places. The first is that I have been obsessing over strawberry rhubarb ever since I made the Strawberry Rhubarb Crumble Muffins so I’ve been trying to come up with another recipe to put them in before rhubarb’s short season is over. The second source of inspiration was beets! Love Beets to be exact. I won a giveaway on Instagram a few weeks ago and one of the brands sponsoring the giveaway was Love Beets. Matt and I were super excited since we know the brand and have purchased their roasted beets quite a few times. When I found out I won and would be getting some beet powder sent my way, I started brainstorming how I could use it. I had never tried using beets in a sweet recipe before so I knew that’s what I wanted to try. After giving it a lot of thought, I decided on beet donuts and ended up on the version you see in these photos.

Beet Donuts with a Brown Butter Strawberry Rhubarb Glaze  |  Lemon & Mocha

I love using the beet powder for this recipe because it gives the donuts a beautiful pink color and all of the added superfood benefits of beets without the actual taste of beets. No, this is not sponsored as I won the giveaway randomly (one of those like this page and that page then tag a friend in the comments), but I love Love Beets and I’m excited to share their products with you if you aren’t already familiar with them!

Beet Donuts with a Brown Butter Strawberry Rhubarb Glaze  |  Lemon & Mocha

The donuts are moist vanilla cinnamon donuts, but the sweet and tart brown butter strawberry rhubarb glaze makes them. The glaze is fruity, sweet and has the right amount of punch to it from the rhubarb. It also has a deep richness from the browned butter, just like in my Perfect Chocolate Chip Cookies. Plus, how beautiful does that rich pink color look?

Beet Donuts with a Brown Butter Strawberry Rhubarb Glaze  |  Lemon & Mocha

If you don’t have a donut pan, I highly recommend these silicone pans. I did a bunch of research on the regular metal nonstick pans versus the silicone and while people had good things to say about both, I ultimately went with the silicone for ease of storing and ease of removing the donuts from the pan. The cute colors of the silicone pans also didn’t hurt. Have you ever tried baking donuts?

Beet Donuts with a Brown Butter Strawberry Rhubarb Glaze  |  Lemon & Mocha

Beet Donuts with a Strawberry Rhubarb Glaze
 
Yield: 6 donuts
Ingredients
for the donuts
  • 1 cup all-purpose flour
  • ⅓ cup granulated sugar
  • 1 teaspoon baking powder
  • 1 teaspoon beet powder, optional
  • ½ teaspoon salt
  • ¼ teaspoon ground cinnamon
  • ⅓ cup plus 1 tablespoon milk
  • 2 tablespoons unsalted butter, melted
  • 1 teaspoon vanilla extract
  • 1 large egg
for the glaze
  • 1½ tablespoons butter
  • ½ cup quartered fresh strawberries
  • ¼ cup diced rhubarb
  • 2 tablespoons milk
  • ½ cup powdered sugar
Directions
for the donuts
  1. Preheat the oven to 350 degrees F. Lightly spray a donut pan with nonstick cooking spray and set aside.
  2. Sift together the flour, sugar, baking powder, beet powder, salt and cinnamon in a large bowl.
  3. In a small bowl, whisk together the milk, melted butter, vanilla extract and egg. Add to the flour mixture and stir until just combined.
  4. Using a pastry bag or a plastic sandwich bag with a corner snipped off, pipe the batter into the donut pan cavities. Fill each cavity about ¾ full and be sure to wipe any off that gets dripped onto the center stems. Bake for 12-14 minutes. The tops should be set. When they’re cool enough to handle, remove them from the donut pan and let them cool completely on a wire cooling rack.
for the glaze
  1. Melt the butter in a medium saucepan over medium heat. Continue to cook and swirl your pan to lightly brown the butter. Once the butter has started to foam and is a light golden color, add the chopped strawberries and rhubarb. Cook until soft, about 5 minutes, stirring occasionally.
  2. Puree the fruit mixture with the milk in a food processor or blender. Stir in the vanilla extract then let sit until the mixture has cooled.
  3. Once cooled, whisk in the powdered sugar until smooth. Dip the donuts in the glaze then let them sit on the cooling rack or plate for a couple minutes.
Notes
The glaze won't completely set because it is more of a syrup. If you want the glaze to set, you can melt 2 tablespoons of white chocolate chips into the pureed fruit mixture before letting cool. I made it both ways and thought it tasted good without the white chocolate so I didn't feel the need to add them just to make the glaze set more.

Donut recipe adapted from As Easy as Apple Pie.
Glaze recipe adapted from Pillsbury.

Some of the links above are affiliate links, which means I may receive a small commission for my referral. This does not affect the retail cost of the item. Thank you for supporting Lemon & Mocha!