Recipes

Sheet Pan Chicken Fajita Bowls
Sheet Pan Chicken Fajita Bowls  |  Lemon & Mocha

I’m back with another healthy make ahead lunch or dinner recipe for you! It is much needed after Monday’s Elote Hot Dog, right? Those hot dogs were so good, but food like that is a treat for Matt and I. Most weeks, lunches and dinners consist of meals like these Sheet Pan Chicken Fajita Bowls. Many people think healthy is boring, but that’s only if you let it be boring! You all know I’m obsessed with food so I would never eat healthy every day if it meant sacrificing flavor.
Sheet Pan Chicken Fajita Bowls  |  Lemon & Mocha

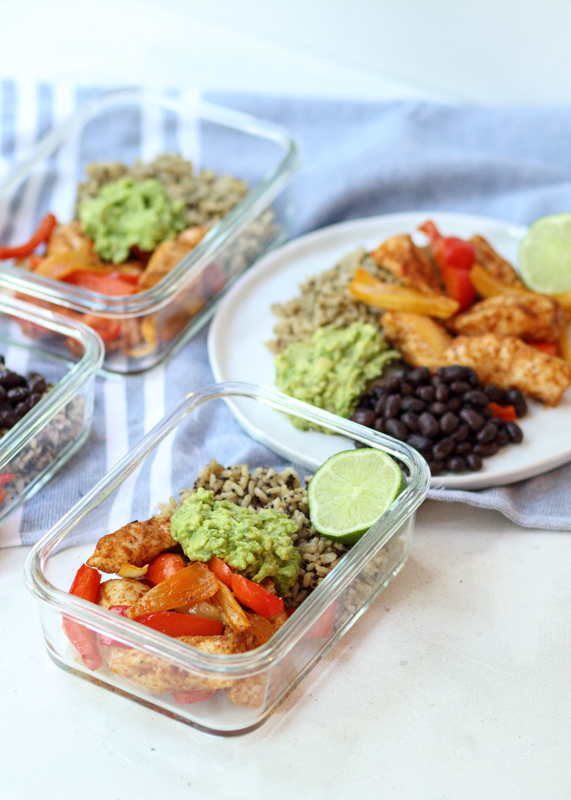
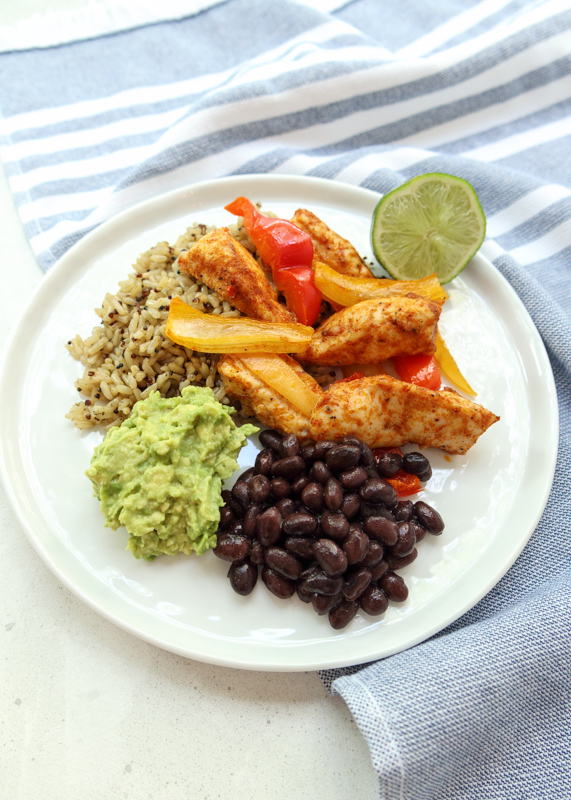
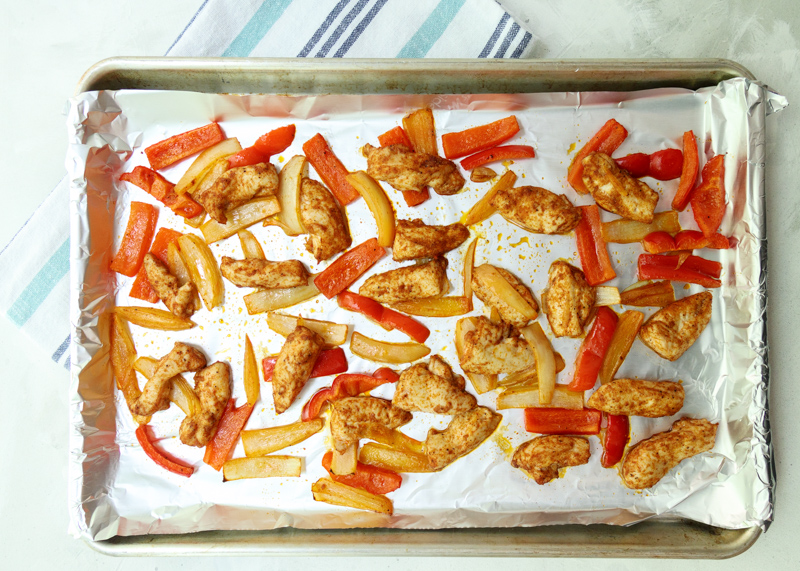
Let me break down these bowls for you. Chicken tenders, red bell pepper and onion get tossed in a simple yet flavor-packed seasoning mix. I find it to taste more earthy and smoky than spicy, but if you like spicy food you can definitely increase the amount of chili powder. It then all gets baked at the same temperature on the same sheet pan.
Sheet Pan Chicken Fajita Bowls  |  Lemon & Mocha

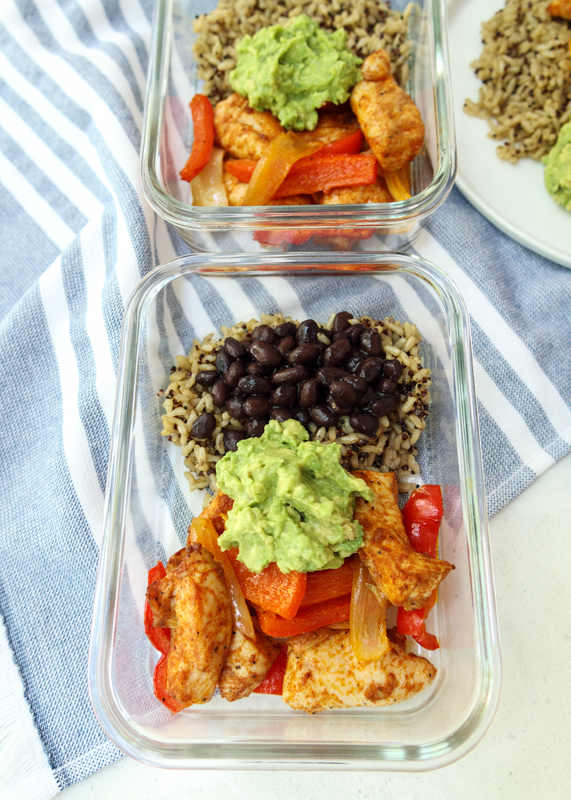
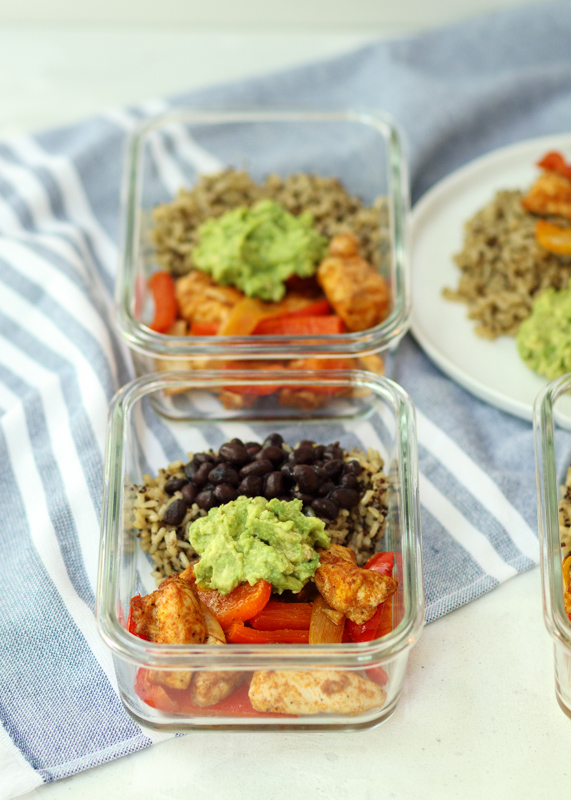
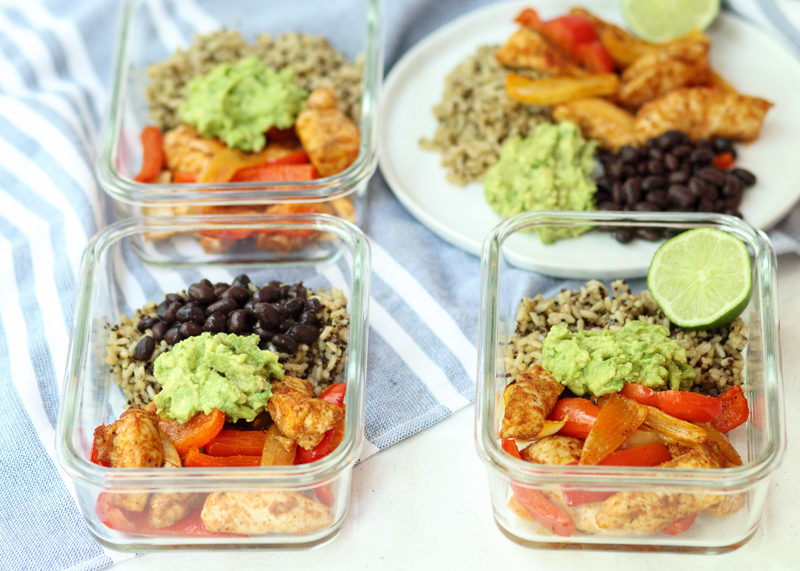
Grains get layered on the bottom of the bowl, topped with the cooked chicken and veggies, black beans, avocado mashed with lime juice and garlic powder. That’s it!
Sheet Pan Chicken Fajita Bowls  |  Lemon & Mocha

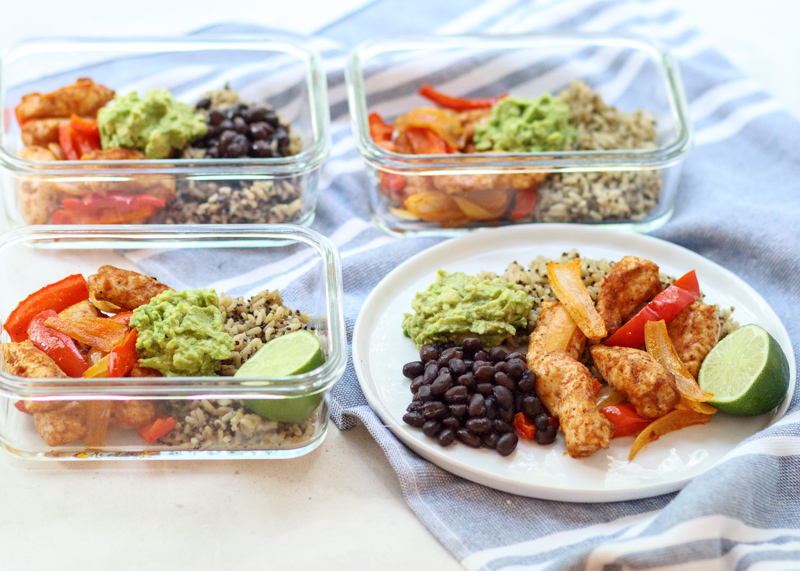
If you notice in the photos that two of the fajita bowls are missing their black beans that is because Matt does not like them. Everyone is all about “doing it for the gram” these days, but I would just rather everyone like and enjoy their food!
Sheet Pan Chicken Fajita Bowls  |  Lemon & Mocha

Matt and I have been cooking fajita chicken and veggies over rice for dinner since we first started cooking together. Once we discovered the Seeds of Change brown rice and quinoa microwavable packets we started having this meal nonstop because the rice quinoa packets are so easy and crazy good. No, this is not an ad, we are just long-term obsessed! I have been able to find these packets at almost every grocery store I’ve been in, including Costco.
Sheet Pan Chicken Fajita Bowls  |  Lemon & Mocha

If you would prefer to make plain brown rice or quinoa I would definitely season it a bit. You could even try a different grain, I’ve been into barley lately, or substitute in some sweet potatoes – yum! Now I’m thinking about how I could roast sweet potatoes wedges on the same pan as the chicken and veggies – keeping that one in mind for later! No matter how you customize your Sheet Pan Chicken Fajita Bowls, after one bite you will making this one on repeat!
Sheet Pan Chicken Fajita Bowls  |  Lemon & Mocha

Sheet Pan Chicken Fajita Bowls
 
Yield: 4 servings
Ingredients
for the chicken
  • 1 pound boneless skinless chicken tenderloins
  • 1 red bell pepper
  • 1 small onion
  • 1 teaspoon paprika
  • ½ teaspoon garlic powder
  • ½ teaspoon ground cumin
  • ¼ teaspoon salt
  • ⅛ teaspoon black pepper
  • Pinch chili powder
  • 1 tablespoon olive oil
for the rice bowl
  • 2 small avocados
  • 1 teaspoon lime juice
  • ¼ teaspoon garlic powder
  • 2 cups Seeds of Change Brown Rice & Quinoa with Garlic
  • 1 cup black beans
  • 1 lime, for garnish
Directions
for the chicken
  1. Preheat the oven to 375 degrees F. Line a half sheet baking sheet with nonstick aluminum foil or spray with nonstick spray and set aside.
  2. In a small bowl, combine the paprika, garlic powder, ground cumin, salt, pepper and chili powder. I don’t like spicy foods so if you like yours more spicy, add more chili powder. Just be sure to taste it so you don’t over-spice it.
  3. Cut the chicken tenders in half. If they are really wide, you might need to also cut them in half lengthwise so they aren’t too big (see my photos for reference of how big mine were). Cut the bell pepper and the onion into slices. You don’t want the slices too thin of they will overcook. Add the chicken, bell pepper slices and onion slices to a medium mixing bowl. Add the olive oil then toss to combine. Add the spice mixture then toss to coat. Place the seasoned chicken and veggies on the prepared baking sheet and spread them out so they’re touching as little as possible. Bake for 20-25 minutes, or until the chicken reads an internal temperature of 165 degrees F.
for the rice bowl
  1. Put the avocado flesh in a small mixing bowl. Mash with a fork then season with the lime juice and garlic powder. Season with salt and pepper, adding more lime juice or garlic powder as needed. Stir to combine.
  2. To plate the dish, give each bowl ½ cup of the rice and ¼ cup of the black beans. Divide the chicken, veggies and mashed avocado between the 4 bowls. Garnish with a lime wedge.
Notes
We love the Seeds of Change Brown Rice & Quinoa with Garlic in my house. It’s microwavable, packed with flavor and I can find it at most stores. If you want to use your own cooked brown rice or quinoa plan for 2 cups cooked total, or ½ cup per serving. You might also want to season the rice or quinoa since I have only tried this dish with the seasoned Seeds of Change packets.

Some of the links above are affiliate links, which means I may receive a small commission for my referral. This does not affect the retail cost of the item. Thank you for supporting Lemon & Mocha!

Elote Hot Dogs

Elote Hot Dogs  |  Lemon & Mocha

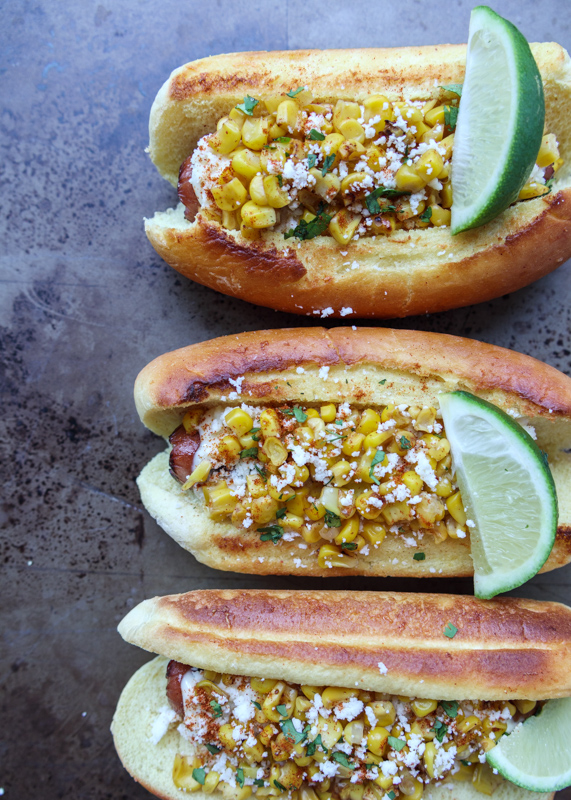
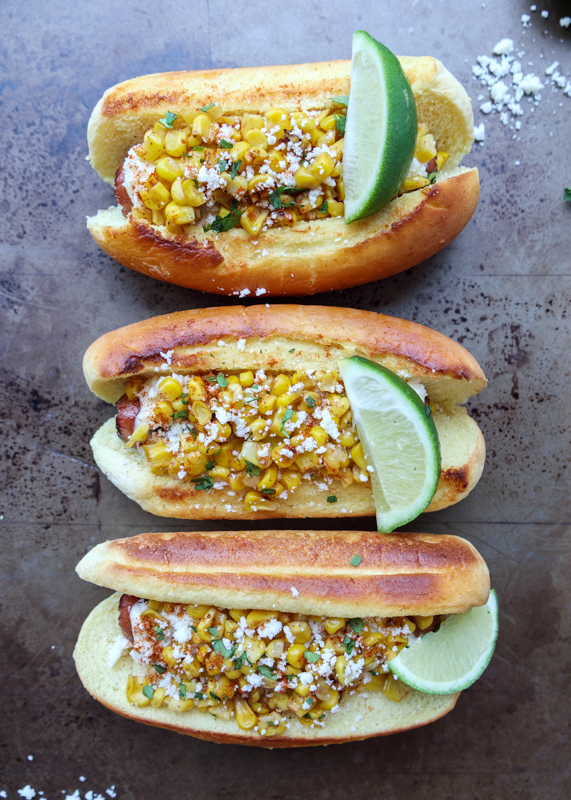
My love for elote knows no bounds. Clearly. Elote is grilled corn on the cob that has been slathered with lime, cotija cheese, chili powder and mayo. It is also known as Mexican street corn and I shared my obsession during my post of the Mexican Street Corn Pasta Salad recipe. Side note: if you haven’t tried that pasta salad yet you are seriously missing out! What we have here are Elote Hot Dogs and they are spectacular. Look at them! They are just waiting for you to take a bite. It’s all the makings of Mexican street corn, but piled on a hot dog.

Elote Hot Dogs  |  Lemon & Mocha

I got the idea for these last fall when Matt and I were in Las Vegas. Prior to our trip I was researching all the outrageous food and I came across a place called Dirt Dog. Their main shop is in Los Angeles, but they have two locations in Vegas. More importantly, they have an elote hot dog on their menu that looked insanely delicious. We were only in Vegas for a few days, but we made sure to seek out that elote dog! It was almost everything I had imagined, except it was too spicy for me; I’m a baby when it comes to spicy food. I decided the concept needed to be recreated at home, but with a manageable spice level so I could enjoy it.

Elote Hot Dogs  |  Lemon & Mocha

These hot dogs will have you doing an extra happy dance. The grilled hotdogs are topped with a spiced lime mayo, then covered in charred corn, tangy cotija cheese, fresh cilantro leaves (or parsley if you don’t like cilantro) and a sprinkling of either smoked paprika or chili powder, whichever your palate would prefer.

Elote Hot Dogs  |  Lemon & Mocha

Hot dogs are delicious as is, but I think loaded hot dogs are seriously underrated. It doesn’t take much extra time to turn the basic grill staple into a serious party pleaser.

Elote Hot Dogs  |  Lemon & Mocha

If you’re looking for more loaded hot dog inspiration, check out my Bruschetta Hot Dogs I posted a few years ago. I have another exciting to creation to share with you next week and my mouth is watering just thinking about it. I hope you all have a great week ahead! One final comment before you go on your way though- if you thought my love for elote had reached its peak, wait until you see Friday’s post! Enjoy, friends!

Elote Hot Dogs  |  Lemon & Mocha

Elote Hot Dogs
 
Yield: 4 hot dogs
Ingredients
for the lime mayo
  • 4 tablespoons mayonnaise
  • 1 teaspoon lime juice
  • ¼ teaspoon smoked paprika
  • ⅛ teaspoon ground cumin
  • Pinch of chili powder
for the hot dogs
  • 4 hot dogs
  • ¾ cup corn
  • 4 hot dog buns
  • 1 tablespoon butter, melted
  • Chili powder or smoked paprika
  • ¼ cup crumbled cotija cheese
  • 1 tablespoon cilantro leaves, chopped
  • Lime wedges, for serving
Directions
for the lime mayo
  1. Stir together the mayonnaise, lime juice, smoked paprika and ground cumin. Add the chili powder to taste.
for the hot dogs
  1. Grill the hot dogs.
  2. While the hot dogs are grilling, char the corn and prepare the buns. Char the corn in a small skillet over medium high-heat, stirring occasionally, until it’s lightly browned. Remove from the heat.
  3. Brush the tops of the buns with the melted butter then lightly sprinkle with either chili powder (spicy) or smoked paprika (not spicy) depending on whether your preference. Toast the buns.
  4. Put a hot dog in each bun. Divide the lime mayo between the hot dogs. Use half the cotija cheese to sprinkle over the mayo, reserve the other half. Divide the corn between the hot dogs then top with the remaining cotija cheese. Garnish with the chopped cilantro, lime wedges and a dusting of chili powder and/or smoked paprika.
Notes
Cotija is a Mexican cheese and usually can be found in the fresh cheese section of your grocery store. If you can’t find cotija, you could substitute queso fresco. If you can’t find either of those, you could try substituting feta.
I used full-fat mayonnaise and all-beef hot dogs.


Sheet Pan Breakfast

Sheet Pan Breakfast  |  Lemon & Mocha

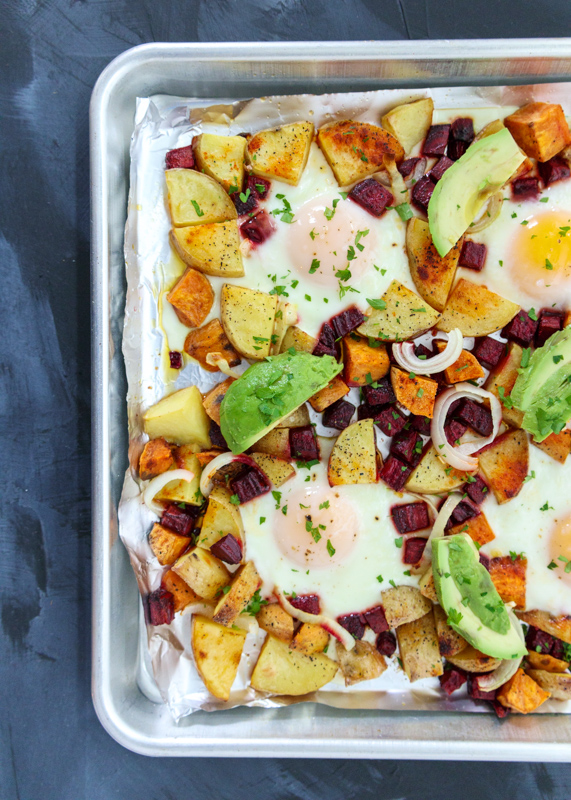
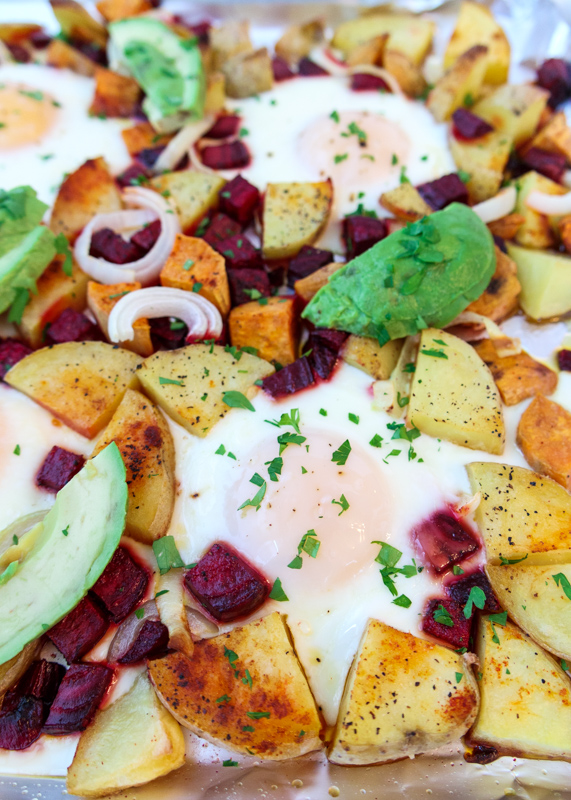
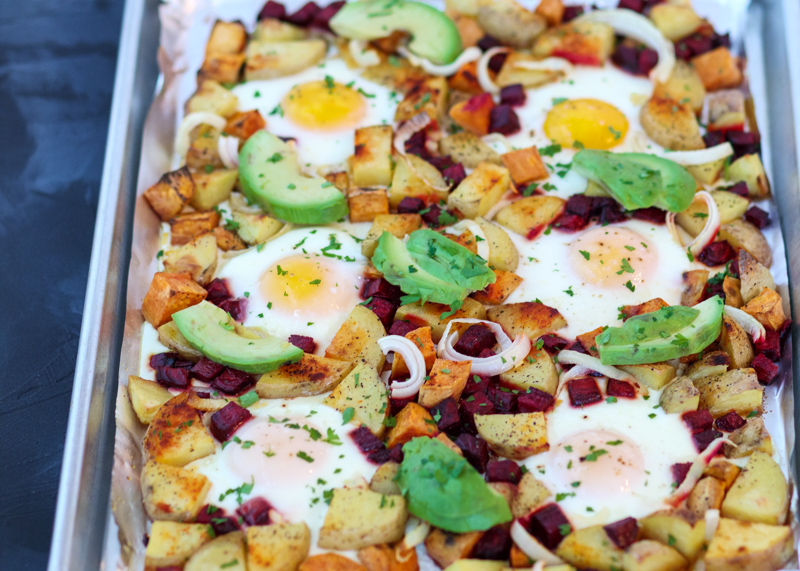
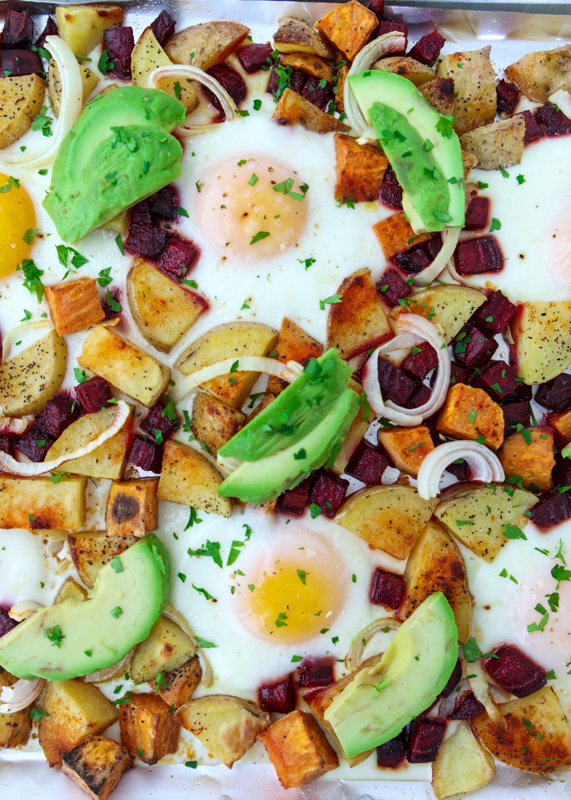
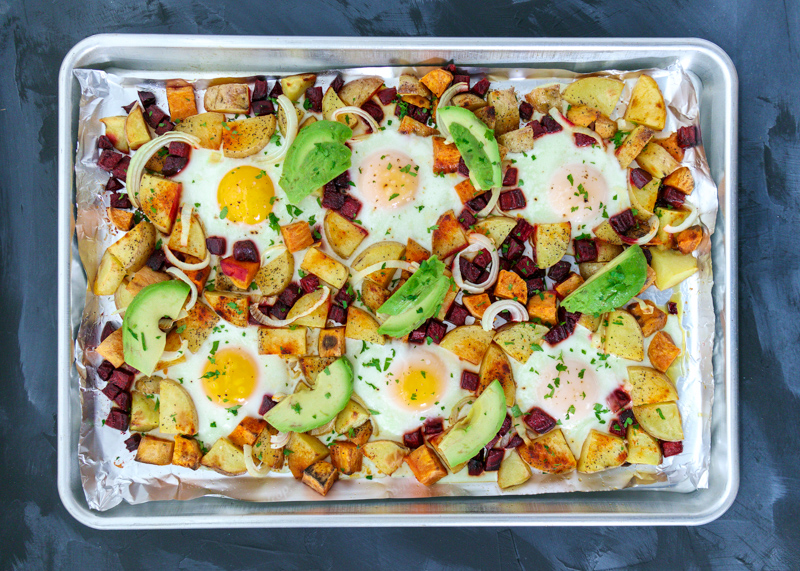
I was on Foodgawker the other month and I came across a recipe concept that blew my mind – a sheet pan breakfast! Basically, you bake the potatoes and eggs in the oven and voila – breakfast! I love breakfast casseroles, but they can get really heavy with all the cheese and dairy. There’s so many different combinations you could come up with for a sheet pan breakfast, but ever since I made those Beet Donuts with a Brown Butter Strawberry Rhubarb Glaze I’ve had beets on my mind. I decided to go with a root vegetable base of roasted Yukon gold potatoes, sweet potatoes and beets. Those get roasted with plenty of seasoning and sliced onion for some additional flavor. When they are almost done, you create little pockets for the eggs, crack them right on the sheet pan then let them bake to their desired done-ness.

Sheet Pan Breakfast  |  Lemon & Mocha

I love runny eggs and I’m slowly getting Matt on the runny egg train as well, but you can cook yours longer if you like the middles firm. I topped it all off with some avocado slices because there’s nothing more satisfying to me in the morning than an avocado smothered in runny yolk – see case in point here. Add in the roasted potatoes and beets and I was in pure breakfast heaven.

Sheet Pan Breakfast  |  Lemon & Mocha

This dish is great for company because you can get everyone eggs without having to stand over the stove, but we saved the other half for ourselves and had it the next day for breakfast. It reheated perfectly in the microwave and the yolks were still runny.

Sheet Pan Breakfast  |  Lemon & Mocha

I think I’ll be making this again really soon, but this time as breakfast for dinner. Have you ever made a sheet pan breakfast? I’m already brainstorming new combinations like potato, cheddar, scallion and bacon or eggplant, mushrooms, tomatoes and prosciutto – yum!

Sheet Pan Breakfast  |  Lemon & Mocha

Sheet Pan Breakfast
 
Yield: 3-4 servings
Ingredients
  • 1 pound yellow thin skin potatoes
  • 2 small sweet potatoes
  • 1 red beet
  • 1-2 tablespoons olive oil
  • ½ teaspoon smoked paprika
  • ¼ teaspoon garlic powder
  • ¼ teaspoon salt
  • ¼ teaspoon ground black pepper
  • 1 small onion
  • 6-8 large eggs
  • 1 avocado, sliced
  • Chopped fresh parsley, for topping
Directions
  1. Preheat the oven to 425 degrees F. Line a half sheet baking pan with nonstick aluminum foil or spray with nonstick cooking spray. Set aside.
  2. Scrub and dry the potatoes and sweet potatoes. Leaving the skins on, cube the potatoes. Peel the beets. Cut the beets into a small dice; they take longer to cook than the potatoes so you want them smaller so they will be done at the same time. Toss the cut potatoes and beets with the olive oil, smoked paprika, garlic powder, salt and pepper then place evenly on the prepared baking sheet.
  3. Bake the potatoes and beets for 20 minutes. While the potatoes are baking, halve and slice the onion. After the potatoes and beets have cooked for 20 minutes, toss them then place the onion slices on top then put back in the oven for 15-20 minutes.
  4. Remove the pan from the oven and make room for the eggs. I made a little pocket for each egg. If you are using nonstick cooking spray you might want to spray a little into each pocket before putting in the egg. Carefully crack an egg into each pocket then season the eggs with a little salt and pepper. Bake for 3 minutes, or until the eggs are your desired done-ness. Top with the avocado slices and chopped parsley, serve.

Recipe adapted from The Flavor Bender.

Blueberry Nectarine Muffins

Blueberry Nectarine Muffins  |  Lemon & Mocha

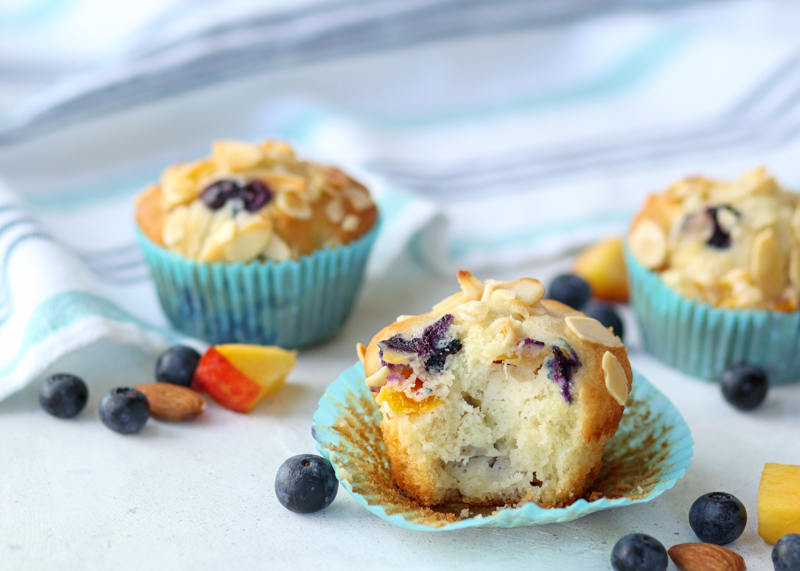
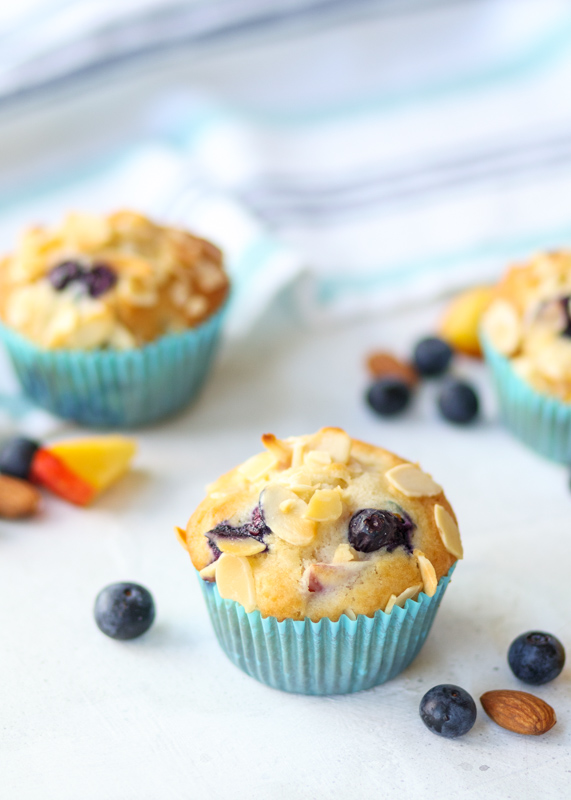
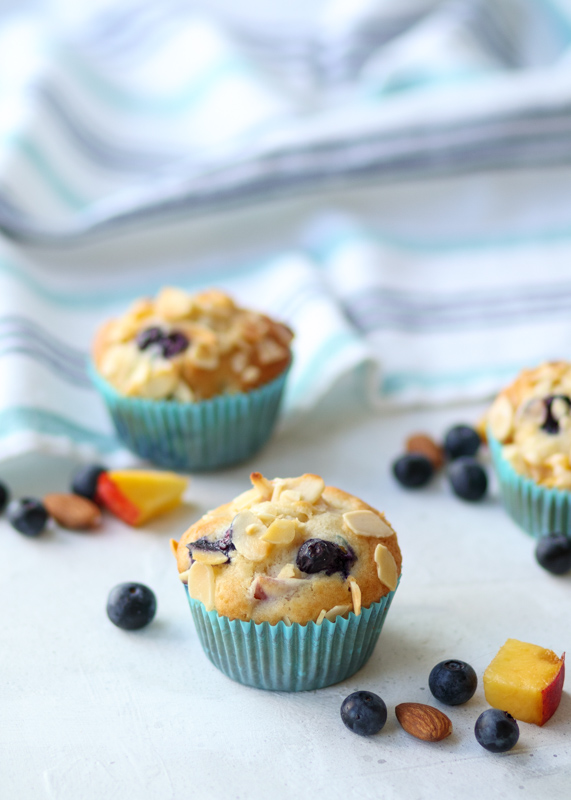
I hope you all had a great 4th of July! I’m not going to waste any time here because your July is about to be off to an amazing start. That is because I am sharing this muffin recipe with you. Now I know I’ve been sharing the Food Network Magazine’s Muffin of the Month recipes in order with you, but I have to skip ahead to the August muffins. Don’t worry, I will share the July ones next month. The August muffins for the Food Network Magazine’s Muffin of the Month are these Blueberry Nectarine Muffins and, damn, they are glorious!

Blueberry Nectarine Muffins  |  Lemon & Mocha

I thought it would be impossible to top the June S’mores Muffins because they were the perfect rendition of s’mores in muffin form complete with gooey chocolate and oozing crispy marshmallow. Now, these didn’t necessarily top the S’mores Muffins because, well, chocolate, but they definitely met the raised muffin standard.

Blueberry Nectarine Muffins  |  Lemon & Mocha

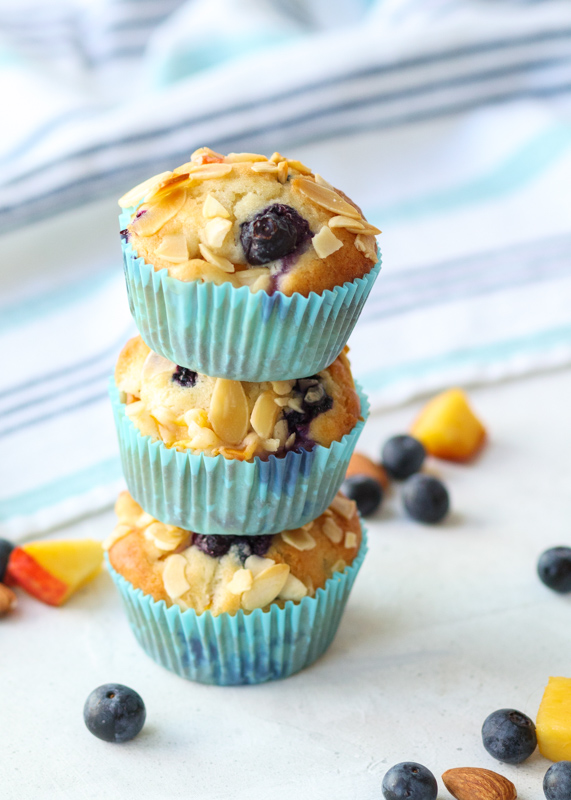
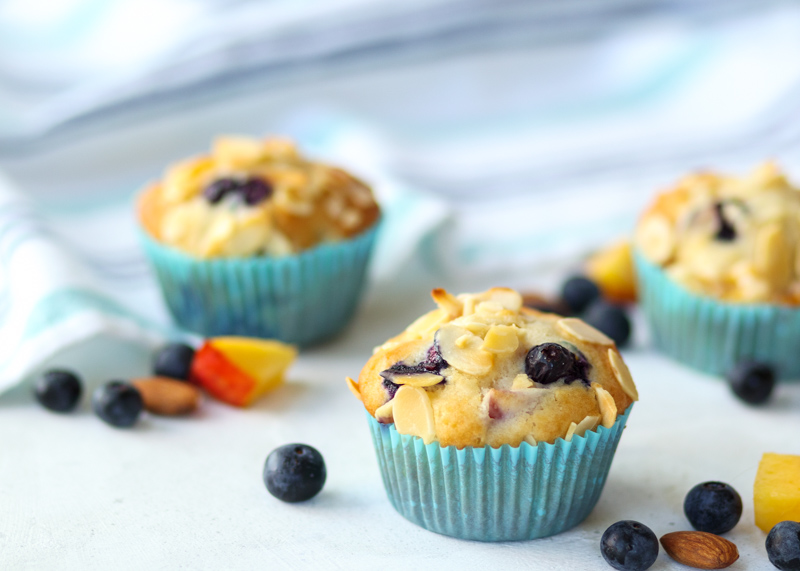
These were the first muffins I’ve made so far from the Food Network Magazine article that came out looking picture perfect in my opinion. But I’m all about taste over here and these muffins had everyone doing a little happy dance. Quickly followed by grabbing a second one. As I mentioned last week, I had some family visiting and the Blueberry Nectarine Muffins were a big hit. So much so that there were dibs being called on the muffins when they started dwindling!

Blueberry Nectarine Muffins  |  Lemon & Mocha

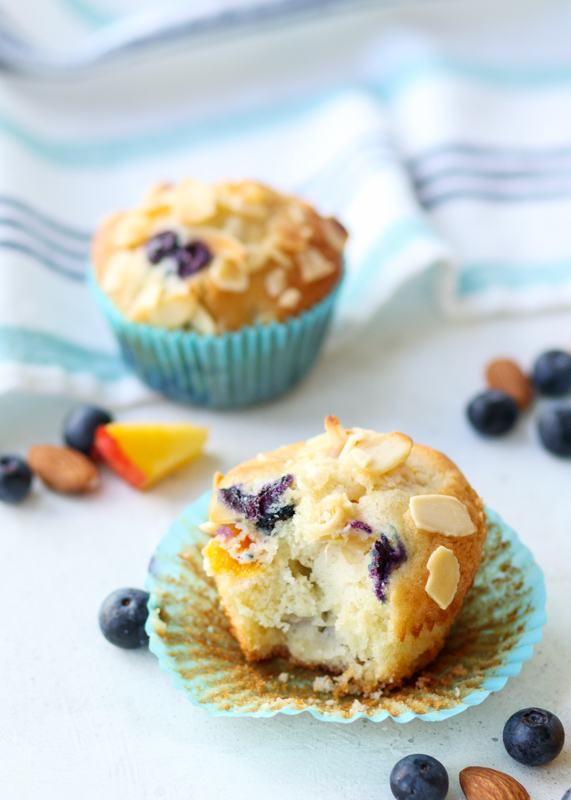
I was happy we had visitors otherwise I would have definitely consumed about 2/3 of these! The muffins have just the right amount of sweetness balanced with the almond taste. The juicy blueberries and crunchy almonds on top really added to the muffin, but the breakout star was the nectarine. Nectarines are in season right now and the chunks in the muffin made it so moist and really took them into the over-the-top-delicious category.

Blueberry Nectarine Muffins  |  Lemon & Mocha

Matt and my goddaughter aren’t big on blueberries and they both requested a nectarine-only muffin next time since it was so good. I love blueberries so I’m partial to the combination of the two, but I would definitely be down for an all nectarine muffin as well. If you want your July to get even better then plan to make these as soon as possible! Especially so you have time to make them again and again while nectarines are still in peak season, which is why I went ahead and shared them early. Enjoy!

Blueberry Nectarine Muffins  |  Lemon & Mocha

Blueberry Nectarine Muffins
 
Yield: 12 muffins
Ingredients
  • 2 cups all-purpose flour
  • ½ teaspoon baking powder
  • ½ teaspoon baking soda
  • ½ teaspoon salt
  • ⅔ cup granulated sugar
  • ½ cup vegetable oil
  • ½ cup plain Greek yogurt
  • 2 large eggs
  • ¼ teaspoon almond extract
  • 2 small nectarines, pitted and chopped (about 1¾ cups)
  • ½ cup blueberries
  • ¼ cup sliced almonds
  • Coarse sugar, for topping (I just used a light sprinkle of regular sugar)
Directions
  1. Preheat the oven to 400 degrees F then line a 12-cup muffin pan with paper liners and set aside.
  2. In a large bowl, sift together the flour, baking powder, baking soda and salt.
  3. In a medium bowl, whisk together the sugar, vegetable oil, yogurt, eggs and almond extract. Pour into the flour mixture then stir until just combined. Add nectarines and blueberries and stir to incorporate.
  4. Fill the muffin cups with the batter. They should be about ¾ of the way full. Top the muffins with the sliced almonds and a light sprinkle of coarse sugar (or regular sugar if you don’t have any). Bake for about 20 minutes, or until the tops are golden and spring back when lightly pressed. Let cool in the pan for 5 minutes then carefully remove to a wire cooling rack to cool completely.
Notes
I used plain nonfat Greek yogurt. You could substitute sour cream or regular plain yogurt if you would prefer.

To get the blueberries to peek through at the top: Let the muffins cook for 1-2 minutes, then carefully (and quickly) remove the pan from the oven, gently top each muffin with 1-2 extra blueberries and return to the oven for the remainder of the cooking time.

 Recipe slightly adapted from January/February 2018 issue of Food Network Magazine.

Some of the links above are affiliate links, which means I may receive a small commission for my referral. This does not affect the retail cost of the item. Thank you for supporting Lemon & Mocha!

Caprese Grilled Chicken

Caprese Grilled Chicken  |  Lemon & Mocha

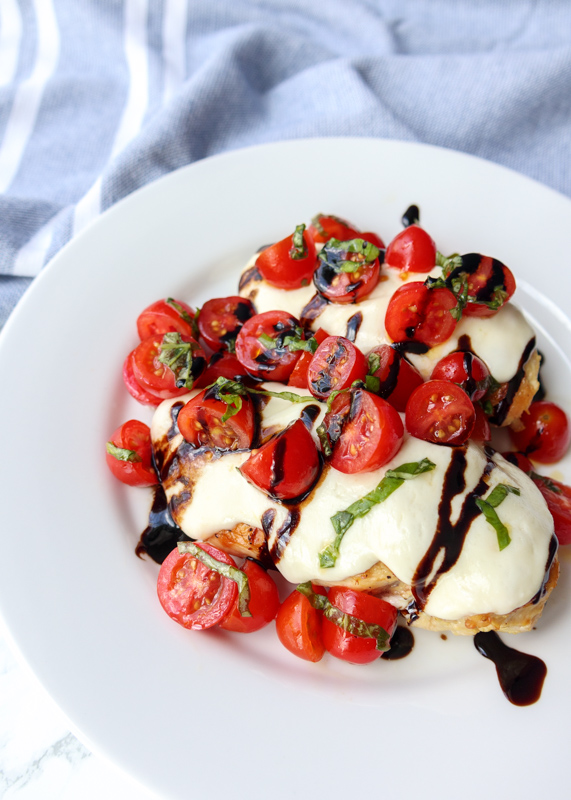
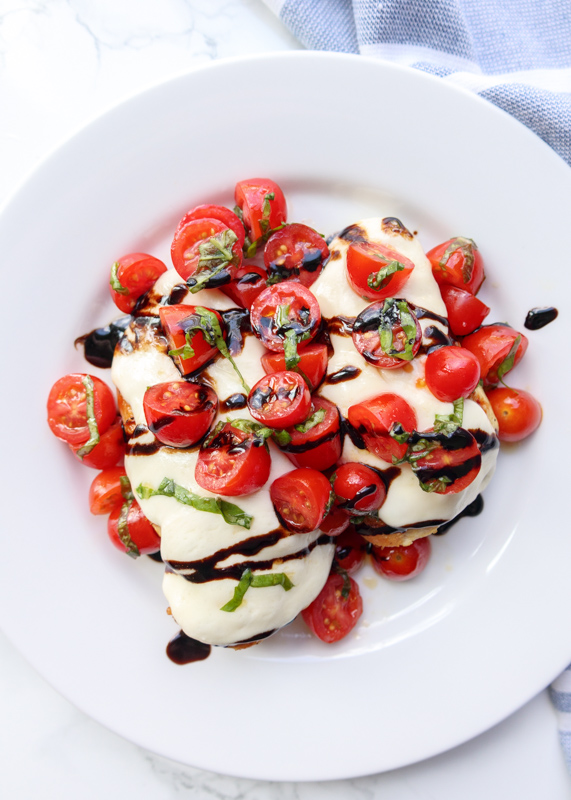
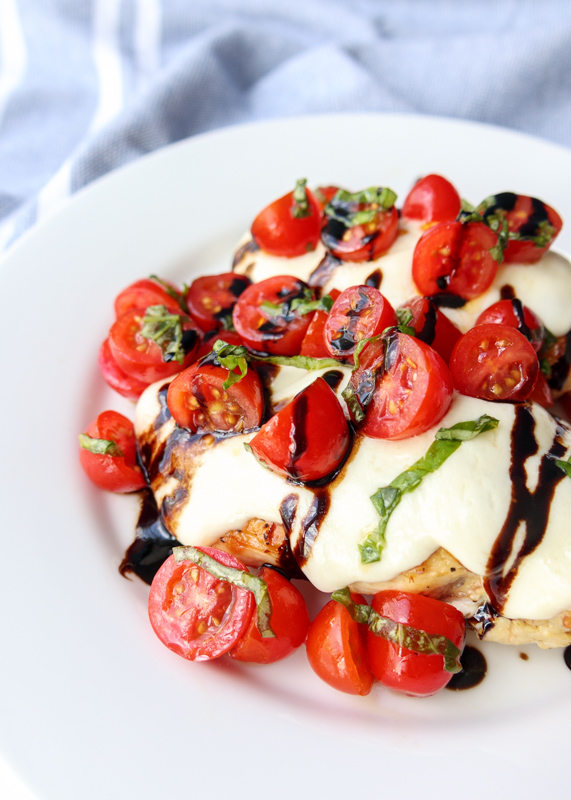
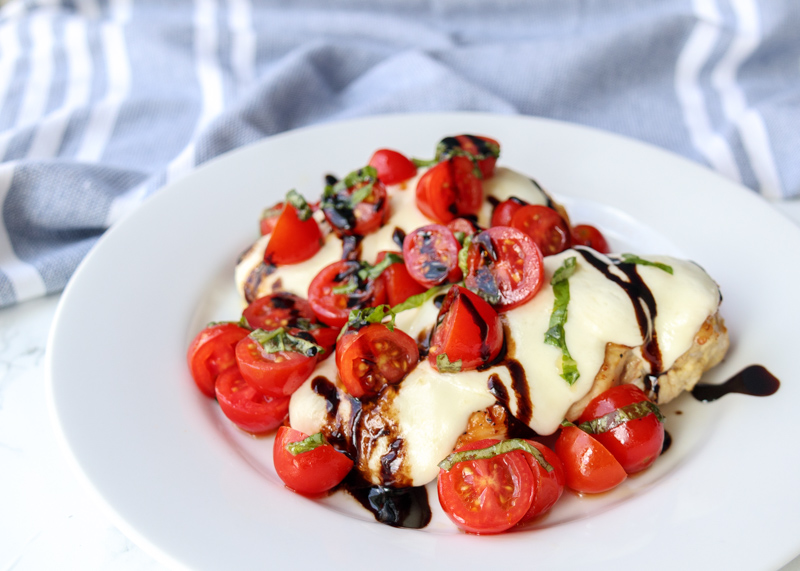
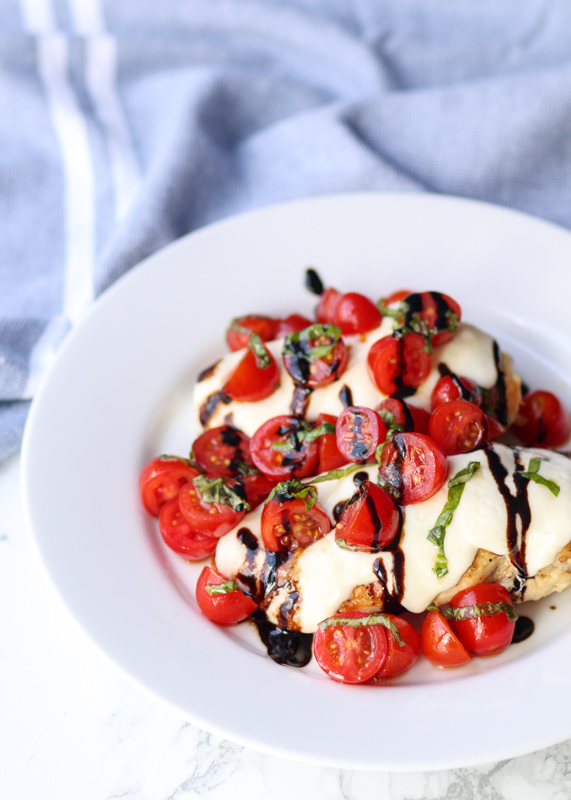
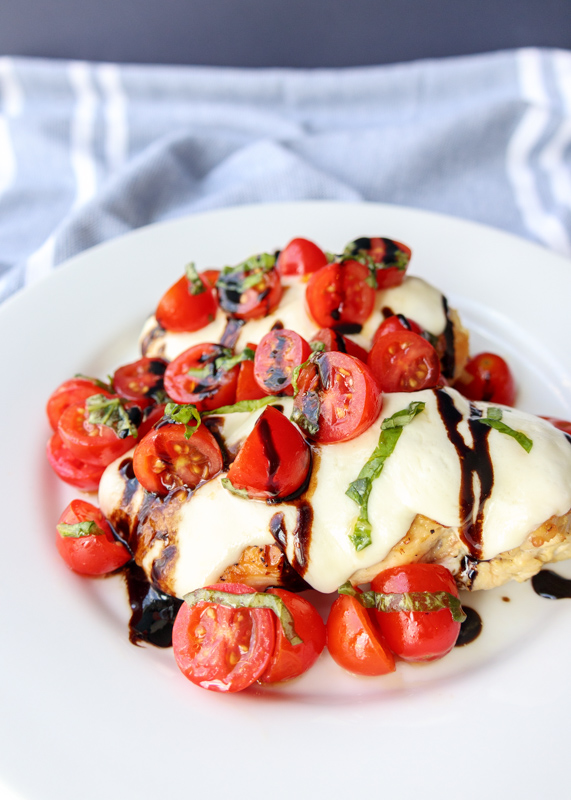
Summer makes me want all things caprese. The other week I shared one of my favorite caprese recipes that I’ve been making for a few years, Watermelon Caprese Salad. This Caprese Grilled Chicken is a new favorite and it’s so simple I’m shocked I hadn’t made it until this summer. Say hello to tender grilled chicken topped with melty mozzarella, juicy grape tomatoes, fresh basil and a sweet balsamic glaze.

Caprese Grilled Chicken  |  Lemon & Mocha

This dish is so easy making it all the more ideal for a perfect summer meal. Fresh mozzarella is amazing cold, but get it a little ooey and gooey and you’ll want to dive right in. Literally. But please use a fork and save yourself some embarrassment.

Caprese Grilled Chicken  |  Lemon & Mocha

Caprese Grilled Chicken would be delicious over some pasta or a big salad. Or you can be like Matt and I and eat it alongside some grilled asparagus. And yes, asparagus does seem to be our meal solution to everything, but I’m okay with that.

Caprese Grilled Chicken  |  Lemon & Mocha

In addition to weeknight dinners I was also thinking this chicken would be perfect for serving at 4th of July or other summer barbecues as a fresh change from hamburgers and hot dogs. I can’t believe 4th of July is already this Wednesday! It feels like summer just started. Do you have any fun plans for the holiday?

Caprese Grilled Chicken  |  Lemon & Mocha

The middle of the week timing isn’t great, but we plan to sneak in some family and friends time, along with some red, white and blue food of course! If you’re looking for recipe inspiration there is a 4th of July drop-down in my recipe index. Have a great week everyone and I’ll be having my next post go out on Thursday. Trust me, you will not want to miss this one! Happy 4th of July!

Caprese Grilled Chicken  |  Lemon & Mocha

Caprese Grilled Chicken
 
Yield: 4 servings
Ingredients
  • 1 pound boneless skinless chicken breasts
  • 2 tablespoons olive oil, divided
  • 4 ounces fresh mozzarella, sliced
  • 1 cup halved grape tomatoes
  • 1 tablespoon chopped fresh basil
  • 1 teaspoon balsamic glaze
  • Salt and pepper
Directions
  1. Either place the chicken in a plastic bag or place some plastic wrap over the chicken sitting on a cutting board and carefully pound the chicken so they have a more even surface. You don’t want to pound them thin, you are just trying to even them out so they cook more evenly.
  2. Lightly drizzle 1 tablespoon of the olive oil over the chicken breasts. Toss or use a basting brush to coat. Season on both sides with salt and pepper. Heat a grill or grill pan to medium-high heat. Grill the chicken for about 4-5 minutes per side, until they reach an internal temperature of 165 degrees F. When the chicken is almost done, carefully place the sliced mozzarella on the top of the chicken. Remove the chicken from the heat when the chicken is cooked through and the mozzarella is melted. Let rest before cutting into the breasts. I typically grill the chicken to 160 degrees F and allow for some carryover cooking, which is where your chicken or meat continues to cook once it’s been removed from the grill. I temp it after a few minutes and make sure it has risen to 165 degrees. This is one way to make sure you don’t overcook your chicken.
  3. In a small bowl, toss the halved grape tomatoes and fresh basil with the remaining tablespoon of olive oil. Season with coarse salt. Place on top of the chicken and finish with a drizzle of the balsamic vinegar.
Notes
You can find balsamic glaze in the grocery store. If you want to make your own: combine ½ cup good quality balsamic vinegar with 2 tablespoons brown sugar in a small saucepan over medium heat. Stir until the sugar has dissolved. Bring to a boil then reduce heat to low and simmer until the mixture is reduced by half, about 10 minutes. The glaze should be thick and syrupy. Let cool before serving. Store in the fridge in an airtight container for up to 2 weeks.