Recipes

Asian Beef Lettuce Wraps
Asian Beef Lettuce Wraps  |  Lemon & Mocha

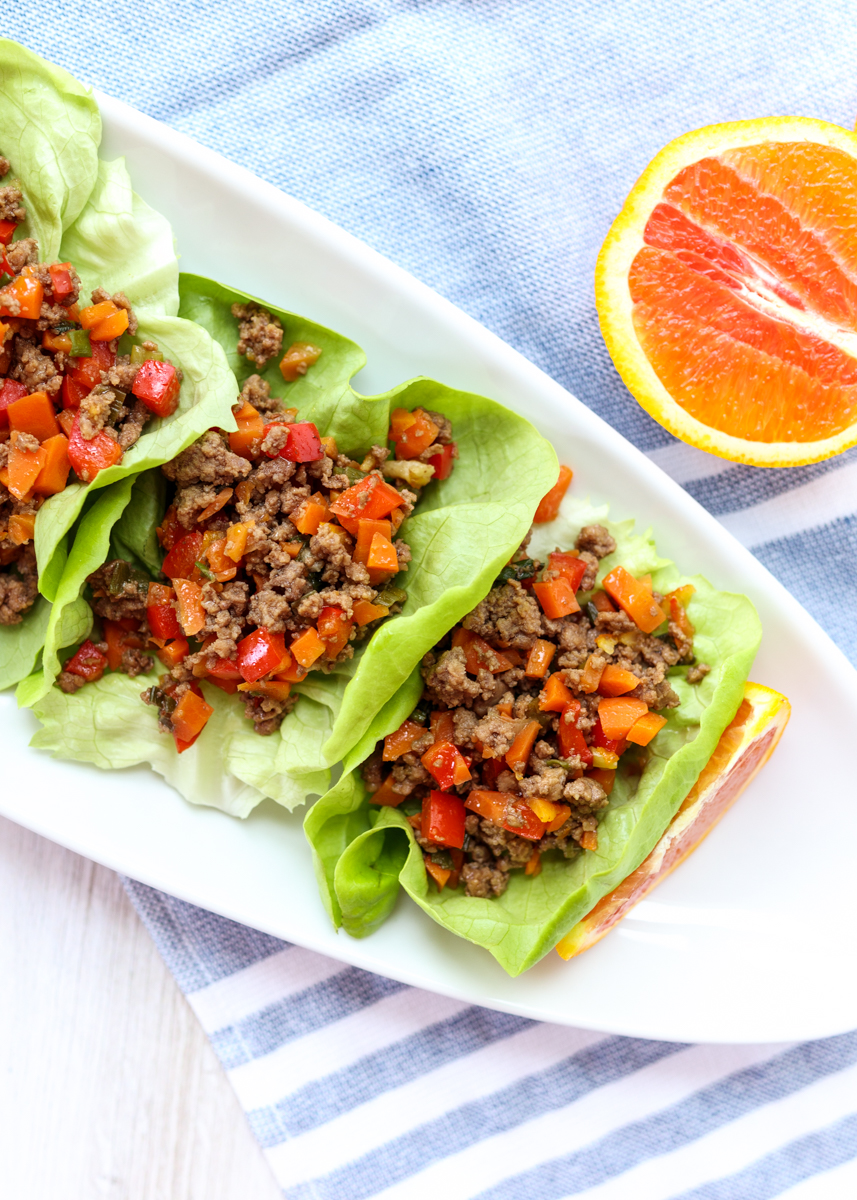
I never thought I would be obsessed with a lettuce wrap until I tasted these Asian Beef Lettuce Wraps from the Flat Belly Diet Cookbook. When I got this cookbook a few years ago I asked Matt to pick out a couple recipes he would be interested in and of course he went right to the beef section. Lean ground beef is sautéed with finely chopped carrots, red bell pepper and scallions then coated in a sweet and savory sauce.
Asian Beef Lettuce Wraps  |  Lemon & Mocha

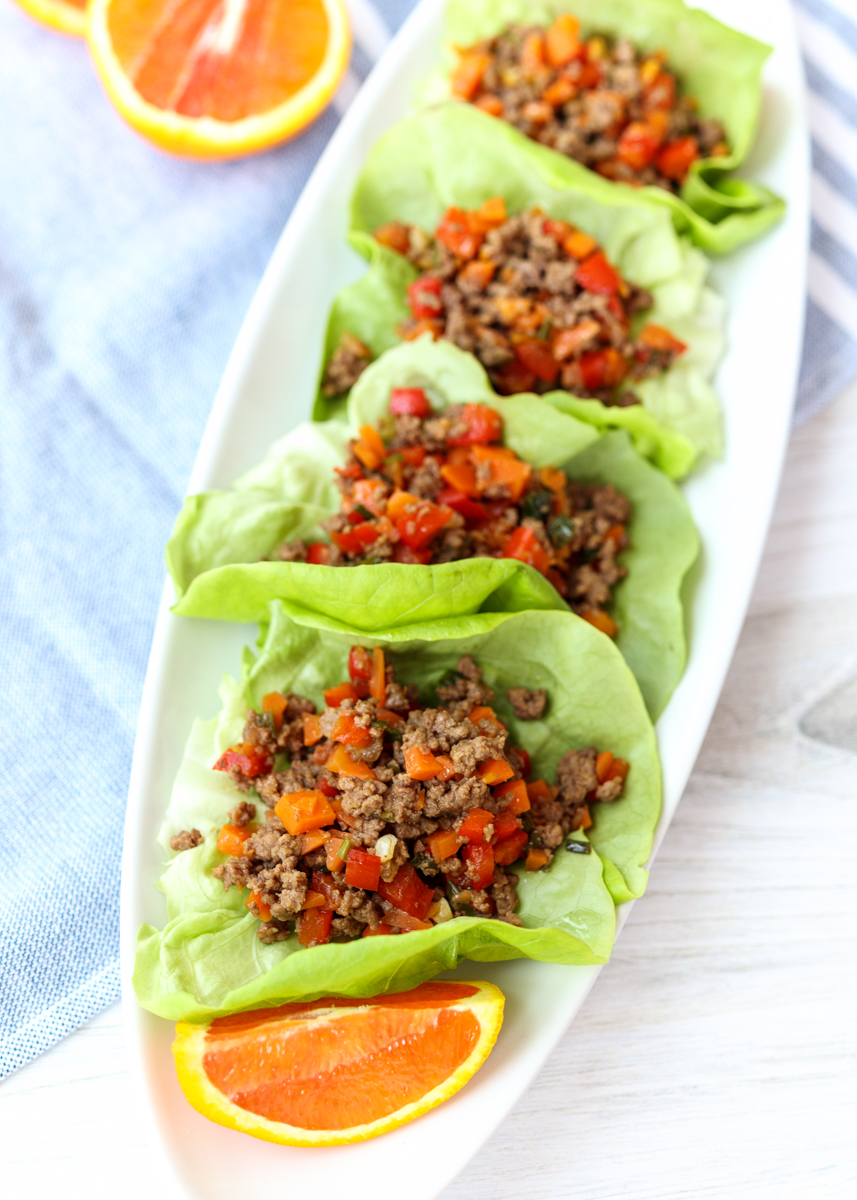
The sauce has only five ingredients, but I was shocked at how flavorful it was and it immediately became a go-to recipe. The sauce is able to add so much punch because there’s a few secret ingredients. Soy sauce, ginger and garlic are all standard fare for Asian lettuce wraps, but then we have hoisin and orange marmalade. I’ve discussed my love for the salty and sweet qualities of hoisin before in the Crispy Sesame Pecan Chicken Tenders with a Hoisin Dipping Sauce and the Hoisin Beef Kebobs posts. The orange marmalade adds the perfect amounts of citrus and sweet notes to the dish that gives it that gotta-have-seconds vibe.
Asian Beef Lettuce Wraps  |  Lemon & Mocha

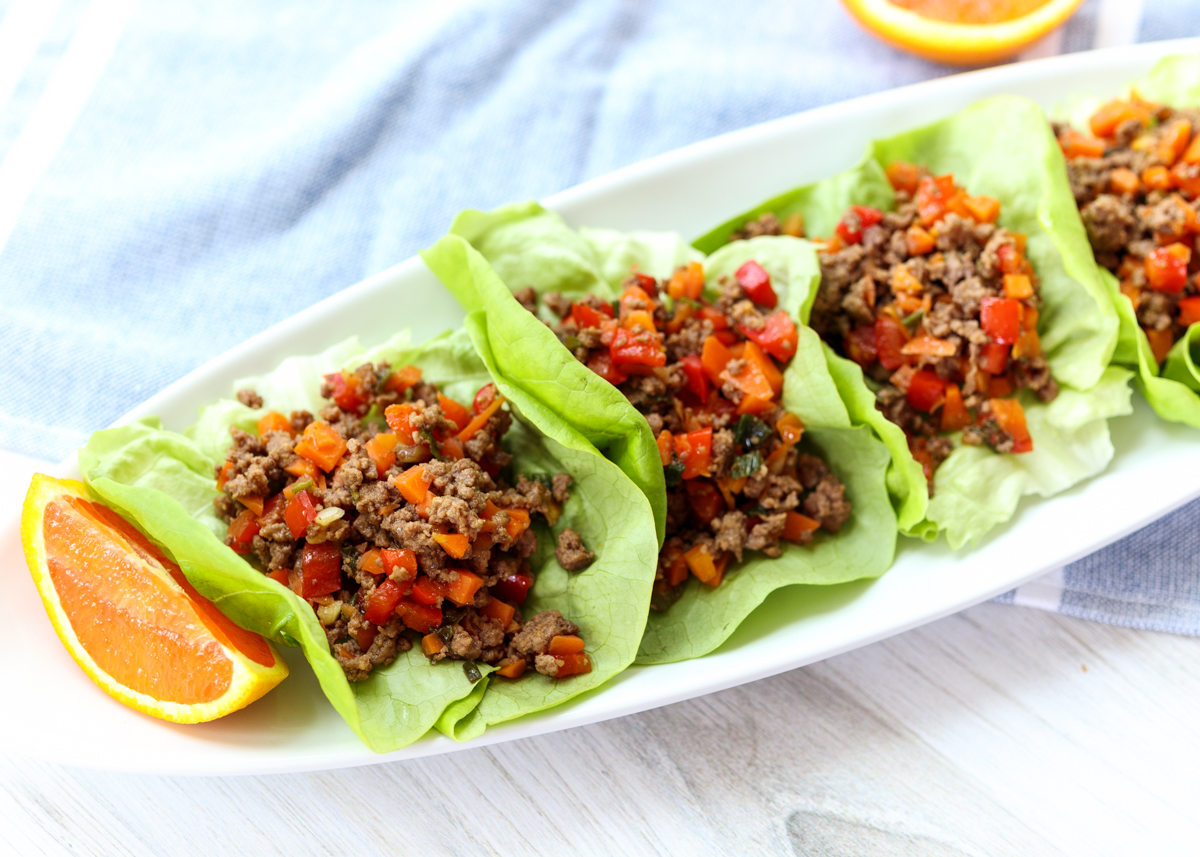
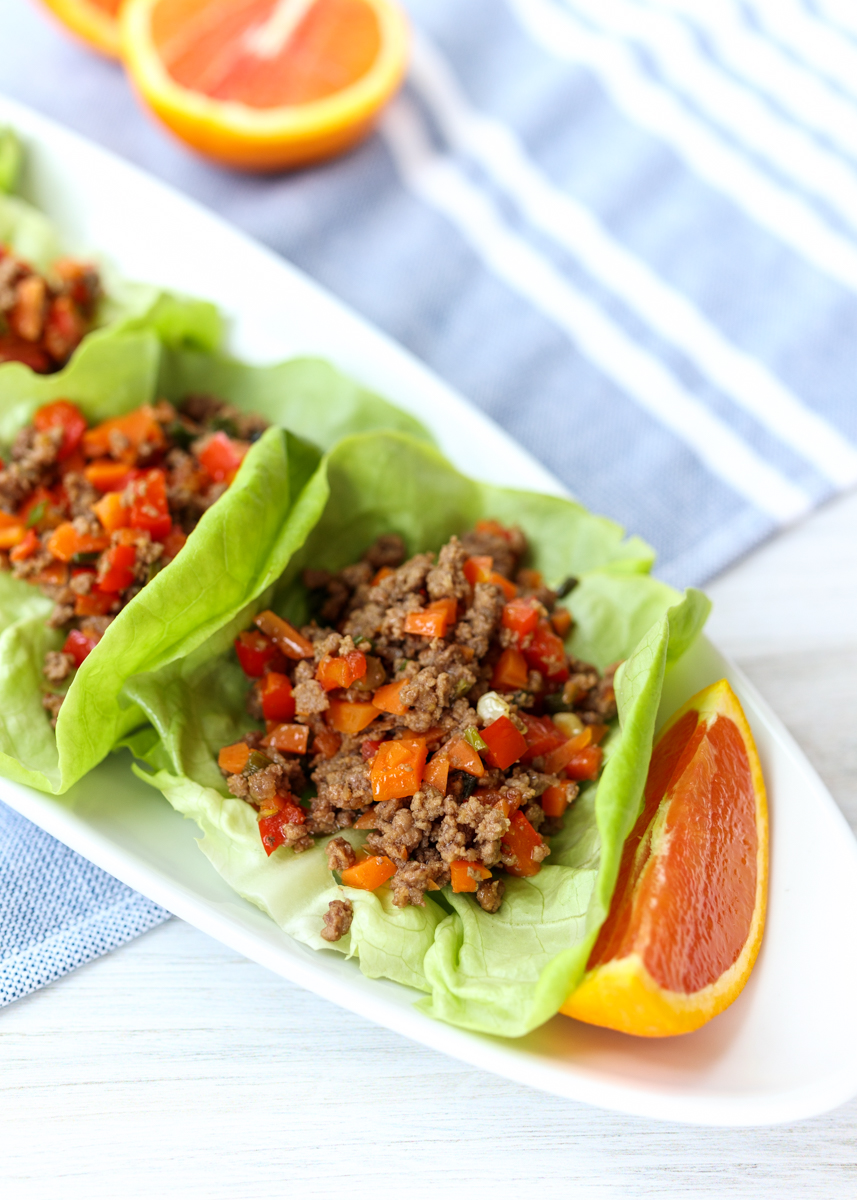
I love the freshness the crispy lettuce wraps add. I usually use Boston or Bibb lettuce and I like to scoop the filling onto the lettuce right before I eat it otherwise I find the lettuce can get soggy. Although there is a bit of chopping, the actual cooking of the lettuce wraps on the stove takes ten to twelve minutes making it a great weeknight meal to have in your back pocket.
Asian Beef Lettuce Wraps  |  Lemon & Mocha

I’ve never tried these lettuce wraps with ground turkey instead of beef, but I’m sure they would still taste good. They just wouldn’t have the rich sumptuous quality you get from eating beef.
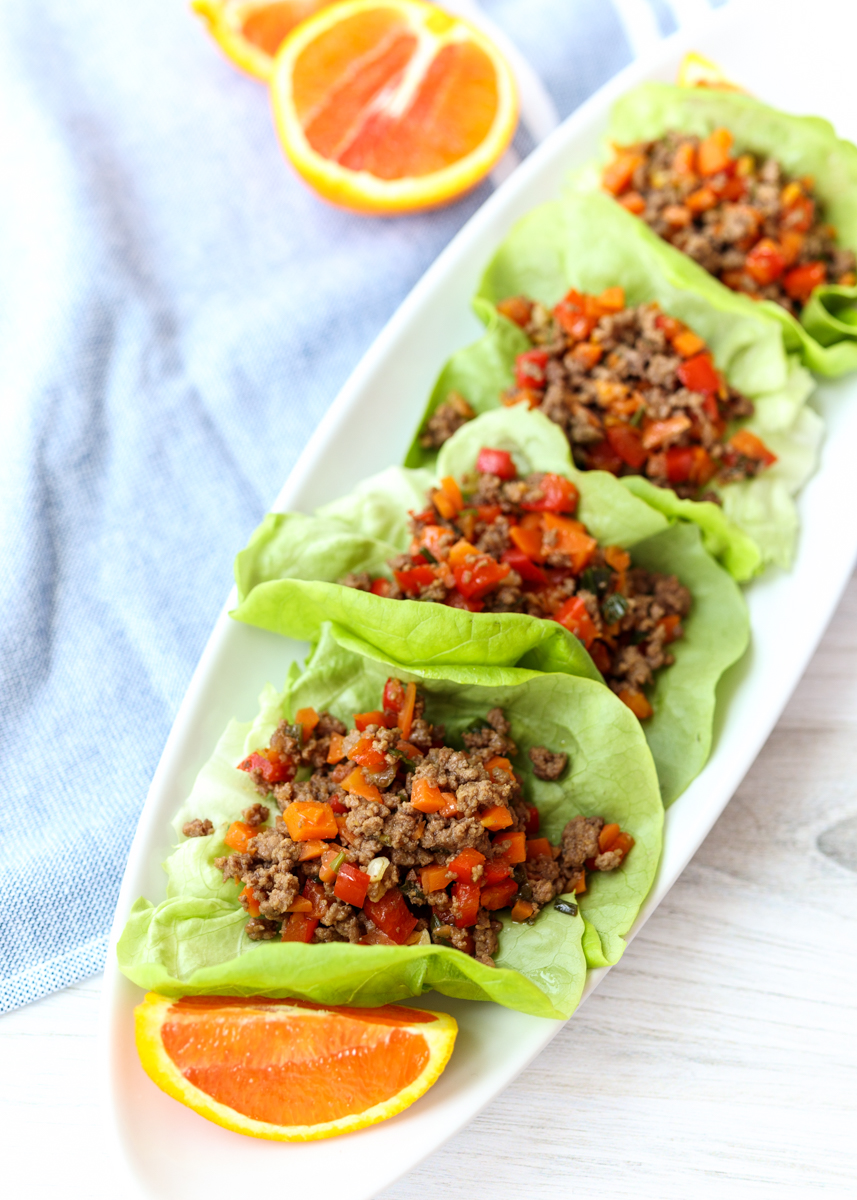
Asian Beef Lettuce Wraps  |  Lemon & Mocha

On a slightly unrelated note, have any of you tried the Impossible Burger? There’s a few restaurants around us that have it, but we haven’t tried it out yet. For those of you that haven’t heard of it, it’s a plant-based burger that supposedly tastes like real meat. I’m intrigued by the potential positive environmental implications, but the ingredient list gives me some pause. Hmm… anyways, have a great Wednesday and I hope you love these Asian Beef Lettuce Wraps!
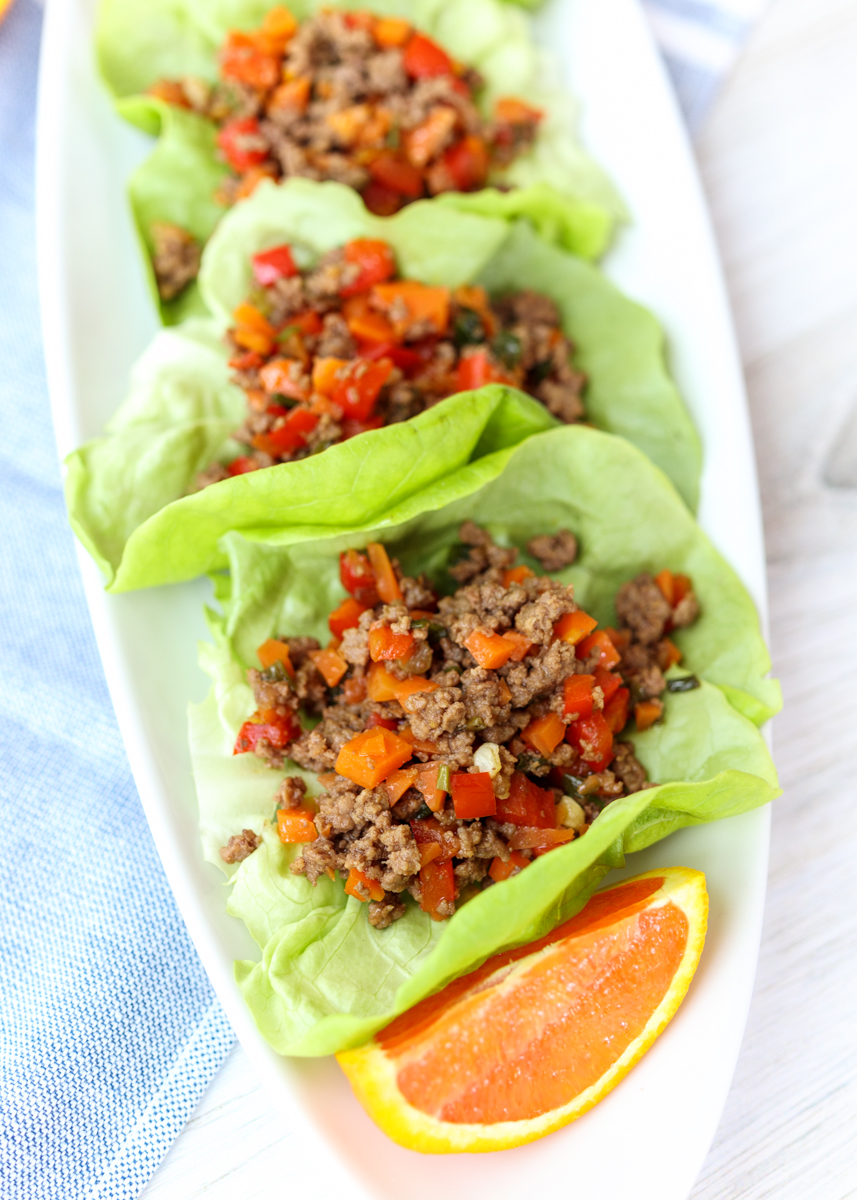
Asian Beef Lettuce Wraps  |  Lemon & Mocha

Asian Beef Lettuce Wraps
 
Yield: 4 servings
Ingredients
  • 3 tablespoons orange marmalade
  • 2 tablespoons low sodium soy sauce
  • 1 tablespoon hoisin
  • 1 tablespoon fresh grated ginger
  • 1 garlic clove, minced
  • 3 tablespoons vegetable oil
  • 1 pound 93% lean ground beef
  • 8 scallions, trimmed and sliced
  • 2 carrots, peeled and finely chopped
  • 1 red pepper, finely chopped
  • 12 Boston or Bibb lettuce leaves
Directions
  1. In a small bowl, whisk together the marmalade, soy sauce, hoisin, ginger and garlic until combined. Set aside.
  2. Heat the oil in a large sauté pan over medium-high heat. Add the beef, scallions, carrots and red pepper; cook for 5-7 minutes or until the meat is mostly cooked. Add the sauce and cook for 5 minutes, until well blended. Remove from the heat and serve with the lettuce leaves.
Notes
The cookbook suggests serving with a side of watermelon. I usually just serve them alongside some additional veggies.

Recipe from Flat Belly Diet! Cookbook: 200 New MUFA Recipes.
Some of the links above are affiliate links, which means I may receive a small commission for my referral. This does not affect the retail cost of the item. Thank you for supporting Lemon & Mocha!

Summer Veggie Couscous

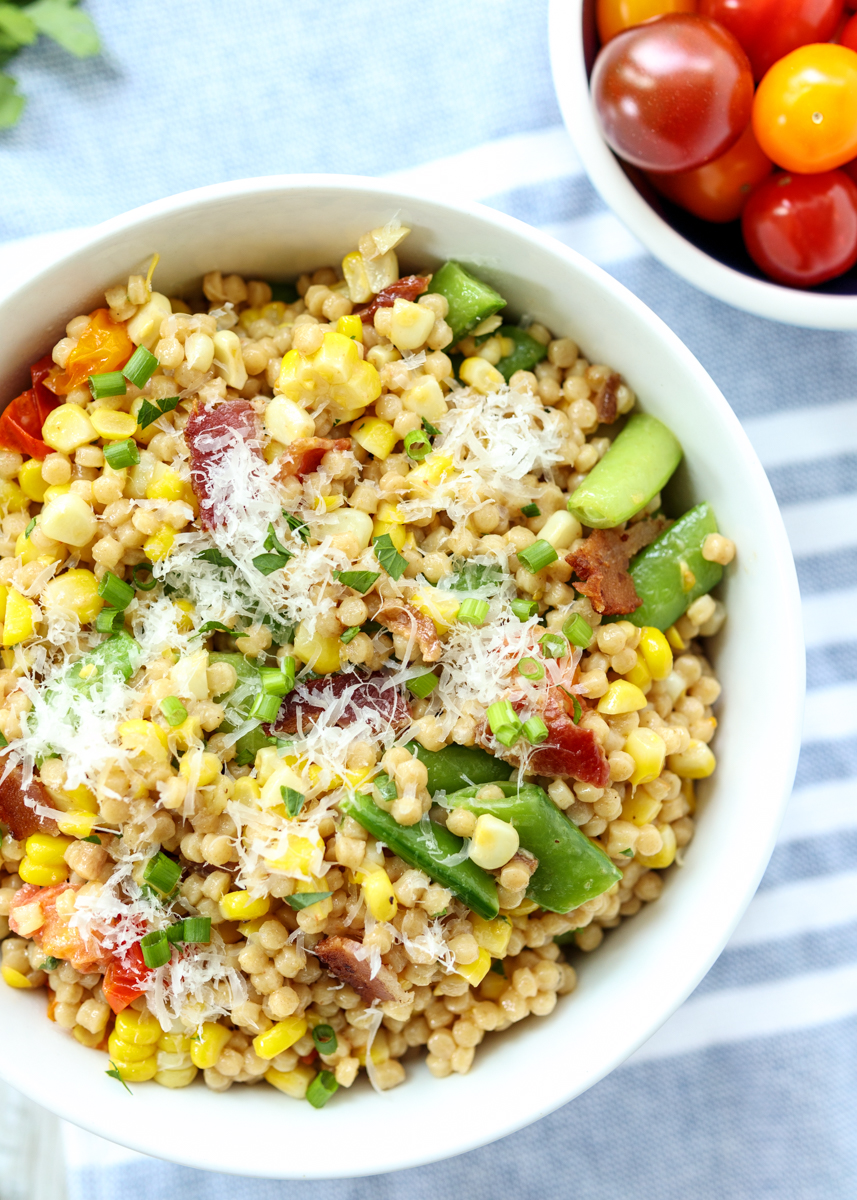
201905231lemonandmocha-2

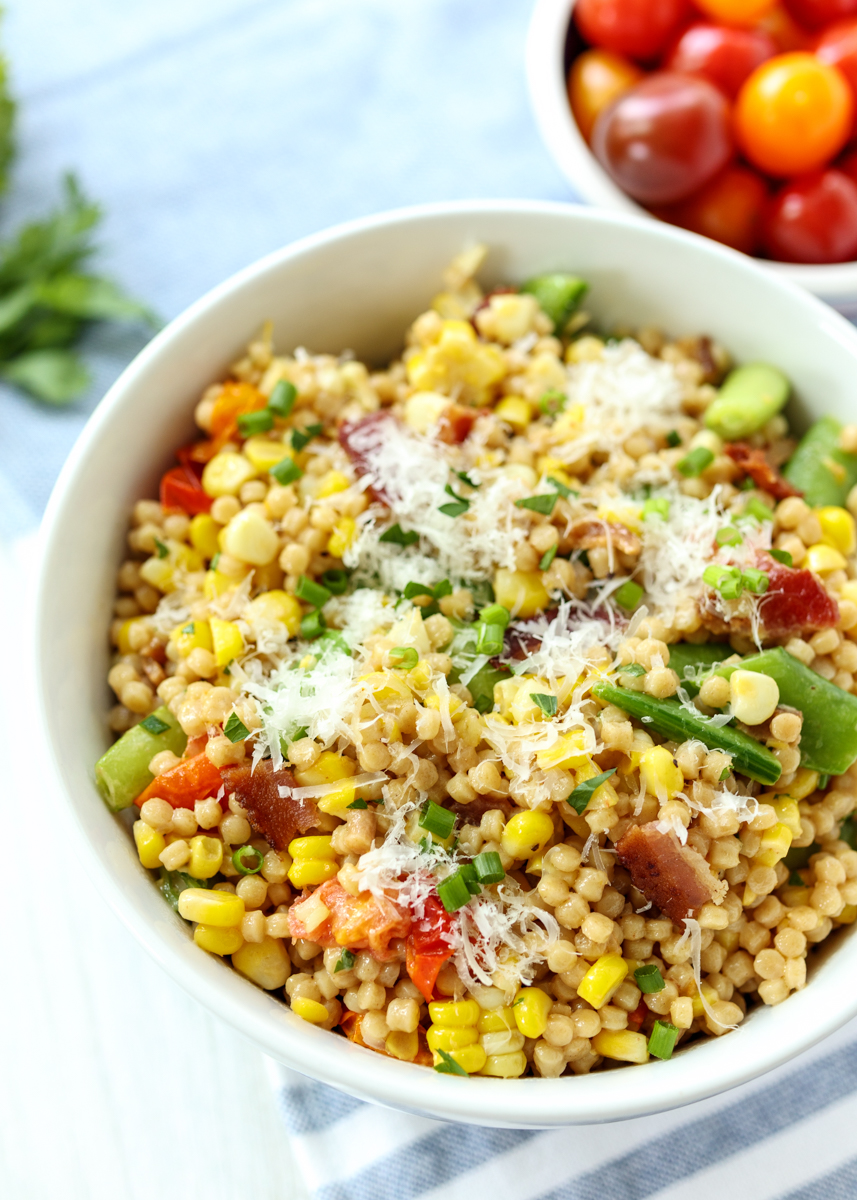
I am so excited to share this Summer Veggie Couscous with you all because, as usual, I first made it forever ago and I’m finally getting around to posting the recipe. Last June when we had family visiting I wanted to make a crowd-pleasing side dish that would scream summer for dinner the first night.

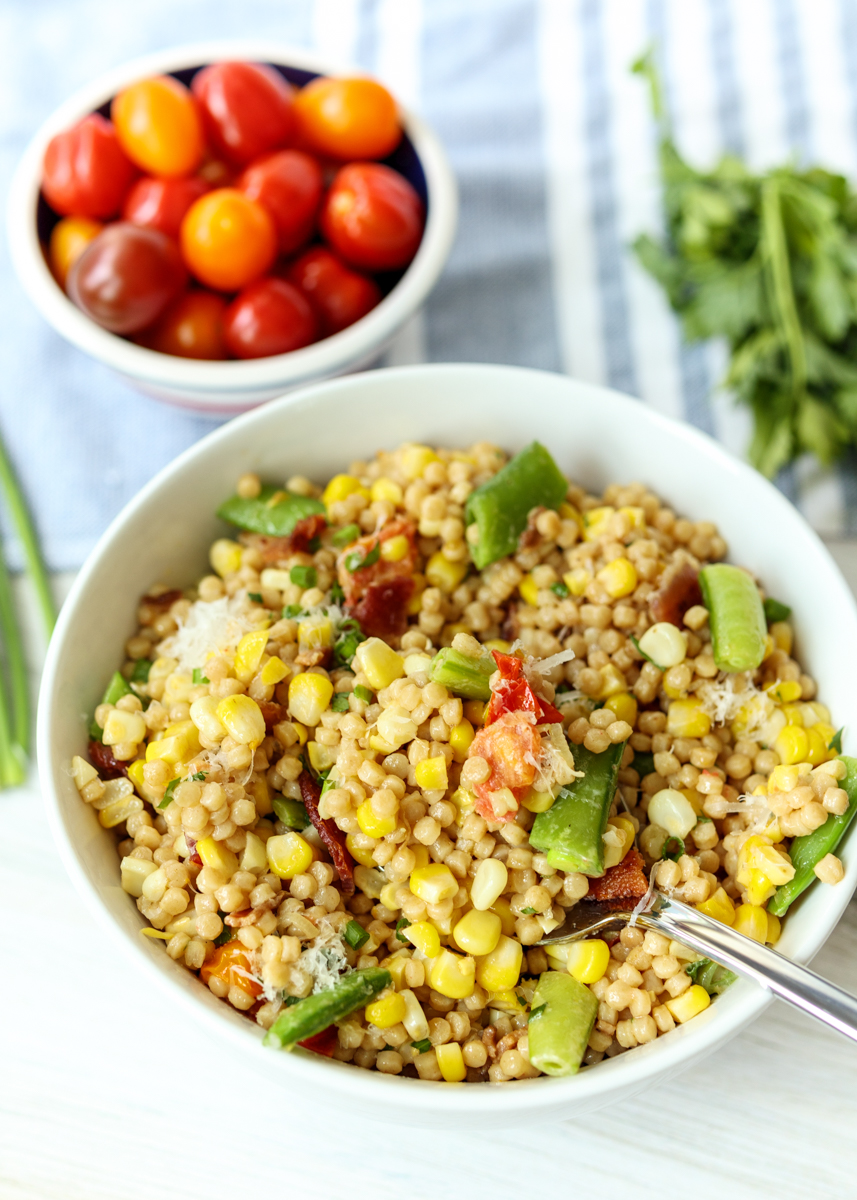
201905235lemonandmocha-2

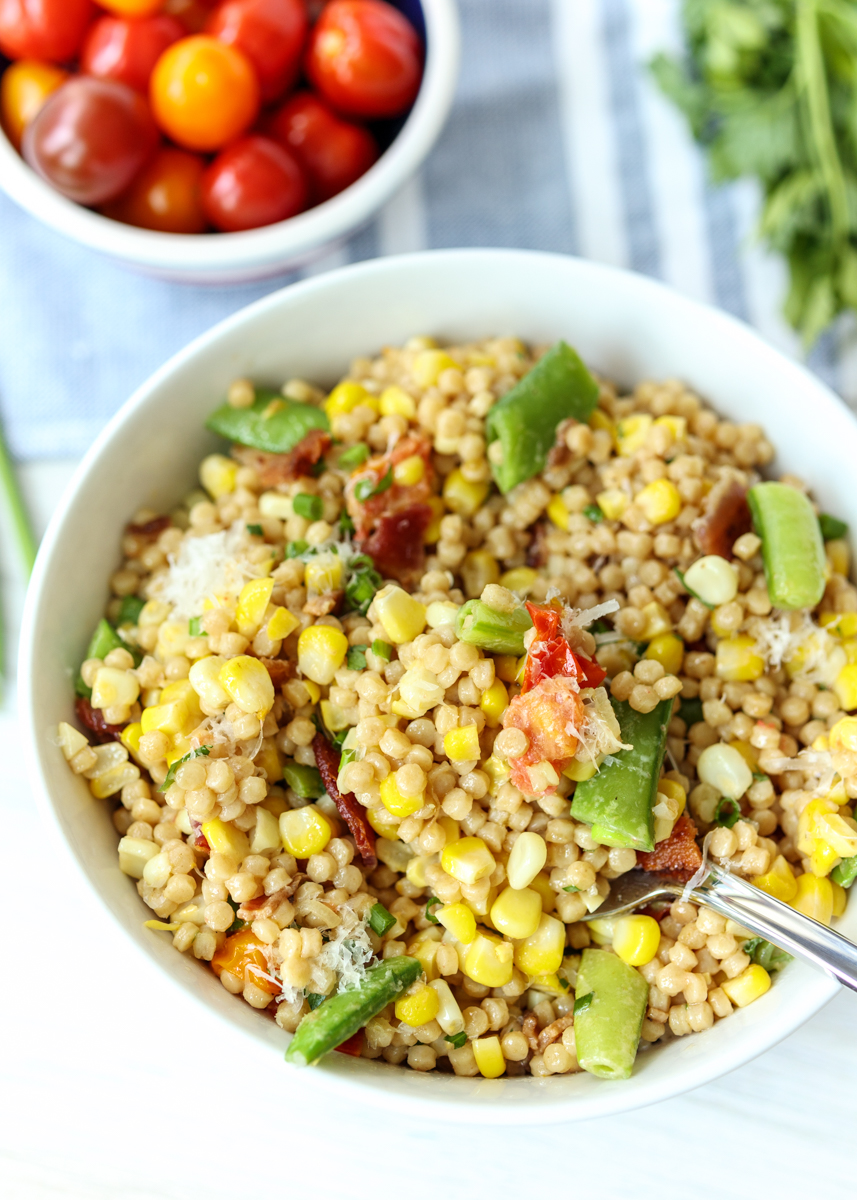
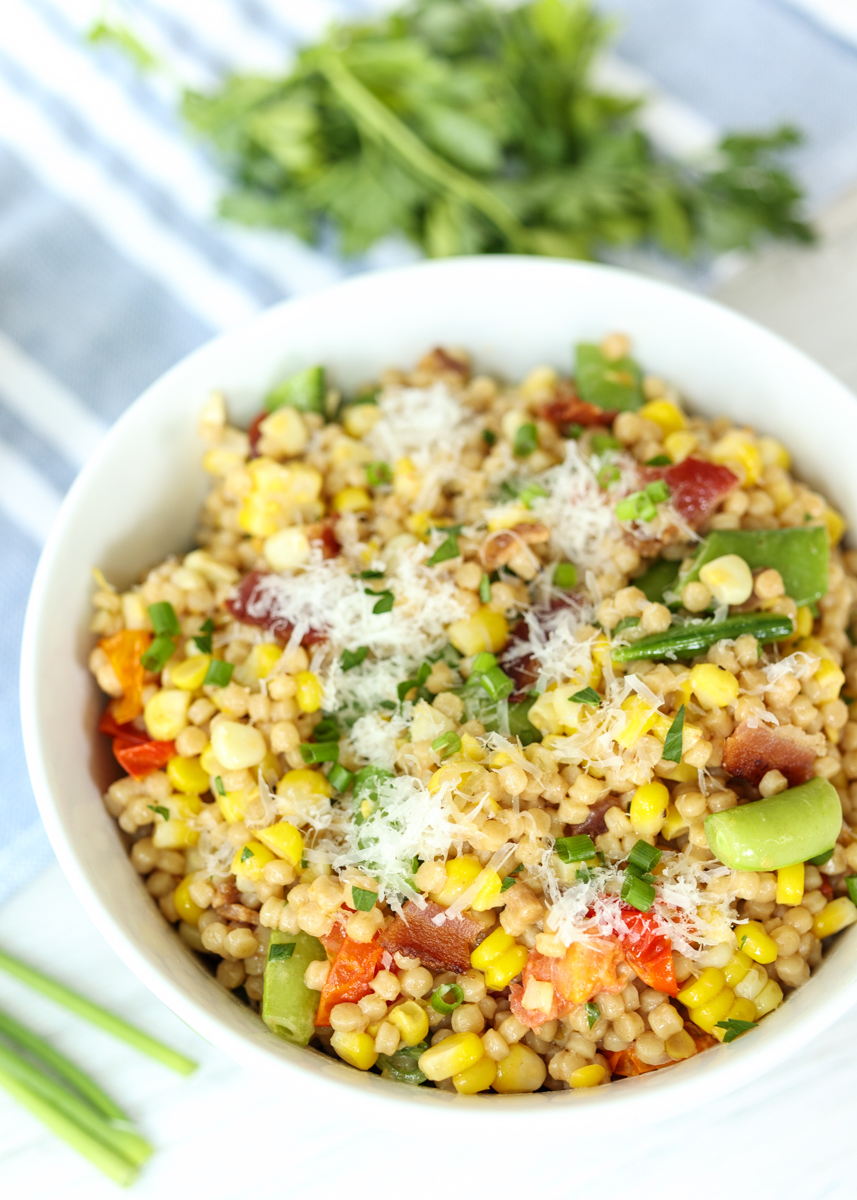
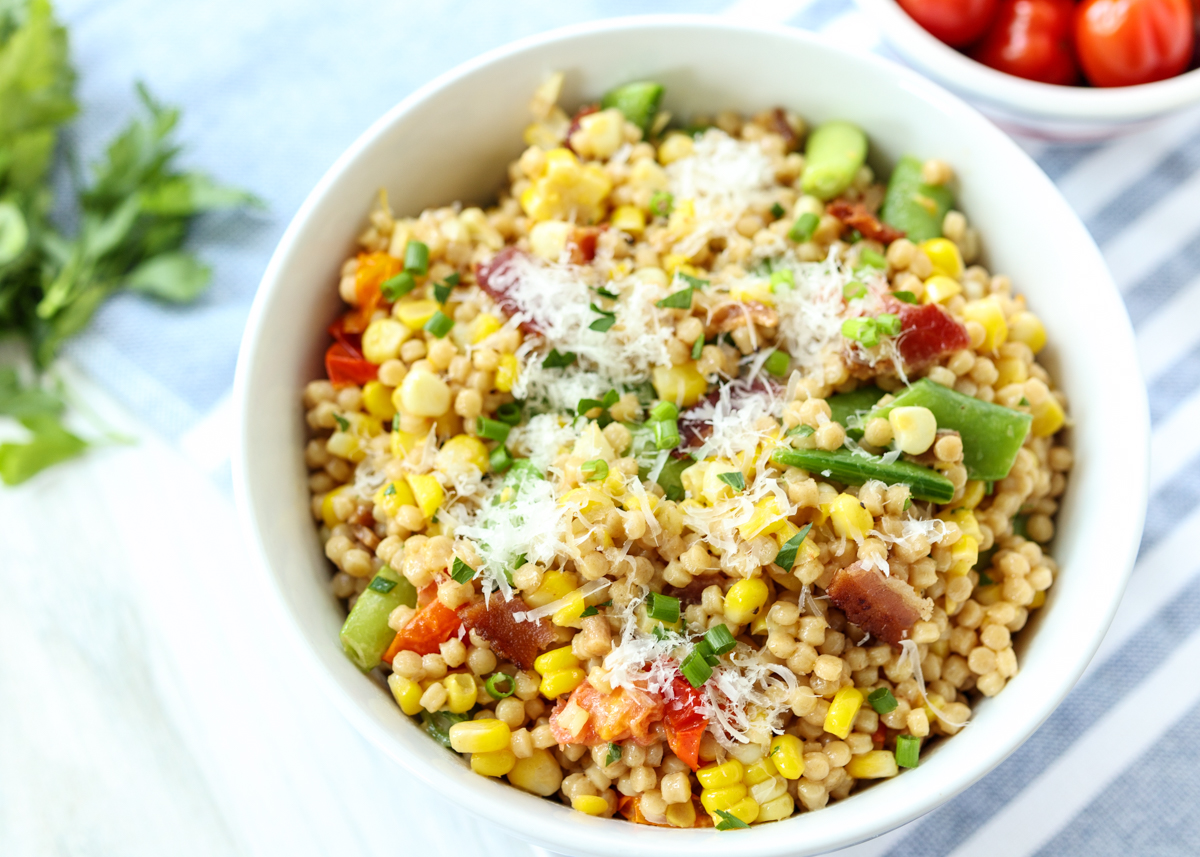
I love a good restaurant re-make so I set out to make my version of the couscous succotash from Not Your Average Joe’s. Unfortunately they recently changed their menu and this side dish is no longer offered so it’s a good thing I came up with my own version! Pearl couscous, also sometimes called Israeli couscous, is combined with sautéed sugar snap peas, grape tomatoes, shallot, roasted corn and crispy bacon. Mascarpone makes the dish creamy without making it heavy and some fresh parsley, chives and Parmesan pack a ton of additional flavor.

201905234lemonandmocha-2

I like to serve it hot, but it would also taste good at room temperature. Once you have all your veggies prepped this Summer Veggie Couscous comes together really quickly. I like to roast the corn and fry the bacon ahead of time then keep them both in the fridge until I’m ready for them.

201905233lemonandmocha-2

Roasting corn is my favorite way to cook corn on the cob (read all about it in my Summer Roasted Veggie Pesto Pasta Salad with Burrata post), but you can grill or boil yours if you prefer. Just keep in mind that roasting or grilling will make sure you have the most flavorful corn to add to the couscous.

201905232lemonandmocha-2

Summer Veggie Couscous pairs well with so many dishes making it the perfect go-to summer side. I originally served it alongside sous vide pork tenderloin, but I’ve since made it to go with burgers and hot dogs or just by itself. It would also work well with grilled chicken or shrimp; Not Your Average Joe’s served it underneath seared scallops. If you want another delicious BBQ side dish that also happens to be a Not Your Average Joe’s re-make, head to my Sweet Potato Salad recipe!

201905236lemonandmocha-2

Summer Veggie Couscous
 
Yield: 6-8 side dish servings
Ingredients
  • 8 ounces pearl couscous, regular or whole wheat, also called Israeli couscous
  • 2 tablespoons olive oil
  • 1 small shallot or ½ a large shallot, thinly sliced
  • 1 cup sugar snap peas, trimmed and halved
  • 1 cup grape tomatoes, halved
  • 3 small ears of corn or 2 large ears, cooked and cut off the cob (see note)
  • 2 slices bacon, cooked and crumbled
  • 1 clove garlic, minced
  • 2 ounces mascarpone
  • ¼ cup fresh grated Parmesan, plus more for topping
  • ½ tablespoon parsley, chopped, plus more for topping
  • 3 chives, chopped, plus more for topping
  • Salt and pepper
Directions
  1. Bring 1½ cups plus 1 tablespoon of water and ¼ teaspoon salt to a boil in a small saucepan. Add the couscous, cover and reduce to a simmer for 10 minutes. Remove from the heat when done; don’t drain.
  2. While the couscous is simmering, heat the olive oil in a large sauté pan over medium high heat. Add the shallots and sauté until they are soft, about 1-2 minutes. Lower the heat to medium and add the snap peas, tomatoes, corn kernels and bacon. Season with salt and pepper. Cook for 3 minutes then add the minced garlic. Sauté for 1 minute then turn off the heat. Add the couscous along with any remaining liquid to the sauté pan. Add the mascarpone and grated Parmesan then stir until the mascarpone has melted and everything is combined. Add the chopped parsley and chives then season with salt and pepper to taste. Serve topped with more grated Parmesan, chopped parsley and chopped chives.


Cheesy Barbecue Chicken Puff Pastry Bites

Cheesy Barbecue Chicken Puff Pastry Bites  |  Lemon & Mocha

Hi, friends! I know it has been a bit since I posted, but I was determined to share these Cheesy Barbecue Chicken Puff Pastry Bites before Memorial Day weekend! Is there a more perfect party appetizer than something cheesy stuffed into a flaky puff pastry cup? The Antipasto Puff Pastry Bites and the Crab Dip Puffs are always such a hit that I decided I needed to come up with another version of puff pastry bites. Since Memorial Day is coming up I wanted an appetizer that would fit well on a BBQ menu. It’s hard to go wrong with sweet tender chicken smothered in gooey cheese, especially when it’s in crispy and buttery puff pastry.

Cheesy Barbecue Chicken Puff Pastry Bites  |  Lemon & Mocha

I know I talked about this in my Antipasto Puff Pastry Bites post, but I just want to reiterate how easy these little bites are to make. I know, I know, they look so fancy, but that’s just the store-bought puff pastry doing all the hard work for you. Roll out the thawed sheet of puff pastry until it’s a little thinner and larger then cut it into squares. I use my pizza cutter; I definitely don’t make the straightest cuts, but it doesn’t really matter. The little squares of puff pastry get pressed into the cups of a mini muffin pan that has been sprayed with nonstick spray.

Cheesy Barbecue Chicken Puff Pastry Bites  |  Lemon & Mocha

After baking just the puff pastry cups for ten minutes you use a spoon to deflate a little cavity into the center of each puff pastry cup then fill with some shredded barbecue chicken and cheddar cheese before baking for another ten minutes. The reason I split up the baking time is by letting the puff pastry bake a little on its own you’re making sure the bottoms will be crispy and completely cooked.

Cheesy Barbecue Chicken Puff Pastry Bites  |  Lemon & Mocha

When I made these for some friends a couple weeks ago I rolled and cut the puff pastry sheet, placed it into the sprayed muffin pan, then covered the whole thing with plastic wrap and placed it in the fridge. That way when everyone arrived I was able to go right to the baking part and it took no time at all to spoon the chicken into the little cups in between the two ten-minute bakes.

Cheesy Barbecue Chicken Puff Pastry Bites  |  Lemon & Mocha

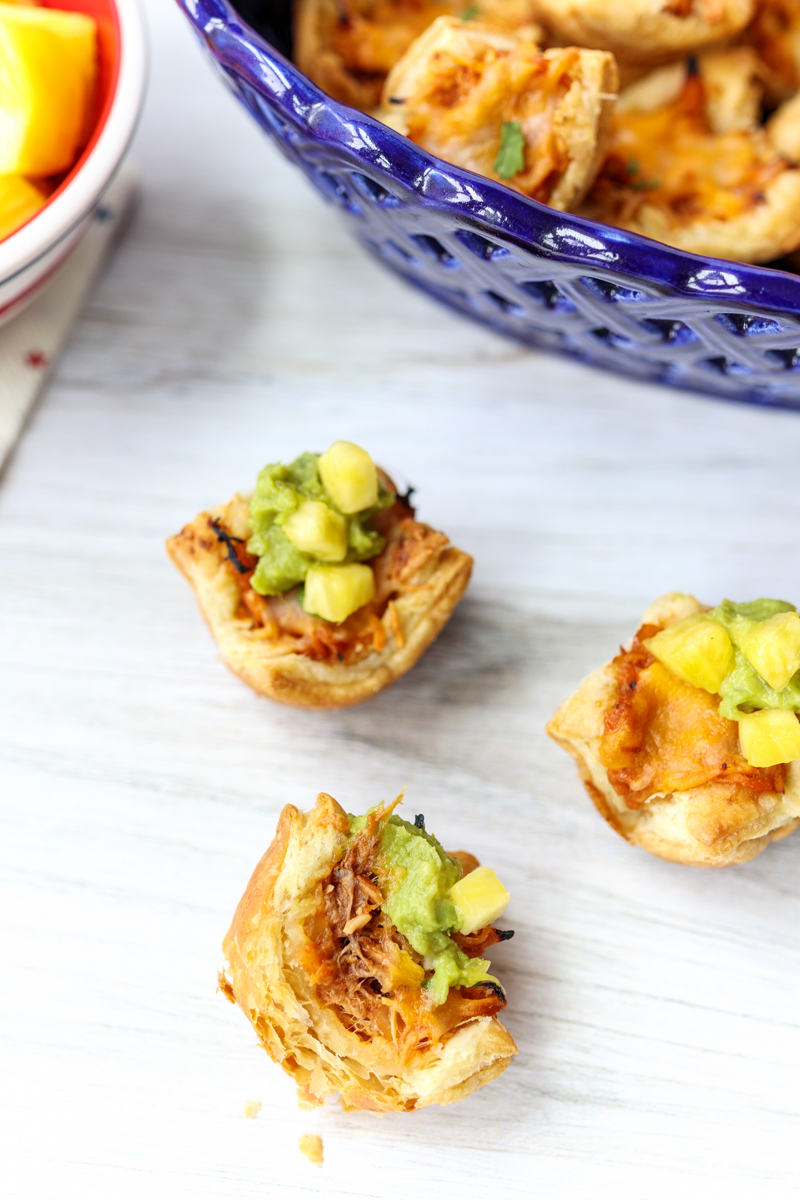
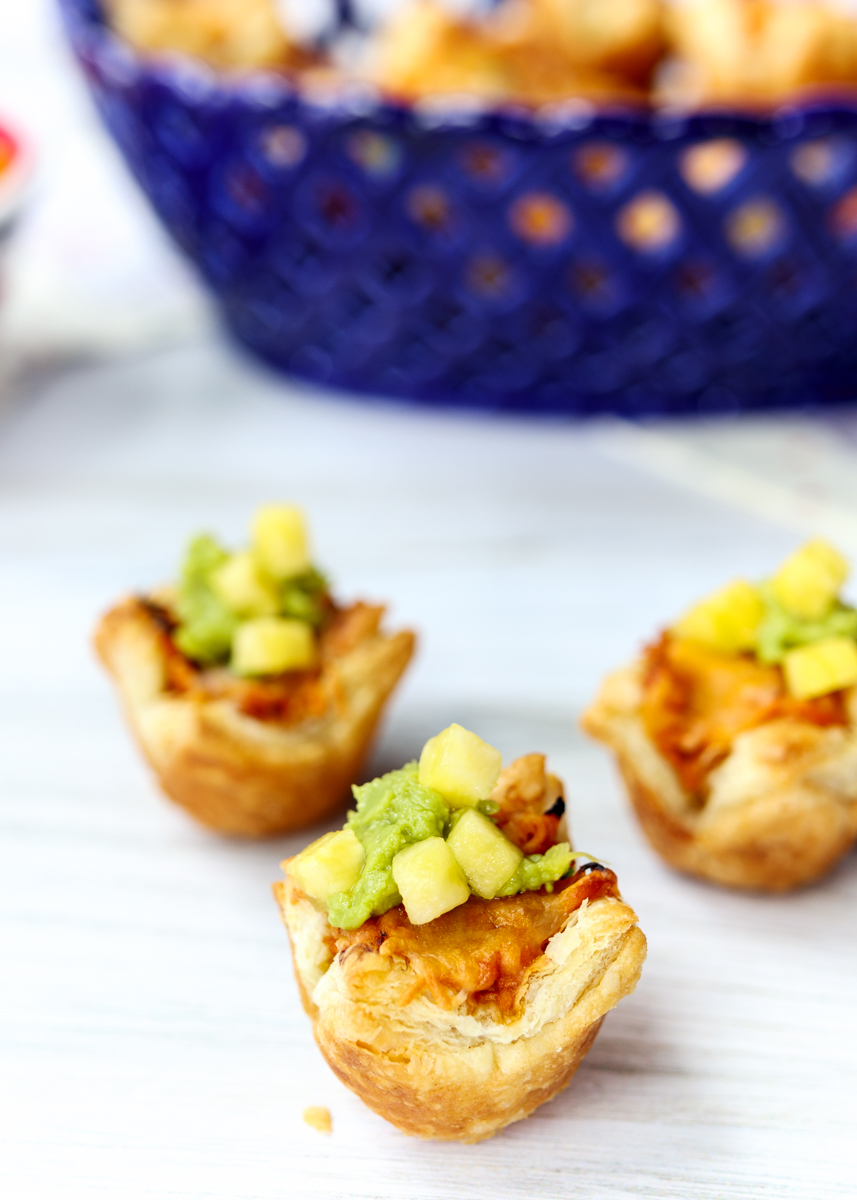
These Cheesy Barbecue Chicken Puff Pastry Bites taste awesome as is, but you can also get creative with different toppings to change the taste a little. My friends and I tried some with chopped pineapple on top and when I made them again for the photo shoot I tried them with a small dollop of guacamole. All three ways tasted really good! You could leave out some topping bowls and let guests choose their own different variations. I hope you all love these as much as we do!

Cheesy Barbecue Chicken Puff Pastry Bites  |  Lemon & Mocha

Cheesy Barbecue Chicken Puff Pastry Bites
 
Yield: 24 bites
Ingredients
  • 1 sheet puff pastry, defrosted, but still cold (mine is usually just right when thawed at room temperature for 35 minutes)
  • 1 cup shredded barbecue chicken, see note
  • ¼ cup plus 1 tablespoon finely shredded cheddar or Mexican blend cheese
  • Finely chopped pineapple for serving, optional
  • Guacamole for serving, optional
  • Cooking spray
Directions
  1. Preheat the oven to 400 degrees F. Lightly spray a mini muffin pan with cooking spray and set aside.
  2. On a lightly floured surface unfold the puff pastry sheet. Roll into a rectangle about 10” by 15”. Cut the rectangle of puff pastry into 24 squares. Press each square into a cup of the prepared mini muffin pan. Return to the fridge for 10 minutes to chill or cover with plastic wrap and leave in the fridge until ready to serve. When ready, bake for 10 minutes then remove from the oven.
  3. When the puff pastry comes out of the oven, gently press a spoon into the middle of each bite to lightly deflate the middle and make room for the chicken. Spoon the shredded chicken into the puff pastry bites. Sprinkle the top of each bite with some of the shredded cheese. Return to the oven for another 10 minutes. Serve hot as is or with pineapple and guacamole on top.
Notes
1 cup of shredded barbecue chicken is roughly the equivalent of a 5¼ ounce cooked chicken breast shredded and mixed with barbecue sauce until fully coated. However, shredded barbecue chicken freezes really well so this is what I normally do: Put 1 pound of boneless skinless chicken breasts in your slow cooker. Add almost a whole bottle of original Sweet Baby Ray’s barbecue sauce and ½ chopped small onion. Let slow cook on low for 6-8 hours. Shred the chicken right in the slow cooker and let cook for 15-30 more minutes. If I make this the day before these puff pastry bites I put what I need in the fridge then freeze the rest. I like to freeze the shredded barbecue chicken in quart freezer bags (flattened after sealing) because they defrost really quickly.


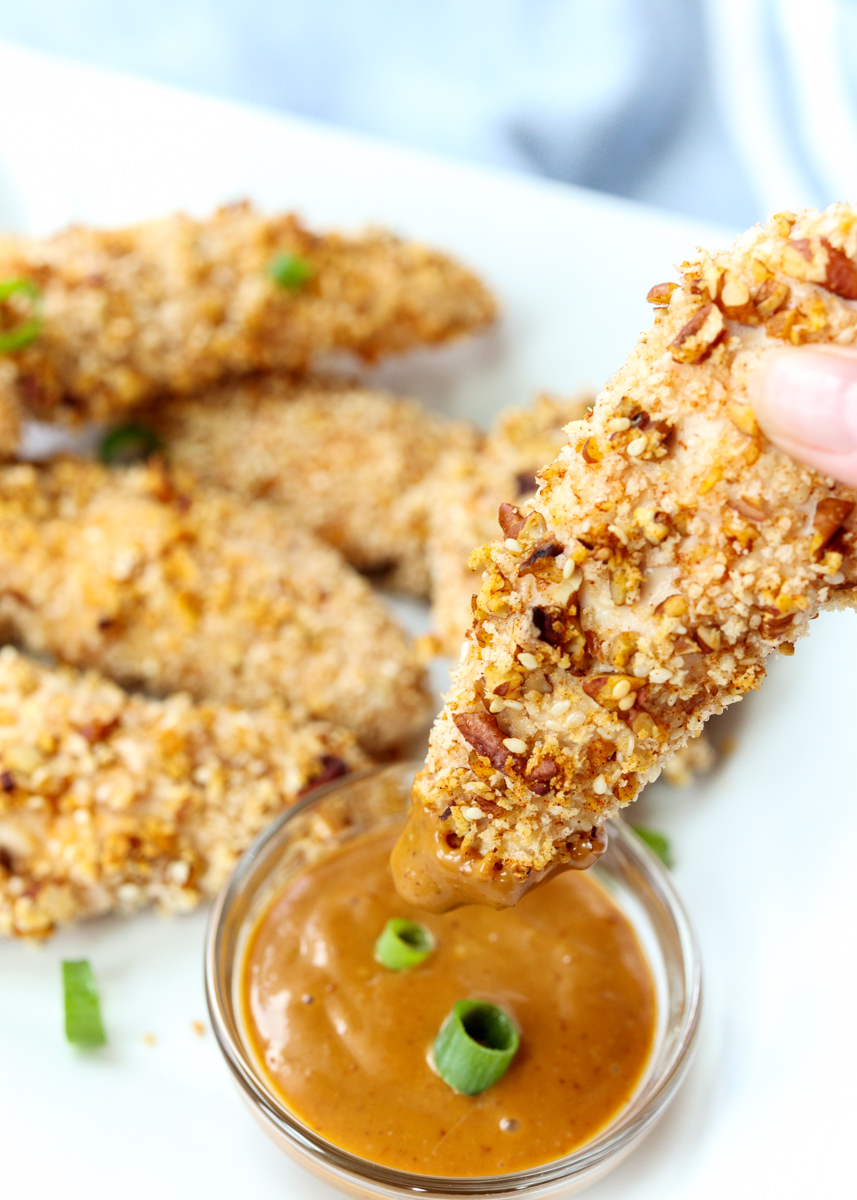
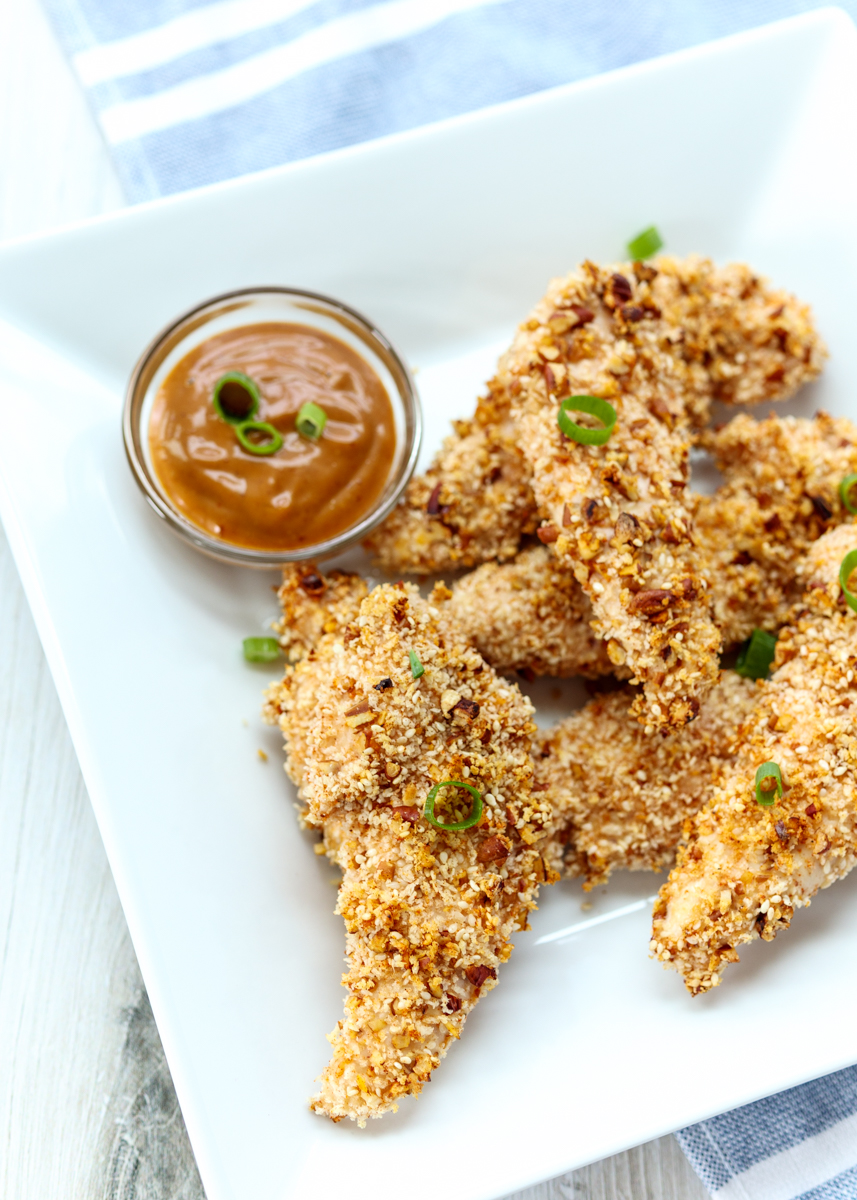
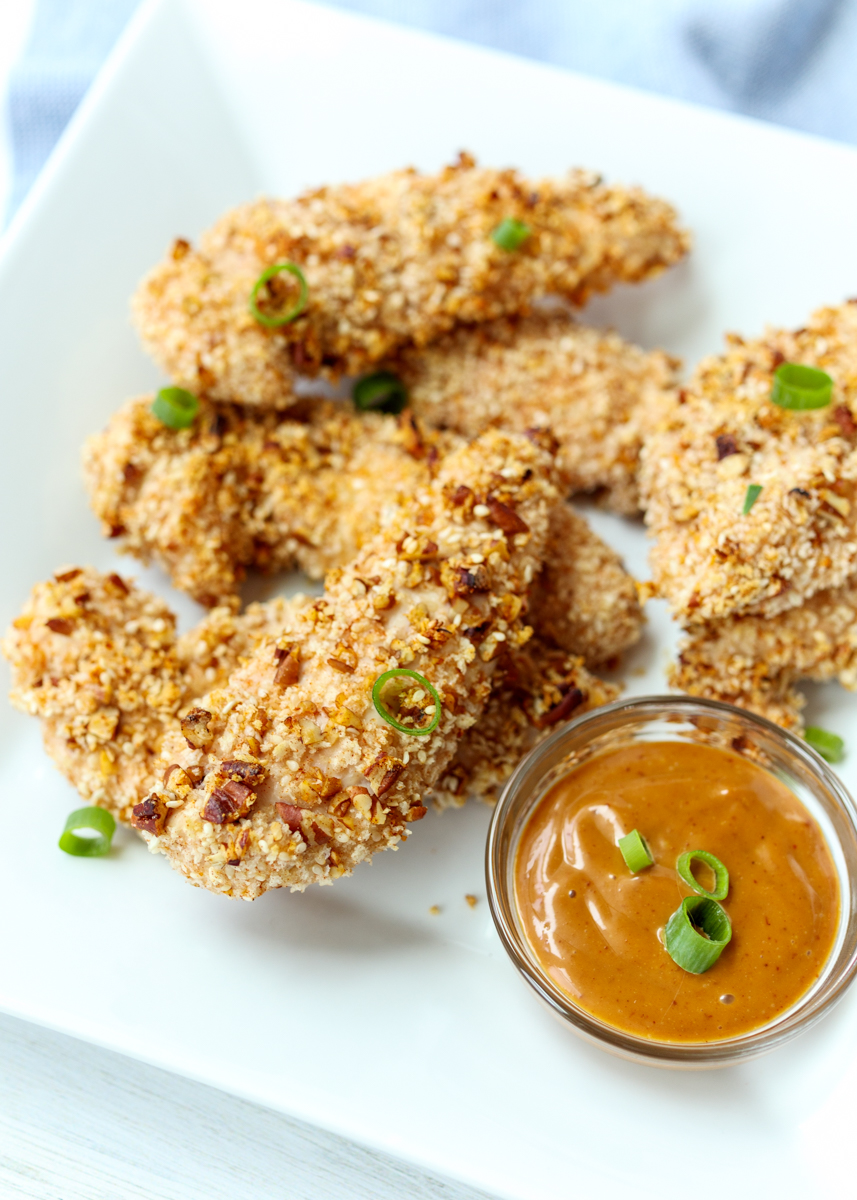
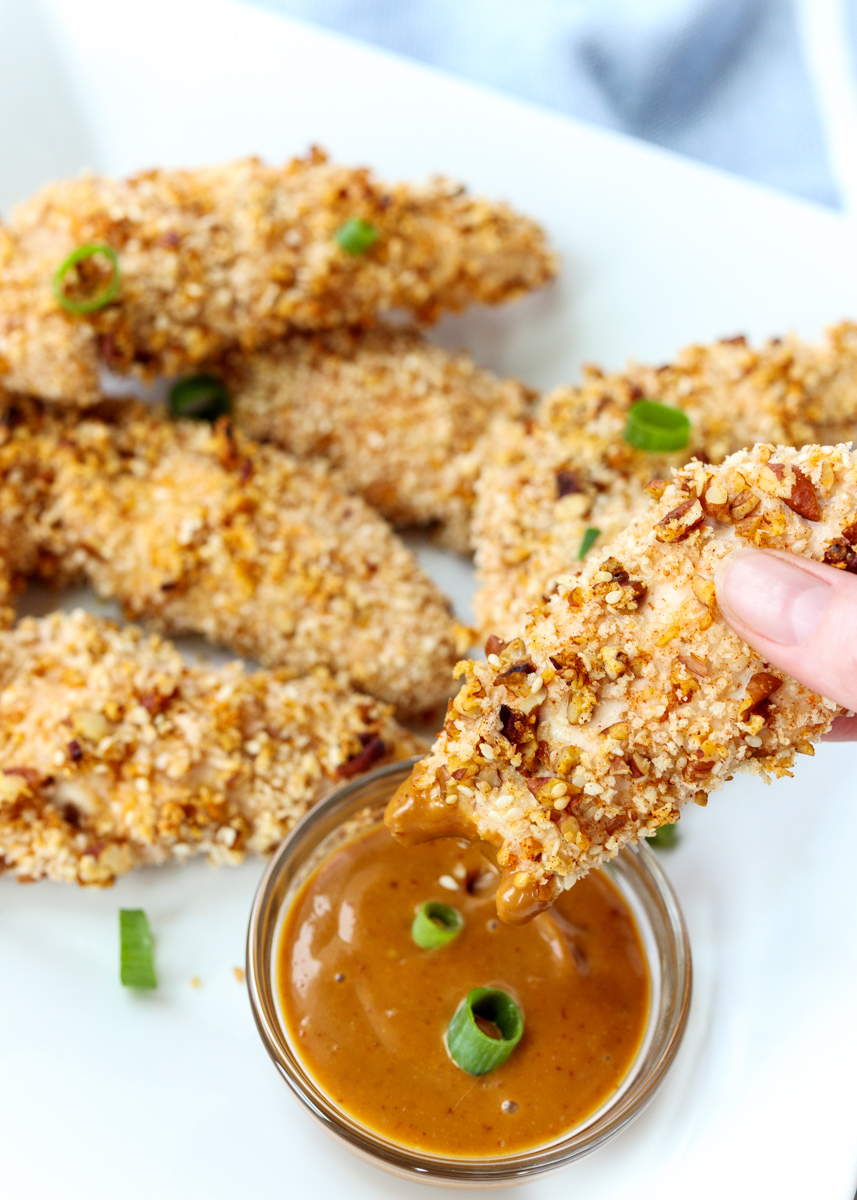
Crispy Sesame Pecan Chicken Tenders with a Hoisin Dipping Sauce

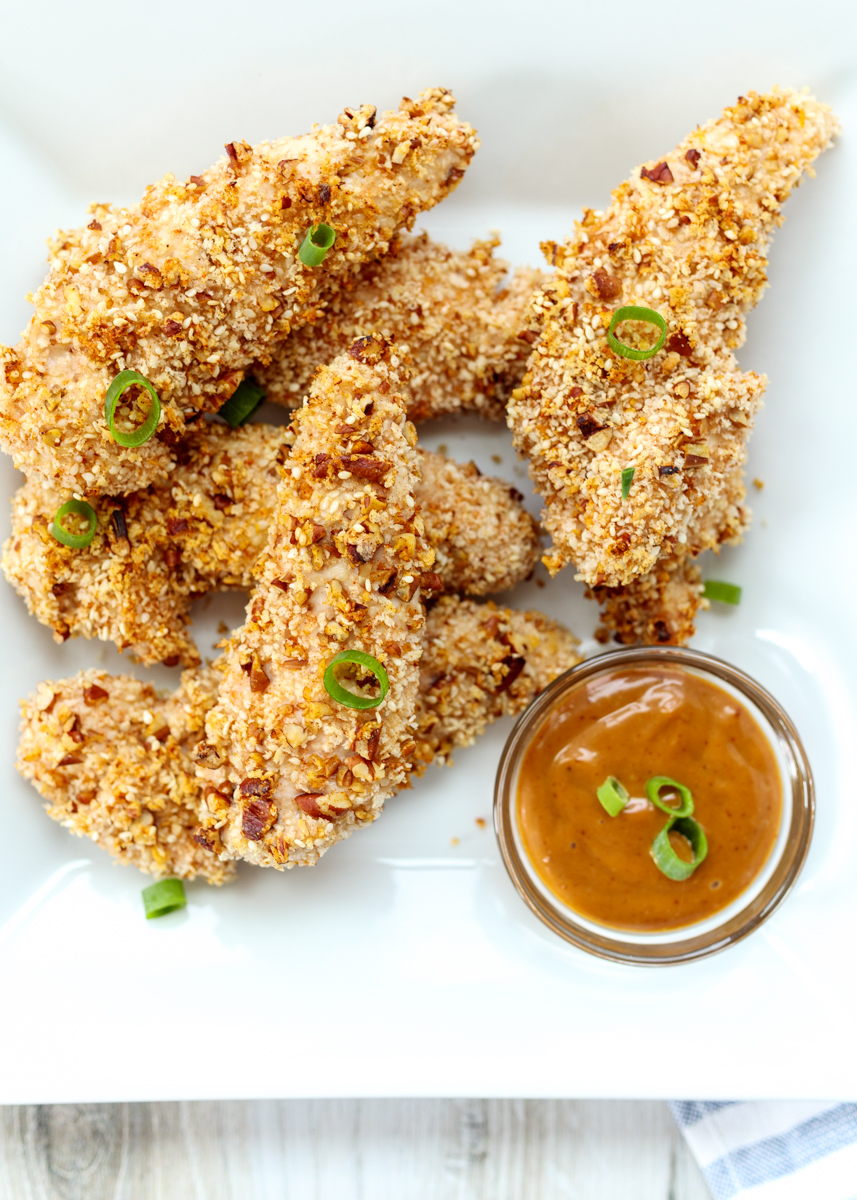
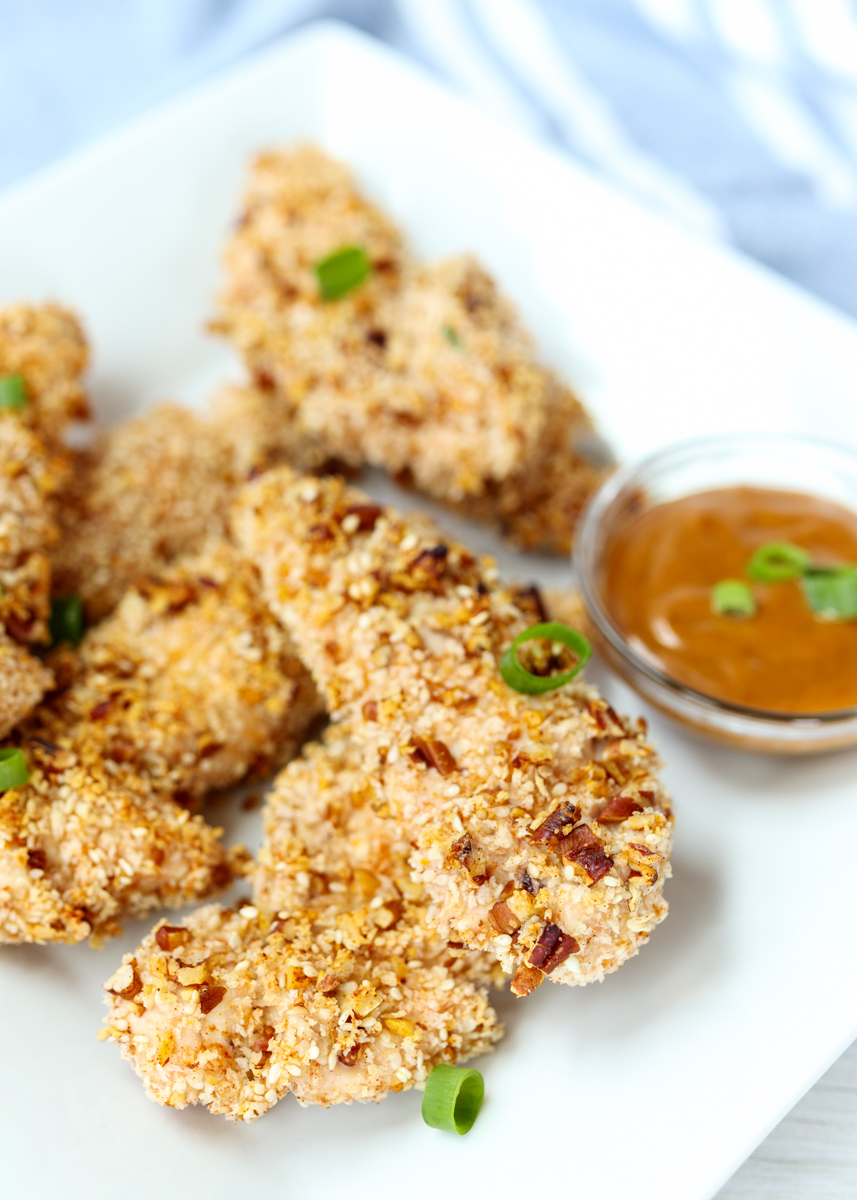
Crispy Sesame Pecan Chicken Tenders with a Hoisin Dipping Sauce  |  Lemon & Mocha

If you know me well then you know I love chicken fingers. They’re crispy, crunchy, perfect for dipping and full of childhood nostalgia. I even mention them in my about Lauren section. Although I usually only have chicken fingers while I’m eating out, I do (attempt) to keep homemade panko crusted chicken bites in the freezer. I say attempt because the batch is usually gone before the week is over.

Crispy Sesame Pecan Chicken Tenders with a Hoisin Dipping Sauce  |  Lemon & Mocha

While going through my recipe binders that I mentioned in the Balsamic Roasted Sweet Potatoes with Gorgonzola and Walnuts post I came across these Crispy Sesame Pecan Chicken Tenders from a 2011 issue of Food Network Magazine. Their recipe calls for shallow frying the tenders, but I knew my baking method for my panko crusted chicken bites was tried and true for creating crispy coated chicken so I baked them instead.

Crispy Sesame Pecan Chicken Tenders with a Hoisin Dipping Sauce  |  Lemon & Mocha

The chicken tenders get dipped in frothy egg whites and then are coated in a combination of panko breadcrumbs, finely chopped pecans, sesame seeds, paprika and salt. The key to achieving crispy chicken tenders in the oven is to place them on a wire cooling rack coated with nonstick cooking spray that you’ve placed on a large baking sheet. This is the same method used for my Baked Pistachio Crusted Chicken. The hot oven air circulates around all sides of the chicken tenders making sure every single bite is crispy – no air fryer needed!

Crispy Sesame Pecan Chicken Tenders with a Hoisin Dipping Sauce  |  Lemon & Mocha

I was a little shocked at how obsessed I was with the panko-pecan-sesame combination. They taste so well together and provide a perfect crunch.

Crispy Sesame Pecan Chicken Tenders with a Hoisin Dipping Sauce  |  Lemon & Mocha

Since these aren’t ordinary chicken tenders I thought they deserved a simple, but stepped-up dipping sauce. The sesame had me thinking of Asian flavors and since I still had hoisin in the fridge from the Hoisin Beef Kebobs I whipped up a quick dipping sauce of hoisin, mayonnaise and lime juice. It’s creamy, sweet and a little tangy. I hope you love these Crispy Sesame Pecan Chicken Tenders as much as we do!

Crispy Sesame Pecan Chicken Tenders with a Hoisin Dipping Sauce  |  Lemon & Mocha

Crispy Sesame Pecan Chicken Tenders with a Hoisin Dipping Sauce
 
Yield: 4 servings
Ingredients
  • 1 cup panko breadcrumbs
  • ½ cup finely chopped pecans
  • ¼ cup sesame seeds
  • 1 teaspoon paprika
  • 1 teaspoon salt
  • 2 large egg whites
  • 1½ pounds bone skinless chicken tenders, or breasts cut into 1” wide strips
  • 2 tablespoons hoisin sauce
  • ¼ cup mayonnaise
  • 1 teaspoon lime juice
  • Cooking spray
Directions
  1. Preheat the oven to 400 degrees F. Spray a wire cooling rack with nonstick cooking spray then place on top of a large baking sheet. Set aside.
  2. In a shallow, wide bowl, combine the panko breadcrumbs, chopped pecans, sesame seeds, paprika and salt. Set aside.
  3. In a medium bowl, beat the egg whites until frothy. Working with 1 tender at a time, dip the chicken in the egg whites then dip in the panko mixture to coat completely. Place on the prepared wire rack so the chicken tenders aren’t touching. Lightly spray the top of the chicken with cooking spray (I use olive oil or coconut oil spray) then bake for 20-22 minutes. Chicken is done when it reaches an internal temperature of 165 degrees F. Keep on the wire rack until serving with the hoisin dipping sauce.
  4. While the chicken is baking, make the hoisin dipping sauce. In a medium bowl combine the hoisin, mayo and lime juice.

 Recipe adapted from September 2011 issue of Food Network Magazine.

Some of the links above are affiliate links, which means I may receive a small commission for my referral. This does not affect the retail cost of the item. Thank you for supporting Lemon & Mocha!

Carrot Cake Nest Cookies

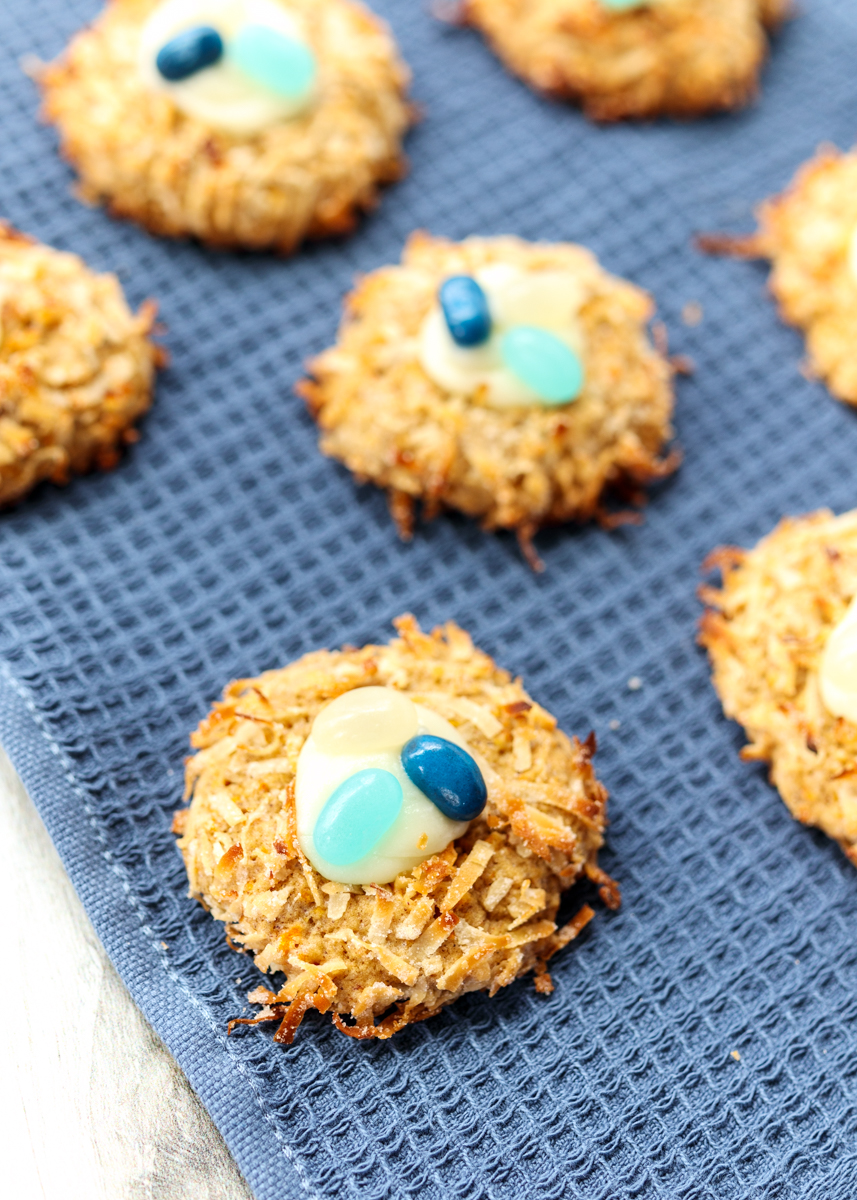
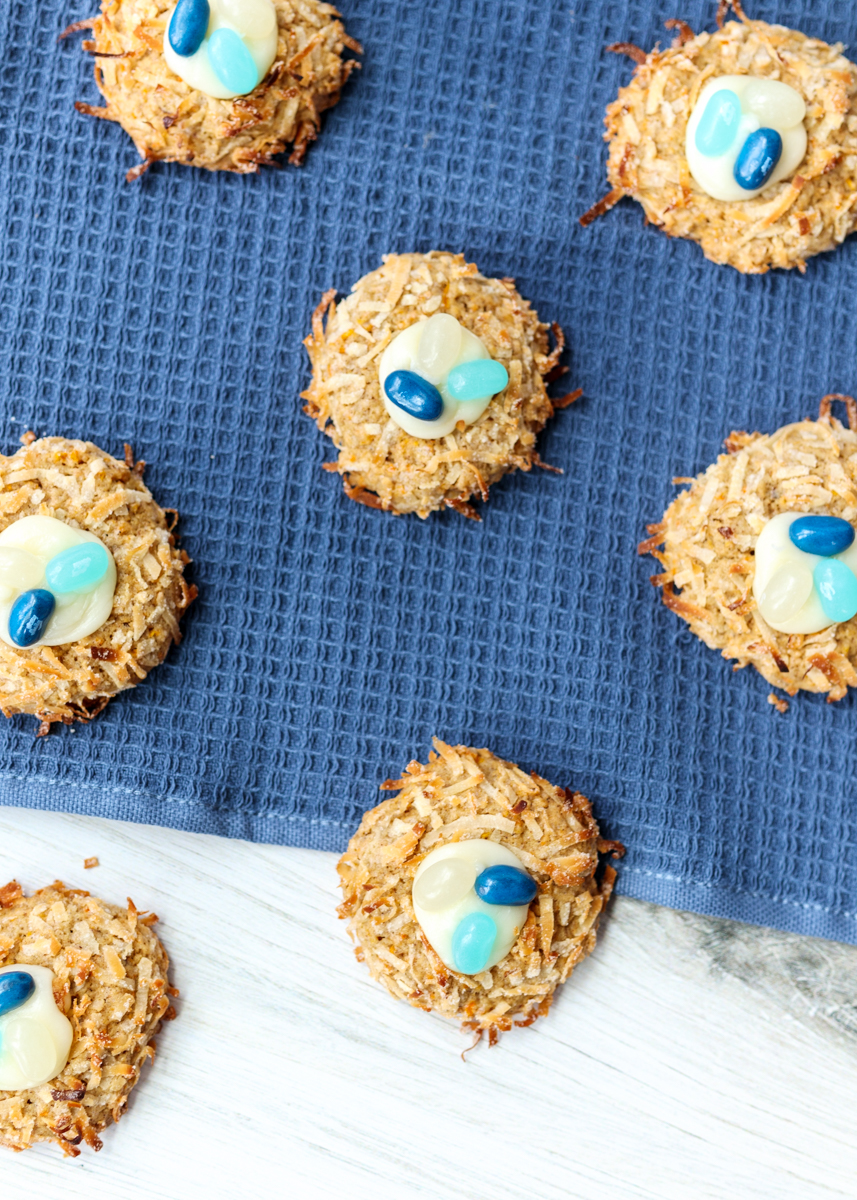
Carrot Cake Nest Cookies  |  Lemon & Mocha

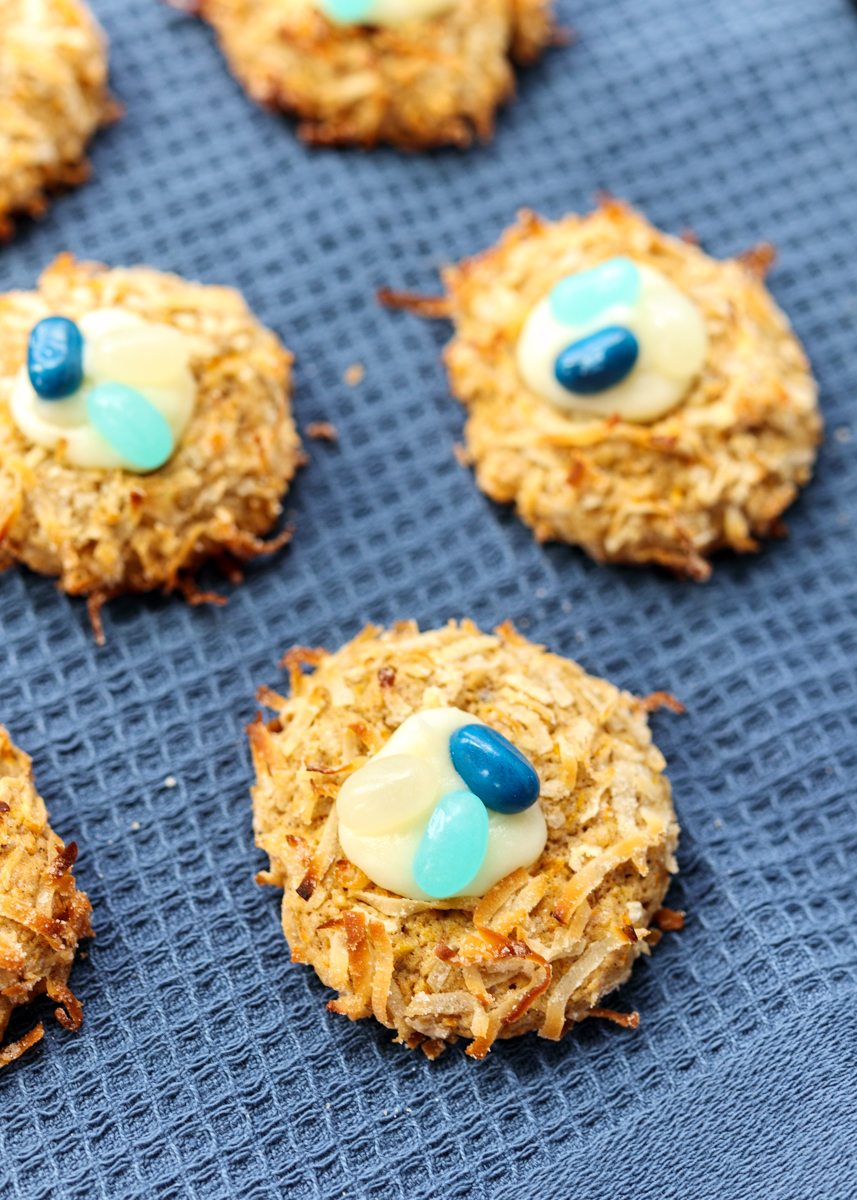
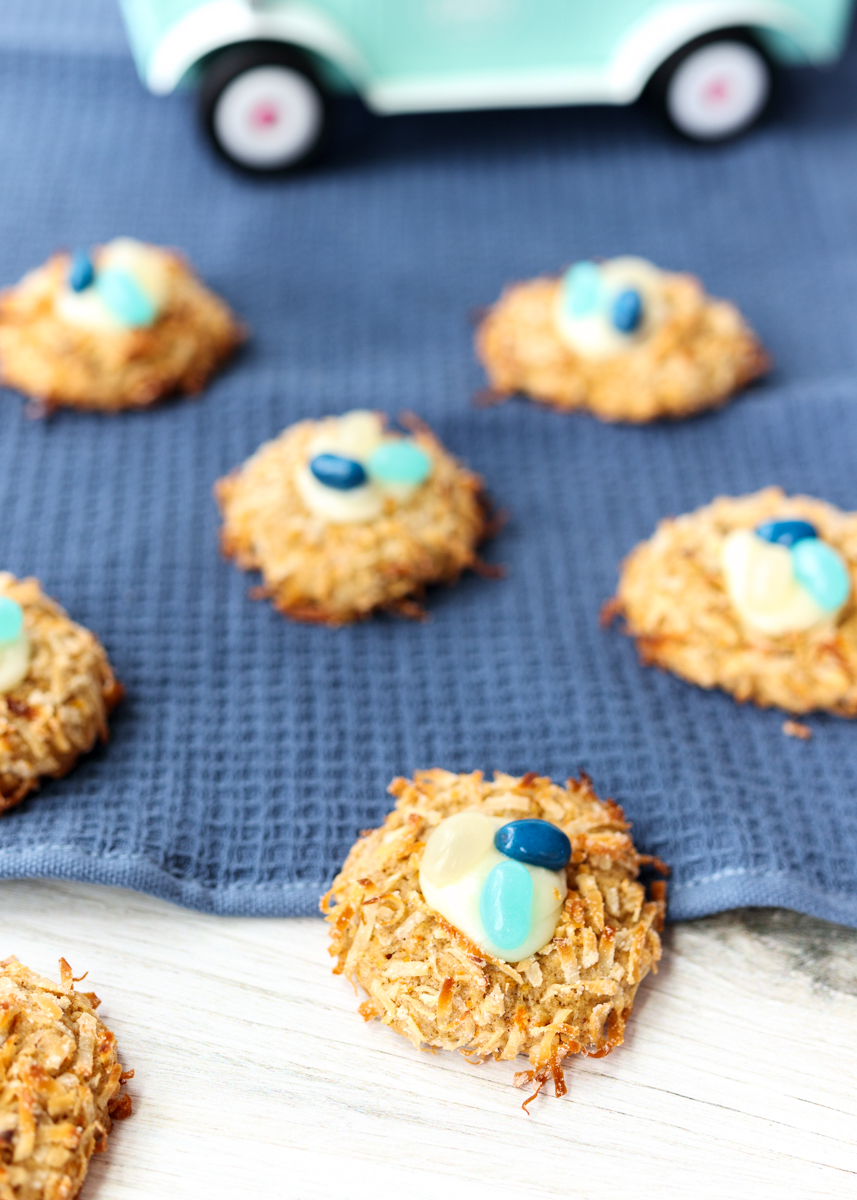
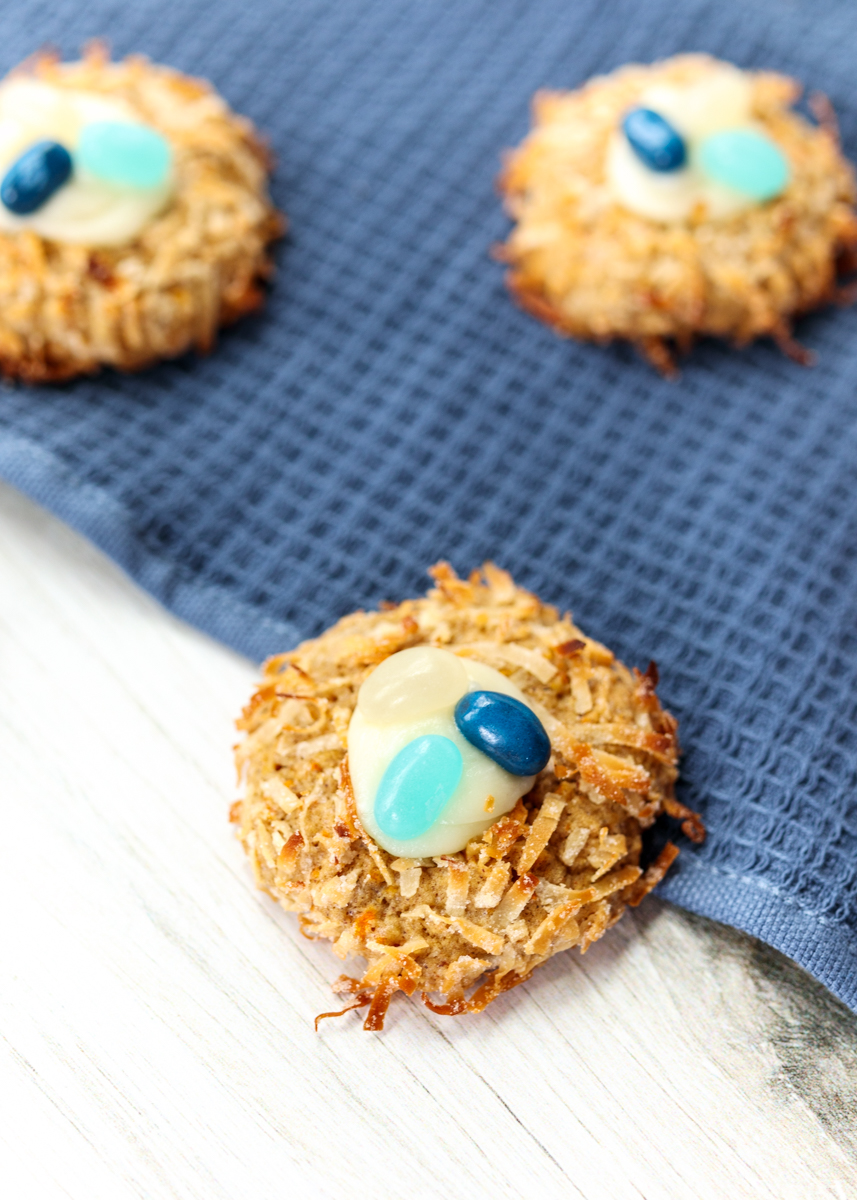
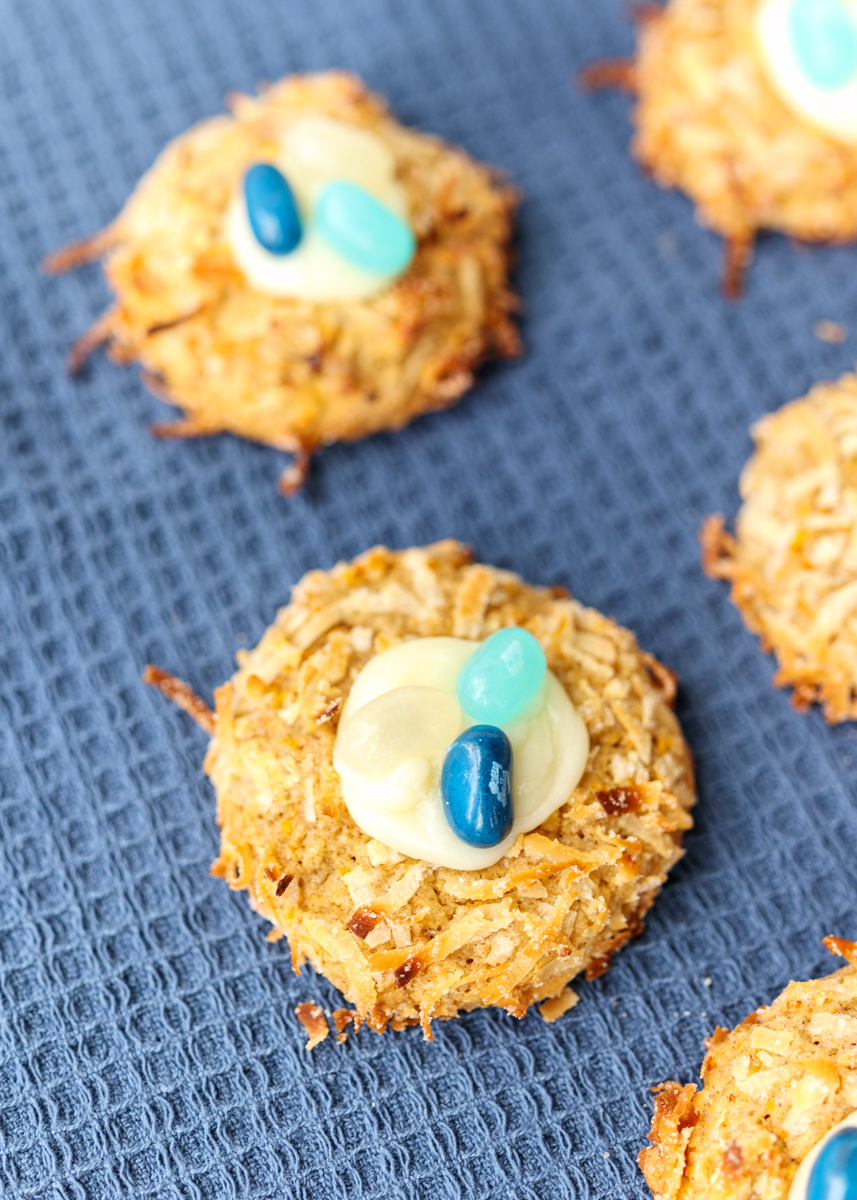
How cute are these Easter jelly bean cookies?! These Carrot Cake Nest Cookies are the Food Network Magazine’s April cookies, which is perfectly fitting because they just scream springtime. After last month’s complicated Rainbow Slice-and-Bake Cookies I was very excited to see a classic drop cookie – with a twist of course.

Carrot Cake Nest Cookies  |  Lemon & Mocha

The cookie batter is filled with all the carrot cake staples: grated carrots, chopped toasted walnuts, and the warming spices of cinnamon, ginger and cloves. Using brown sugar and an egg yolk gives the cookies that ideal chewy texture, which are similar tips I use in my Perfect Chocolate Chip Cookies. Before being baked, the cookie dough balls are rolled in shredded sweetened coconut. In addition to the chewiness, I love the crunch and texture you get in each bite from the chopped walnuts and shredded coconut.

Carrot Cake Nest Cookies  |  Lemon & Mocha

If it stopped there I would still gladly chow down on these carrot cake cookies any day of the week. But there’s more! Piped onto each cooled cookie is a pocket of sweet and buttery cream cheese frosting and some pretty jelly beans. Carrot cake is not complete without cream cheese frosting so it only makes sense for us to frost these cookies to make them truly carrot cake cookies! The little dollop in the middle of the cookie gives just the right balance of cookie to frosting.

Carrot Cake Nest Cookies  |  Lemon & Mocha

Even though they’re so cute, I thought I was going to end up picking off the jelly beans and eating them separately, but I actually really loved a bite of everything all together! Something about the added texture and sweetness of the jelly bean was a nice touch. I also used some of my favorite Jelly Belly jelly bean flavors so that might have been part of it!

Carrot Cake Nest Cookies  |  Lemon & Mocha

The recipe calls for blue and white jelly beans, but if you don’t have enough feel free to branch out into other fun Easter pastel colors. I used the blue and white combo ones for the photos, but I had other cookies in this batch topped with pink and purple jelly beans as well. I hope you all enjoy these Carrot Cake Nest Cookies – they were one of my favorites so far!

Carrot Cake Nest Cookies  |  Lemon & Mocha

Carrot Cake Nest Cookies
 
Yield: about 22 cookies
Ingredients
for the cookies
  • 1⅓ cups all-purpose flour
  • 1½ teaspoons ground cinnamon
  • ½ teaspoon ground ginger
  • Pinch of ground cloves
  • ¼ teaspoon salt
  • 8 tablespoons unsalted butter (1 stick), at room temperature
  • ⅓ cup granulated sugar
  • ⅓ cup dark brown sugar
  • 1 large egg yolk, at room temperature
  • 2 teaspoons vanilla extract
  • ¾ cup finely grated carrots (about 2 carrots)
  • ¼ cup finely chopped toasted walnuts
  • 1¾ cups shredded sweetened coconut
for the frosting
  • 2 ounces cream cheese, at room temperature
  • 2 tablespoons unsalted butter, at room temperature
  • ⅛ teaspoon vanilla extract
  • ½ cup powdered sugar
  • Blue and white jelly beans, for topping
Directions
for the cookies
  1. Place oven racks in the upper and lower thirds. Preheat oven to 350 degrees F. Line 2 baking sheets with parchment paper and set aside.
  2. In a medium bowl, whisk together the flour, cinnamon, ginger, cloves and salt. In the bowl of a stand mixer or in a large bowl with a hand mixer, beat the butter, granulated sugar and brown sugar on medium-high until fluffy, about 3 minutes. Add the egg yolk and the vanilla then beat again until well combined. Add the carrots and walnuts then beat again. Slowly add the flour mixture while on low speed and beat until just combined.
  3. Scoop tablespoons of dough then roll the balls into the shredded coconut. I used my medium Oxo cookie scoop. Place 1-inch apart on the prepared baking sheets. Use the handle of a wooden spoon or something round similar in size to make a deep indentation into the centers of the cookies. Bake the cookies, switching the baking pans halfway through from top to bottom, for 22-24 minutes, or until the cookies are set and the coconut is golden brown. Let cool completely on the pans placed on wire cooling racks.
for the frosting
  1. In the bowl of a stand mixer or in a medium bowl with a hand mixer, beat the cream cheese, butter and vanilla with the whisk attachment until light and fluffy. Add the powdered sugar and beat until fluffy. Transfer to a resealable plastic bag with the corner snipped or a pastry bag fitting with a round tip. If you aren’t ready to use right away, keep refrigerated. Pipe the frosting into the indentation if each cooled cookie then top each cookie with 3 jelly beans.

 Recipe from January/February 2019 issue of Food Network Magazine.

Some of the links above are affiliate links, which means I may receive a small commission for my referral. This does not affect the retail cost of the item. Thank you for supporting Lemon & Mocha!