Dessert

Lemonade Pinwheel Cookies
Lemonade Pinwheel Cookies  |  Lemon & Mocha

I have a confession that you may or may not have noticed. I skipped the May Food Network Magazine cookies. The May cookies are strawberry french macarons and at first I was intimidated, but excited. French macarons have been on my kitchen bucket list for years now. I bought all the ingredients to make them, read through the recipe (which was my ultimate mistake – always fully read through a recipe before committing to it!)… and just couldn’t get psyched up to make them.
Lemonade Pinwheel Cookies  |  Lemon & Mocha

The Food Network Magazine recipe did a few things differently from other recipes I’ve read and I’ll be honest, sometimes the magazine recipes can be really hit or miss. When it came down to it, if I was finally going to make french macarons, something I’ve been excited about for years, but have never gotten around to, should I really be using a Food Network Magazine recipe with no reviews instead of my trusted cookbook or blogger sources? So, I put everything aside, ate a bunch of strawberries, and decided to move right along to the June cookies.
Lemonade Pinwheel Cookies  |  Lemon & Mocha

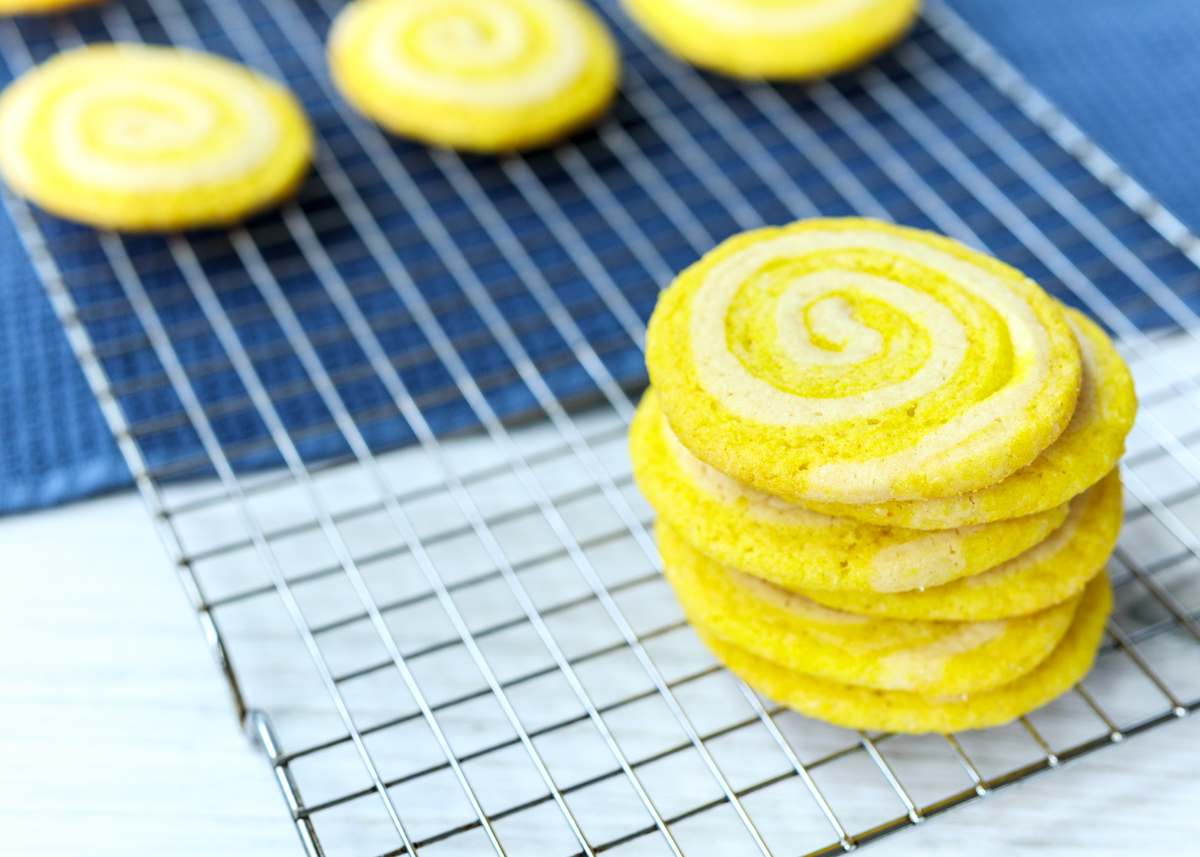
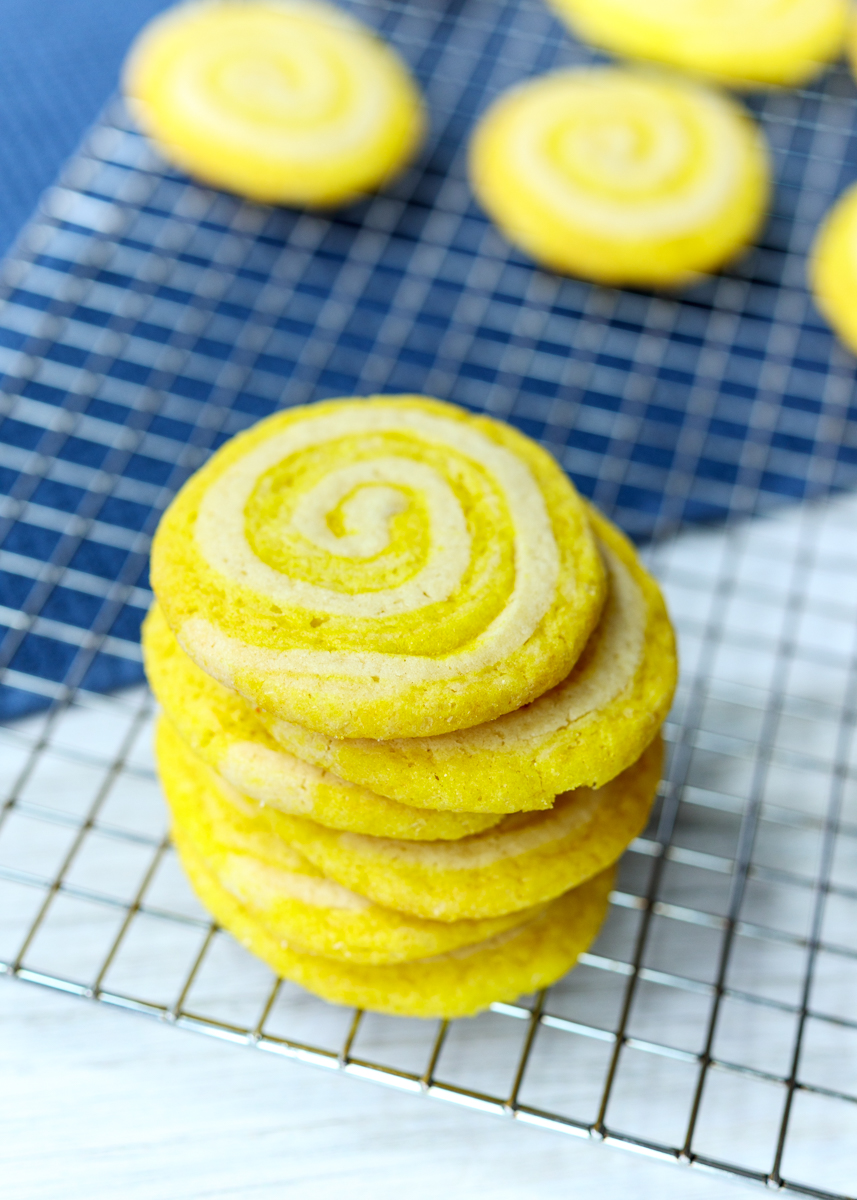
These Lemonade Pinwheel Cookies are definitely not to be skipped! They are chewy and bursting with lemon flavor. A couple weekends ago we had an awesome long family weekend with Matt’s parents and brother, Nick, in the Catskills. Nick is a lemon and lime fan so I brought some of these cookies along. They were a definite hit; my mother-in-law, Theresa, even ate some, which is a big deal since she is not usually a dessert person!
Lemonade Pinwheel Cookies  |  Lemon & Mocha

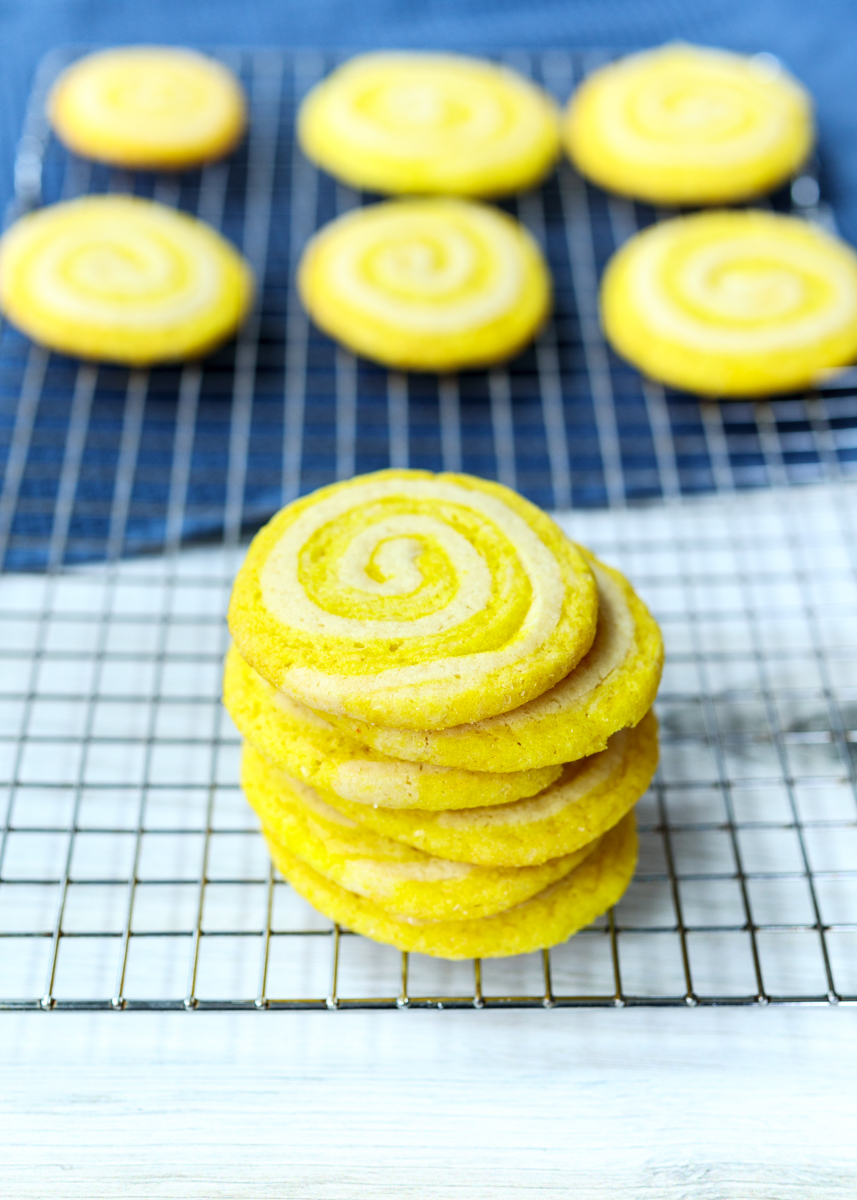
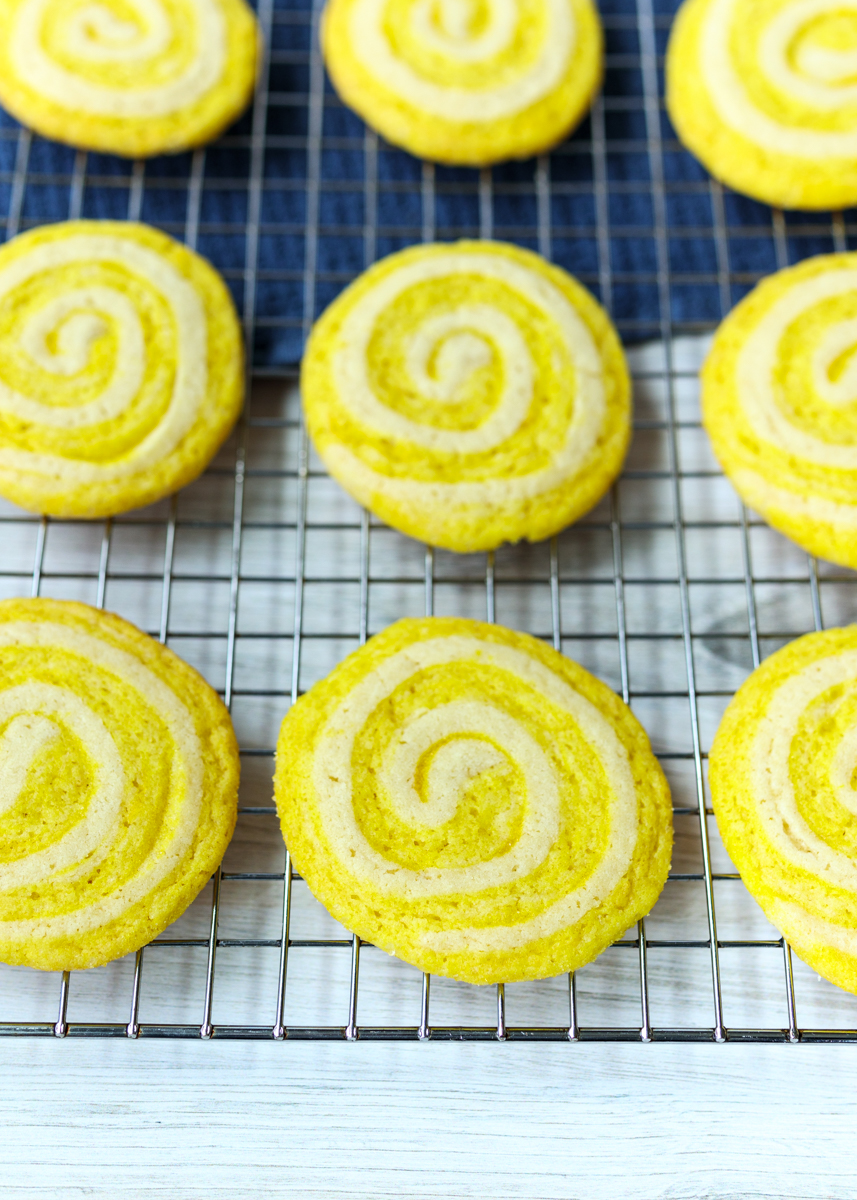
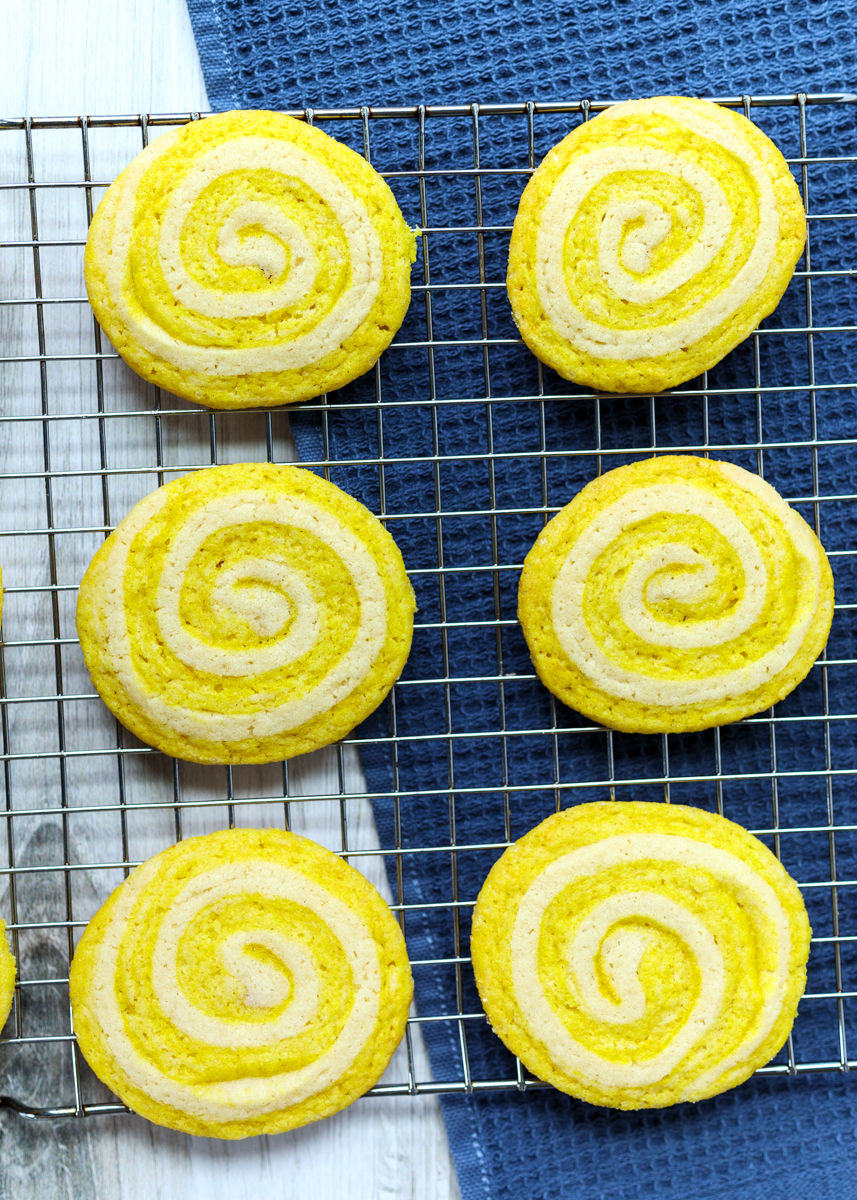
The way you get the pinwheel effect is by laying two sheets of cookie dough on top of one another, rolling them up, then slicing and baking the cookies. The lighter dough is a sugar cookie dough with lemon extract. The yellow layer is that same lemon sugar cookie dough, but with lemon juice, lemon zest and lemon gelatin powder amping up the lemon flavor. There’s also a little yellow gel food coloring.

Lemonade Pinwheel Cookies  |  Lemon & Mocha

If you like lemon then I promise you will love these cookies! Make sure you read the recipe thoroughly well in advance because there’s two separate chilling steps so you most likely will want to give yourself at least two days to make them. Enjoy!
Lemonade Pinwheel Cookies  |  Lemon & Mocha

Lemonade Pinwheel Cookies
 
Yield: 24 cookies
Ingredients
  • 2 cups all-purpose flour, plus more for dusting
  • ½ teaspoon salt
  • ½ teaspoon baking powder
  • ¼ teaspoon baking soda
  • 12 tablespoons unsalted butter (1½ sticks), room temperature
  • ⅔ cup granulated sugar
  • 1 large egg
  • ½ teaspoon pure vanilla extract
  • ¼ teaspoon pure lemon extract
  • ¼ cup lemon gelatin powder (from one 3-ounce box), divided
  • Lemon zest from 2 lemons
  • 1 teaspoon lemon juice
  • ½ teaspoon yellow gel food coloring
  • 2 tablespoons yellow sanding sugar, divided
  • 1 tablespoon coarse white sugar
Directions
  1. In a medium bowl, sift together the flour, salt, baking powder and baking soda. In a large bowl with a hand mixer or in the bowl of a stand mixer, beat the butter and sugar on medium-high speed for 3 minutes, or until fluffy. Add the egg, beat, then add the vanilla and lemon extracts and beat, scraping down the sides as needed. Add the flour mixture on a reduced low speed until just combined.
  2. Place half the dough on a large sheet of plastic wrap, flattening the dough into a disk as you wrap it. To the remaining dough, add 2 tablespoons of the gelatin powder, the lemon zest, lemon juice and the gel food coloring. Beat until just combined then wrap that half of the dough in plastic wrap, also shaping into a disk. Refrigerate both disks of dough until firm for at least 2 hours or overnight.
  3. Remove the plain colored dough from the fridge and roll it out into a 10-inch by 11-inch rectangle on a lightly floured. I found it easier to move the dough if I rolled it out on a floured piece of wax paper or plastic wrap. Put aside. Remove the yellow dough from the fridge and repeat the rolling process. Place the yellow dough rectangle on top of the plain colored dough rectangle. Trim the edges then sprinkle 1 tablespoon of the yellow sanding sugar over top. Starting with the long end, tightly roll up the dough to form a log. Wrap the log in plastic wrap then refrigerate until firm for at least 3 hours or overnight.
  4. Preheat the oven to 350 degrees F with the oven racks in the upper and lower thirds of the oven. Line 2 baking sheets with parchment paper and set aside. In a small bowl, combine the remaining 2 tablespoons of gelatin powder, 1 tablespoon yellow sanding sugar and the coarse white sugar. Remove the dough log from the fridge and roll it in the sugar mixture, pressing to help stick. Use a sharp knife to cut the log into ⅜-inch thick slices. Arrange the cookies on the prepared baking sheets. Bake for 15 minutes, or until the cookies are set around the edges, switching the pans halfway though. Let the cookies cool for 5 minutes on the pan then transfer to a wire cooling rack to cool completely.
Notes
Make sure your dough sheets are equal sizes and wrap the dough together tightly when you roll it. The ends of my dough log were all uneven and not very tightly wrapped so I got about 14 or so perfect looking cookies and the rest of my cookies were kind of odd shaped because they were closer to the ends of the dough log.

 Recipe from January/February 2019 issue of Food Network Magazine.

Some of the links above are affiliate links, which means I may receive a small commission for my referral. This does not affect the retail cost of the item. Thank you for supporting Lemon & Mocha!

Strawberry Lemonade Cupcakes

Strawberry Lemonade Cupcakes  |  Lemon & Mocha

Spring desserts are all about bright flavors and colors so I thought these Strawberry Lemonade Cupcakes would be the perfect fit for these cute spring butterfly cupcake toppers gifted to me by my goddaughter. They are technically strawberry lemon cupcakes, but doesn’t strawberry lemonade sound much more fun?

Strawberry Lemonade Cupcakes  |  Lemon & Mocha

The cupcake is a classic lemon recipe flavored with lemon zest and lemon juice. It’s a nice subtle lemon flavor that doesn’t overpower the strawberry frosting.

Strawberry Lemonade Cupcakes  |  Lemon & Mocha

If I was making these lemon cupcakes with a plain vanilla or cream cheese frosting I would add lemon extract to really amp up the lemon flavor since I love it so much, but the strawberry frosting is so good you really don’t want a lemon punch from the cupcakes to take away from it.

Strawberry Lemonade Cupcakes  |  Lemon & Mocha

The strawberry frosting is a buttercream frosting flavored with powdered freeze dried strawberries. I took a cue from my Strawberry Chocolate Ganache Cake Balls; using freeze dried strawberries crushed up into a powder is the ultimate way to pack in real strawberry flavor without any of the moisture of fresh strawberries. I’ve seen freeze dried strawberries in many grocery stores and Trader Joe’s and Target definitely stock it.

Strawberry Lemonade Cupcakes  |  Lemon & Mocha

I’ve used this strawberry frosting on a chocolate cake before and it tasted just as bright and delicious paired with these lemon cupcakes. I hope you enjoy these cupcakes – they went fast in our house!

Strawberry Lemonade Cupcakes  |  Lemon & Mocha

Strawberry Lemonade Cupcakes
 
Yield: 12 cupcakes
Ingredients
for the cupcakes
  • 1 ½ cups all-purpose flour
  • 2 teaspoons baking powder
  • ½ teaspoon salt
  • ½ cup unsalted butter, room temperature
  • 1 cup sugar
  • 2 large eggs, room temperature
  • 1 ½ teaspoon vanilla
  • ½ cup milk
  • Zest and juice from 2 lemons
for the frosting
  • ½ ounce freeze dried strawberries
  • 1 cup unsalted butter (2 sticks), room temperature
  • 2 ½ cups powdered sugar
Directions
for the cupcakes
  1. Preheat oven to 350 degrees F. Line a cupcake pan with cupcake liners so you have enough for 12 cupcakes.
  2. In a small mixing bowl, sift together the flour, baking powder and salt until combined.
  3. In the bowl of a stand mixer or in a large bowl with a hand mixer, beat the butter and sugar on high until fluffy, about 2 minutes. Add the eggs and vanilla then beat on medium-high until combined. Add the flour mixture while on low until only a few streaks remain. Add the milk, lemon zest and juice then whisk by hand until combined.
  4. Fill the cupcake liners with the batter until ⅔ full. Bake for 18-22 minutes. They are done when a toothpick comes out clean and the tops spring back when you lightly press on them. Remove cupcakes from the pan and cool completely on a wire rack before frosting.
for the frosting
  1. Turn the freeze-dried strawberries into a powder using a food processor or by carefully crushing into a powder in the bag with a rolling pin. Set aside.
  2. In the bowl of a stand mixer or in a large bowl with a hand mixer, beat the butter until soft and fluffy, scraping down the sides as needed. Add the strawberry powder and the powdered sugar, beat on low until combined, scraping down the sides as needed. Frost the cupcakes using a pastry bag fitted with a 1M Wilton tip.

Lemon cupcake recipe from Sally’s Baking Addiction.

Carrot Cake Nest Cookies

Carrot Cake Nest Cookies  |  Lemon & Mocha

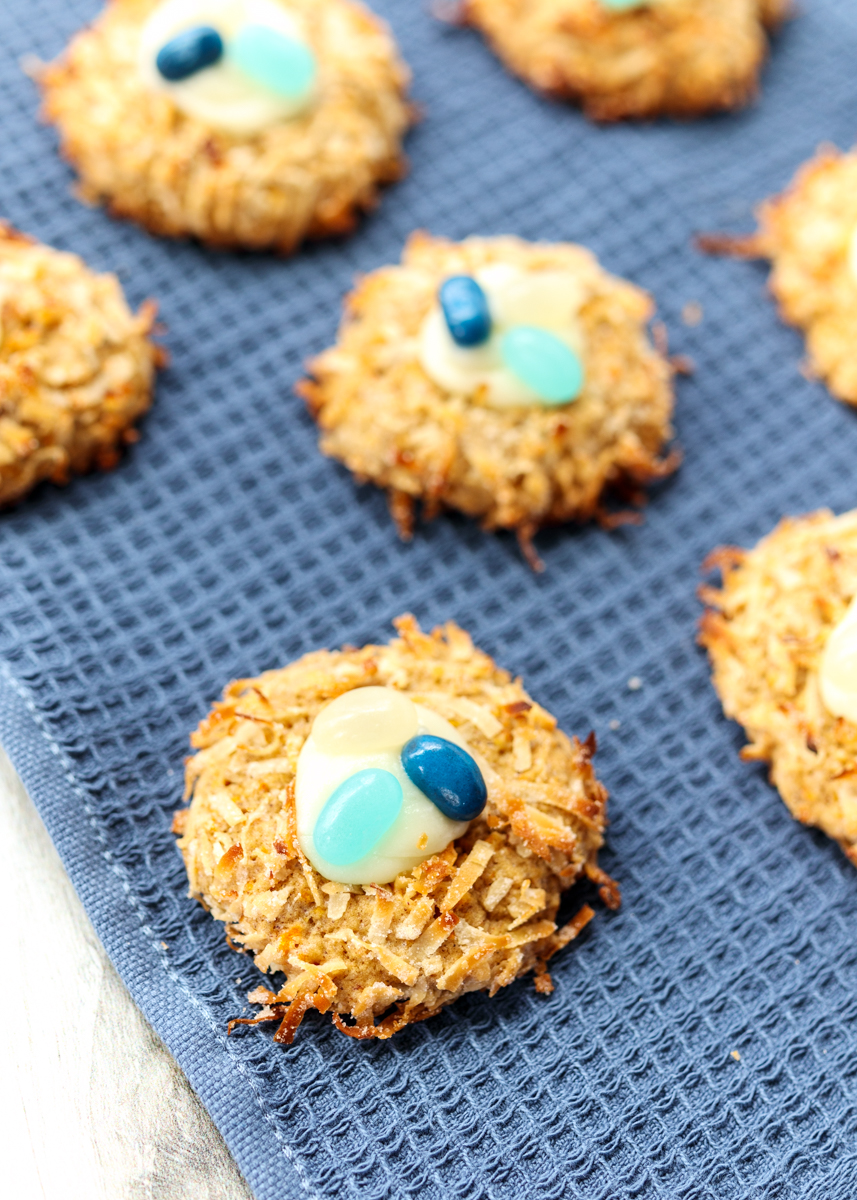
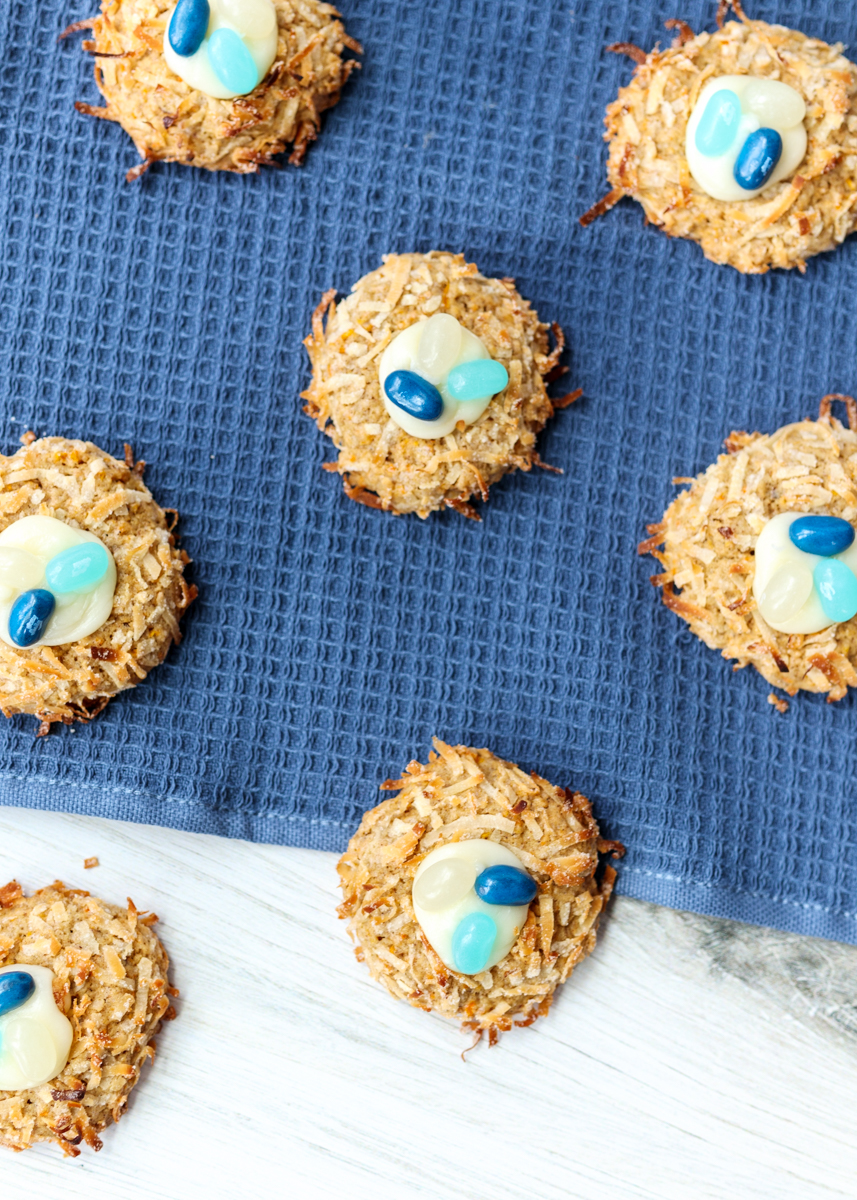
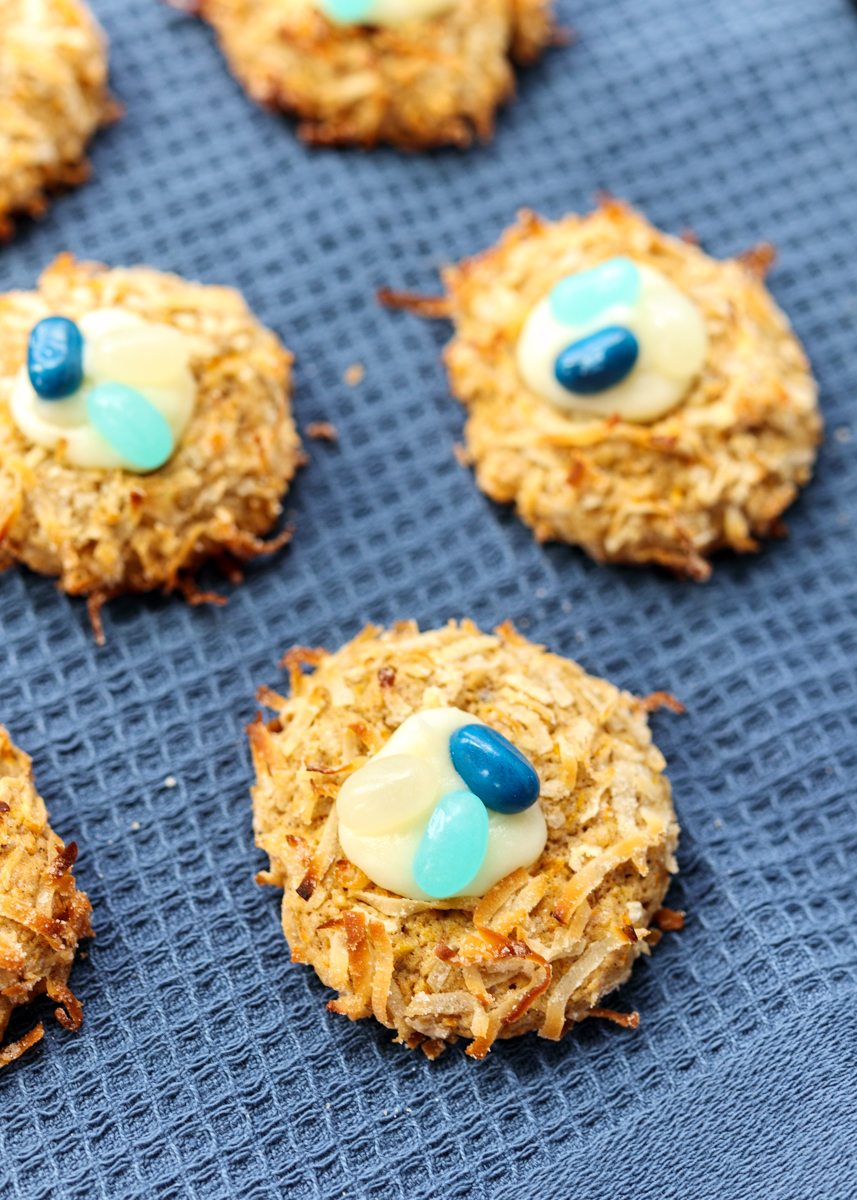
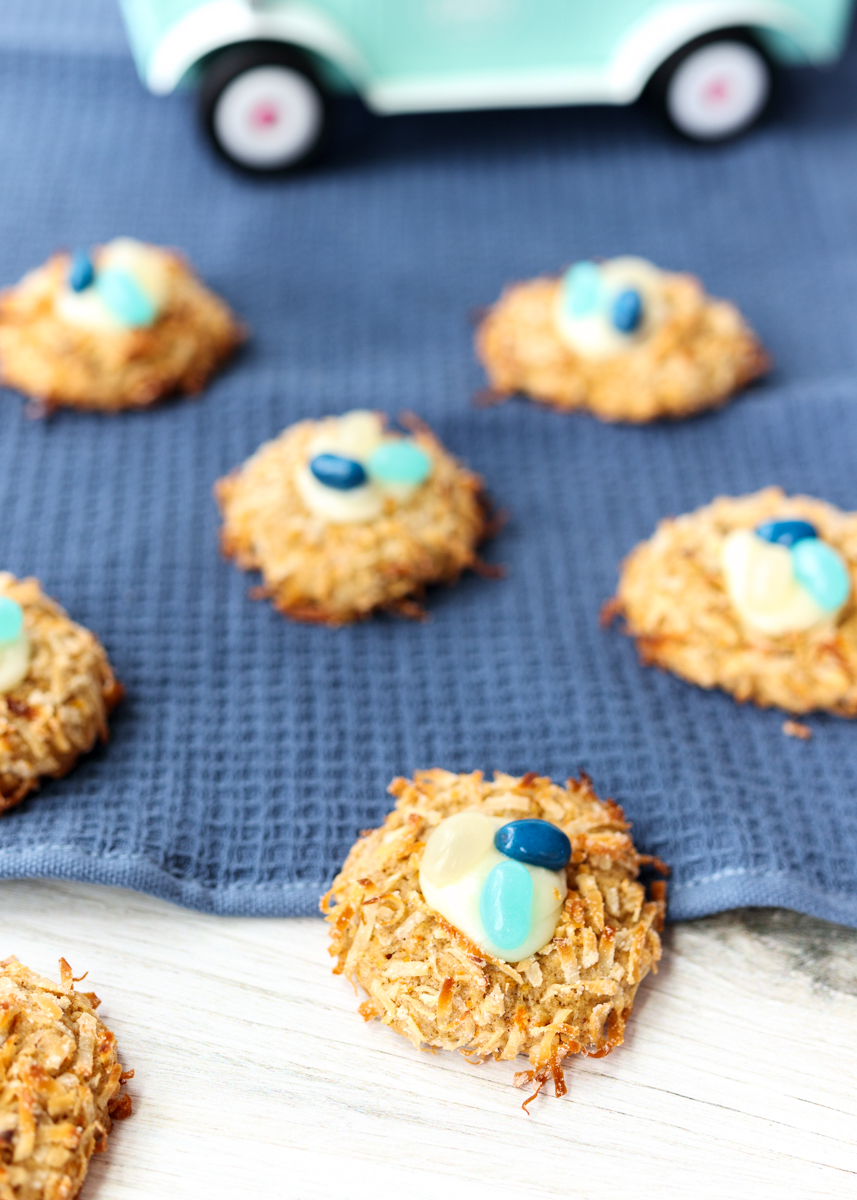
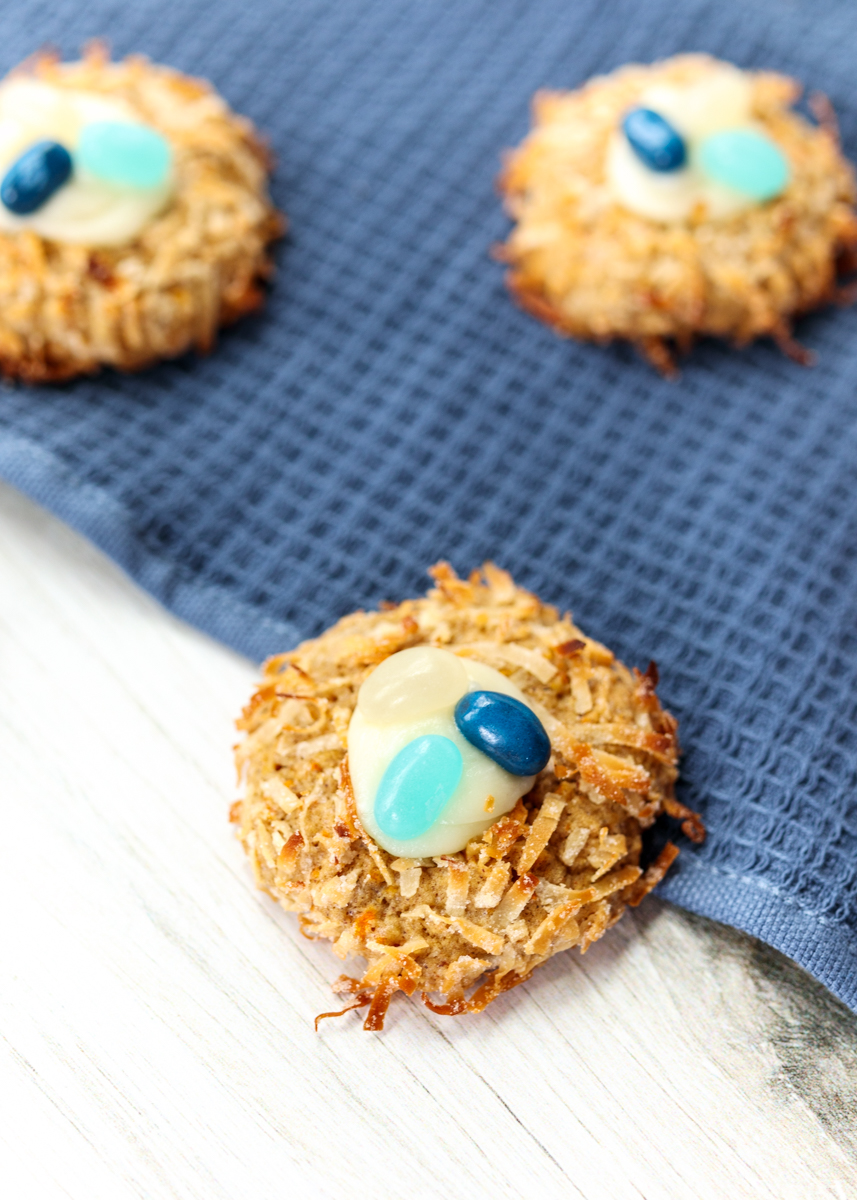
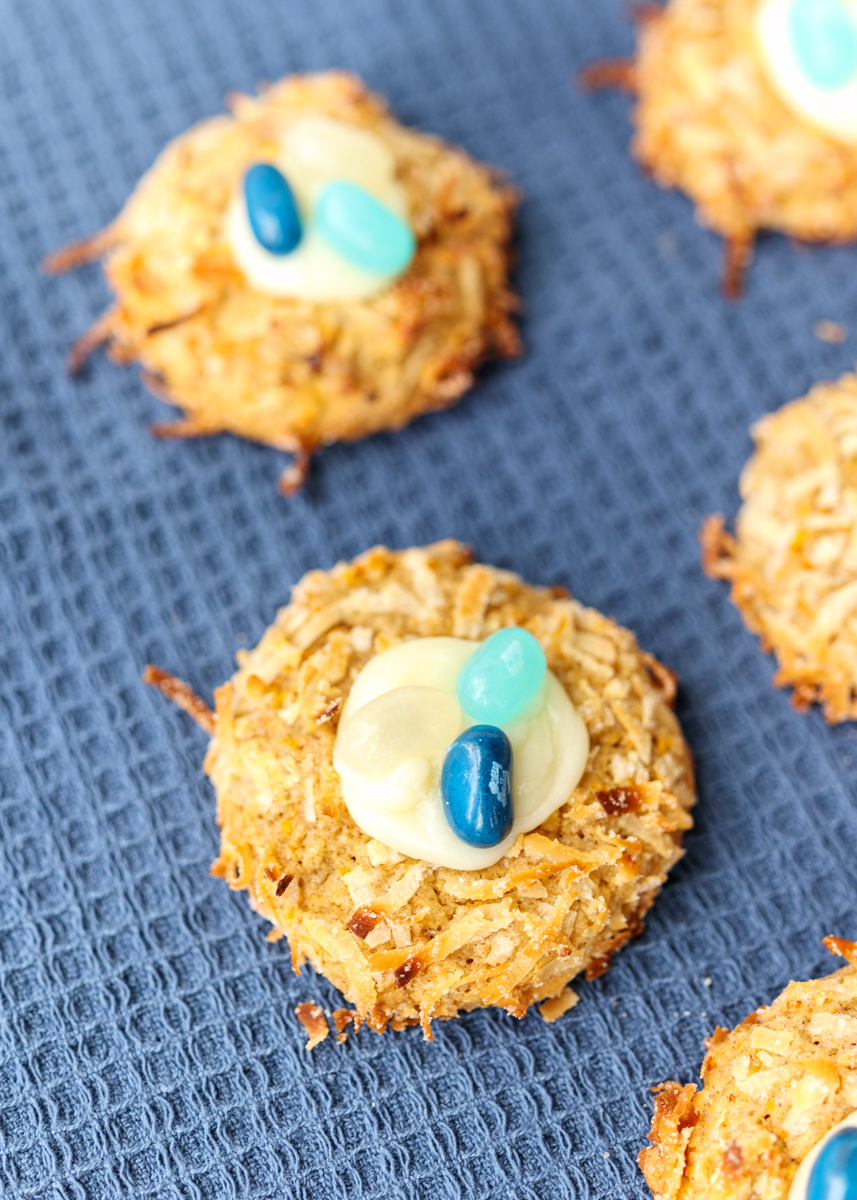
How cute are these Easter jelly bean cookies?! These Carrot Cake Nest Cookies are the Food Network Magazine’s April cookies, which is perfectly fitting because they just scream springtime. After last month’s complicated Rainbow Slice-and-Bake Cookies I was very excited to see a classic drop cookie – with a twist of course.

Carrot Cake Nest Cookies  |  Lemon & Mocha

The cookie batter is filled with all the carrot cake staples: grated carrots, chopped toasted walnuts, and the warming spices of cinnamon, ginger and cloves. Using brown sugar and an egg yolk gives the cookies that ideal chewy texture, which are similar tips I use in my Perfect Chocolate Chip Cookies. Before being baked, the cookie dough balls are rolled in shredded sweetened coconut. In addition to the chewiness, I love the crunch and texture you get in each bite from the chopped walnuts and shredded coconut.

Carrot Cake Nest Cookies  |  Lemon & Mocha

If it stopped there I would still gladly chow down on these carrot cake cookies any day of the week. But there’s more! Piped onto each cooled cookie is a pocket of sweet and buttery cream cheese frosting and some pretty jelly beans. Carrot cake is not complete without cream cheese frosting so it only makes sense for us to frost these cookies to make them truly carrot cake cookies! The little dollop in the middle of the cookie gives just the right balance of cookie to frosting.

Carrot Cake Nest Cookies  |  Lemon & Mocha

Even though they’re so cute, I thought I was going to end up picking off the jelly beans and eating them separately, but I actually really loved a bite of everything all together! Something about the added texture and sweetness of the jelly bean was a nice touch. I also used some of my favorite Jelly Belly jelly bean flavors so that might have been part of it!

Carrot Cake Nest Cookies  |  Lemon & Mocha

The recipe calls for blue and white jelly beans, but if you don’t have enough feel free to branch out into other fun Easter pastel colors. I used the blue and white combo ones for the photos, but I had other cookies in this batch topped with pink and purple jelly beans as well. I hope you all enjoy these Carrot Cake Nest Cookies – they were one of my favorites so far!

Carrot Cake Nest Cookies  |  Lemon & Mocha

Carrot Cake Nest Cookies
 
Yield: about 22 cookies
Ingredients
for the cookies
  • 1⅓ cups all-purpose flour
  • 1½ teaspoons ground cinnamon
  • ½ teaspoon ground ginger
  • Pinch of ground cloves
  • ¼ teaspoon salt
  • 8 tablespoons unsalted butter (1 stick), at room temperature
  • ⅓ cup granulated sugar
  • ⅓ cup dark brown sugar
  • 1 large egg yolk, at room temperature
  • 2 teaspoons vanilla extract
  • ¾ cup finely grated carrots (about 2 carrots)
  • ¼ cup finely chopped toasted walnuts
  • 1¾ cups shredded sweetened coconut
for the frosting
  • 2 ounces cream cheese, at room temperature
  • 2 tablespoons unsalted butter, at room temperature
  • ⅛ teaspoon vanilla extract
  • ½ cup powdered sugar
  • Blue and white jelly beans, for topping
Directions
for the cookies
  1. Place oven racks in the upper and lower thirds. Preheat oven to 350 degrees F. Line 2 baking sheets with parchment paper and set aside.
  2. In a medium bowl, whisk together the flour, cinnamon, ginger, cloves and salt. In the bowl of a stand mixer or in a large bowl with a hand mixer, beat the butter, granulated sugar and brown sugar on medium-high until fluffy, about 3 minutes. Add the egg yolk and the vanilla then beat again until well combined. Add the carrots and walnuts then beat again. Slowly add the flour mixture while on low speed and beat until just combined.
  3. Scoop tablespoons of dough then roll the balls into the shredded coconut. I used my medium Oxo cookie scoop. Place 1-inch apart on the prepared baking sheets. Use the handle of a wooden spoon or something round similar in size to make a deep indentation into the centers of the cookies. Bake the cookies, switching the baking pans halfway through from top to bottom, for 22-24 minutes, or until the cookies are set and the coconut is golden brown. Let cool completely on the pans placed on wire cooling racks.
for the frosting
  1. In the bowl of a stand mixer or in a medium bowl with a hand mixer, beat the cream cheese, butter and vanilla with the whisk attachment until light and fluffy. Add the powdered sugar and beat until fluffy. Transfer to a resealable plastic bag with the corner snipped or a pastry bag fitting with a round tip. If you aren’t ready to use right away, keep refrigerated. Pipe the frosting into the indentation if each cooled cookie then top each cookie with 3 jelly beans.

 Recipe from January/February 2019 issue of Food Network Magazine.

Some of the links above are affiliate links, which means I may receive a small commission for my referral. This does not affect the retail cost of the item. Thank you for supporting Lemon & Mocha!

Rainbow Slice-and-Bake Cookies

Rainbow Slice-and-Bake Cookies  |  Lemon & Mocha

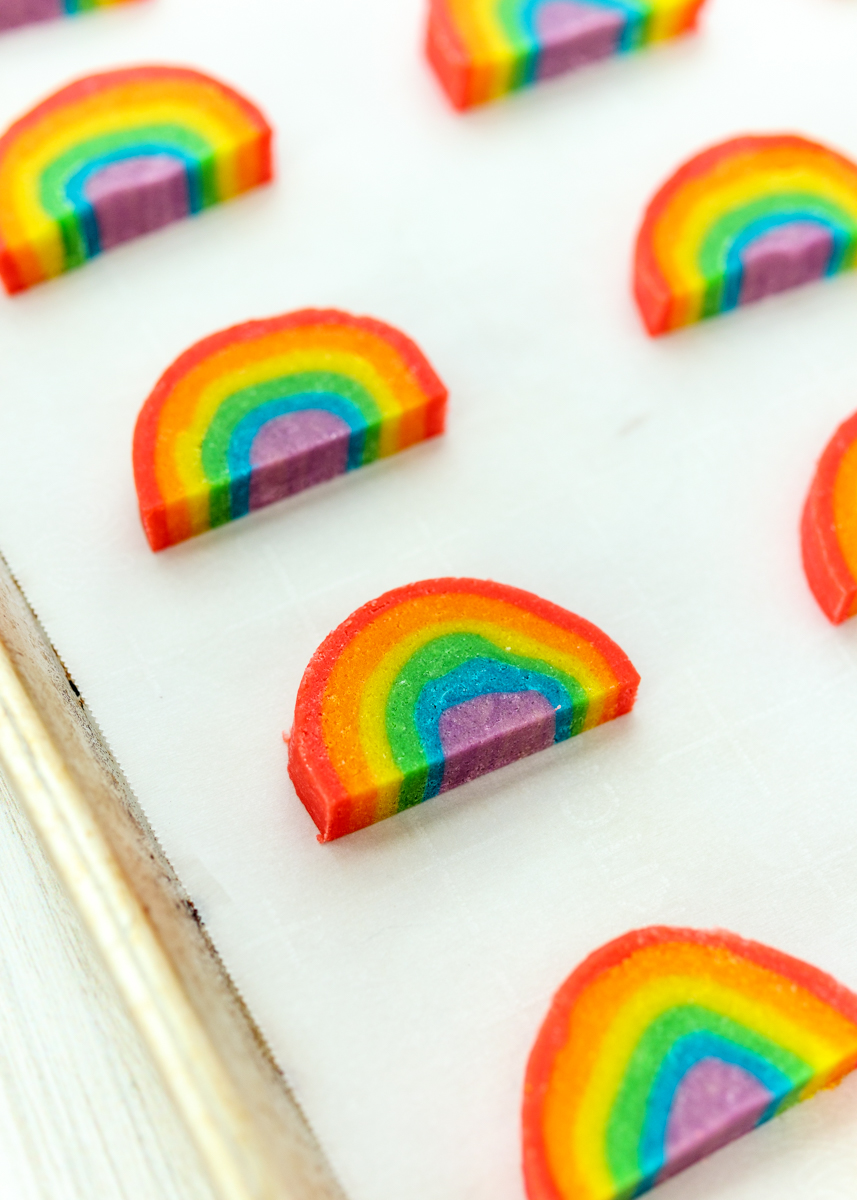
I have to admit that I was completely dreading these March cookies from the Food Network Magazine. The photos looked incredibly intimidating, especially since it’s a magazine so of course the rainbow cookies in the photograph was absolute perfection. Then I looked at the recipe and saw it involved tinting the cookie dough six, yes, six, different colors and these weird instructions for rolling, measuring and wrapping the dough that somehow gives you these cool rainbow cookies. I’m committed to completing this monthly cookie challenge so I rolled my sleeves up and dove in.

Rainbow Slice-and-Bake Cookies  |  Lemon & Mocha

The actual cookie dough is a very simple, buttery cookie recipe. You then divide the dough into six pieces so you’re going to want to make sure you have a lot of bowls ready! I used my kitchen scale to divide the dough since the recipe specified the amounts in ounces. Side note: if you don’t already have a kitchen scale, I highly recommend one if you do a lot of baking. They are fairly inexpensive (under twenty dollars) and are necessary for many baking recipes. Particularly for when you are baking something with layers, for example I make Matt those Italian tricolor cookies every Christmas and it is definitely key to make sure each of those thin layers has an exactly even amount of batter.

Rainbow Slice-and-Bake Cookies  |  Lemon & Mocha

Anyways, back to these crazy rainbow cookies! So once you have your dough divided up you tint each section with gel food coloring. Food coloring typically comes in a pack of red, yellow, green and blue. You could combine colors to make the orange and purple, but I used the same neon gel food coloring that I used for my Chocolate Marshmallow Monster Cookie Sandwiches, which ended up being a lot easier and didn’t use up all of the red food gel. Now, I bet you’re wishing I would stop babbling about food coloring and are wondering how to get that cool layered rainbow shape!

Rainbow Slice-and-Bake Cookies  |  Lemon & Mocha

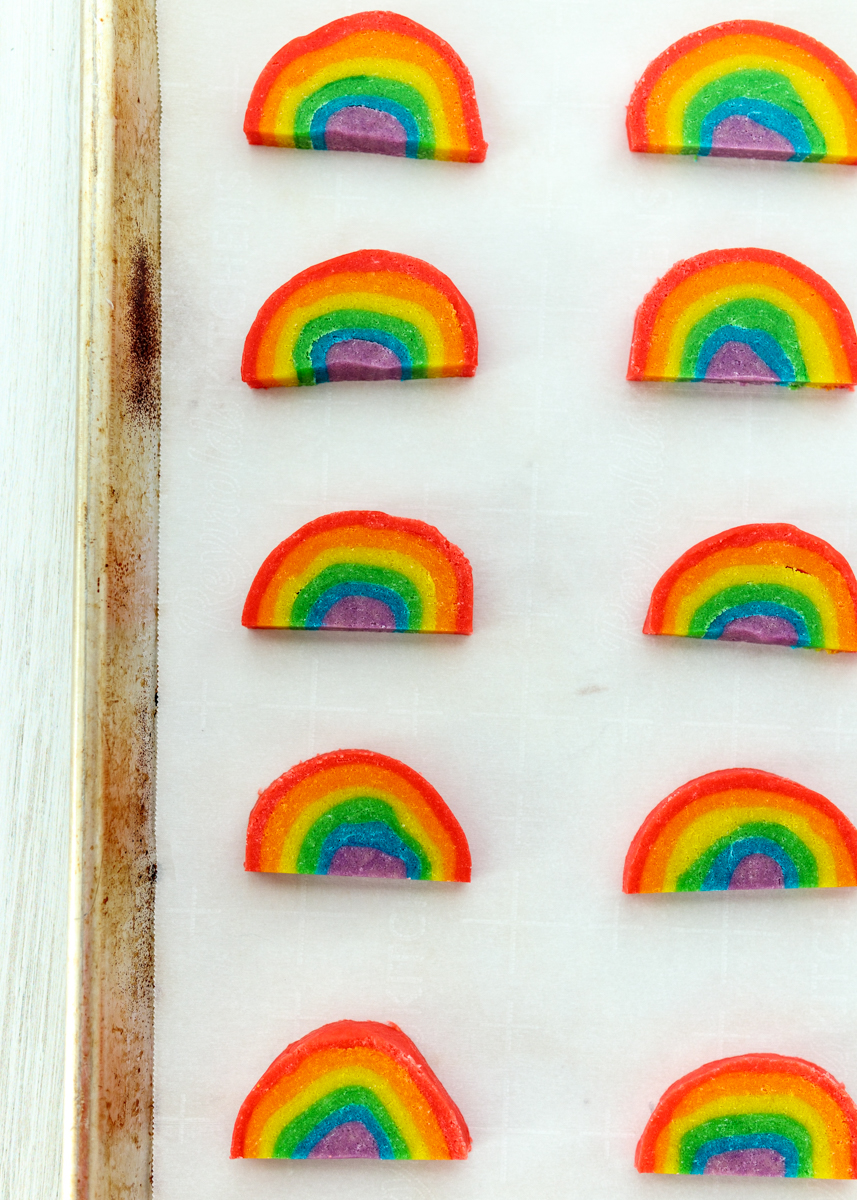
The gist of it is that the purple section gets rolled into a log. The blue section then gets rolled into a rectangle that wraps around the log, then the green section gets rolled into a slightly larger rectangle that wraps around the now larger log and so on until you have a big roll of cookie dough. After the dough log has had a chance to chill, you slice rounds, like a classic slice-and-bake cookie, then cut each round in half to get that rainbow half-circle shape. Voila!

Rainbow Slice-and-Bake Cookies  |  Lemon & Mocha

I was relieved to discover that making these cookies wasn’t as bad as I anticipated, but if I ever had a desperate need for rainbow cookies in the future I would most likely just pipe rainbow frosting on top since mixing gel food coloring into cookie dough – six times – takes far too long to make it worth it in my opinion. What do you think? Would you give these pretty Rainbow Slice-and-Bake Cookies a shot?

Rainbow Slice-and-Bake Cookies  |  Lemon & Mocha

Rainbow Slice-and-Bake Cookies
 
Yield: about 36 cookies
Ingredients
  • 2½ cups all-purpose flour
  • ½ teaspoon baking powder
  • ¼ teaspoon salt
  • 1 cup unsalted butter (2 sticks) at room temperature
  • ¾ cup granulated sugar
  • ¾ cup powdered sugar
  • 2 large egg yolks
  • 2 teaspoons vanilla extract
  • ¼ teaspoon each red, orange, yellow, green, blue and purple gel food coloring
  • 1 cup white candy melts
Directions
  1. In a medium bowl, sift together the flour, baking powder and salt. In the bowl of a stand mixer or in a large bowl with a hand mixer, beat the butter, granulated sugar and powdered sugar on medium-high speed for 2 minutes, or until light and fluffy. Add the egg yolks and vanilla then beat to combine. Gradually add the flour mixture on low speed until just combined.
  2. Divide the dough: 2 large pieces (about 7 ounces each), 2 medium pieces (about 5 ounces each) and 2 small pieces (about 3 ounces each). Tint 1 of the large pieces of dough red and tint the other one orange. Use a rubber spatula (so it doesn’t stain) to work the food coloring into the dough. Repeat with yellow and green for the 2 medium pieces of dough. Repeat with blue and purple for the 2 small pieces of dough.
  3. Lay a piece of plastic wrap, about 12 inches long, on a clean work surface. Take a large piece of wax paper, about 12 inches long, and lightly flour it. Put on gloves so you won’t get food coloring on your hands and so you can easily move from one color to the next. On the floured wax paper, roll the purple dough into a 7-inch log. It will be about ¾-inch thick. Set aside on the plastic wrap. Brush any purple dough off your gloved hands or the wax paper; dust with more flour if needed.
  4. Use a rolling pin to roll out the blue dough on the wax paper into a rectangle, roughly 3½ inches by 7 inches. Place the purple log on the edge of the blue rectangle and use the wax paper to help you tightly roll it around the purple log, lightly pinching the seam where the 2 long blue edges meet. Set the log back aside on the plastic wrap. Brush any blue dough off your gloved hands, the wax paper or the rolling pin; dust the wax paper with more flour if needed. Repeat for the remaining colors, in these sizes and in this order: green 5 inches by 7½ inches; yellow 6 inches by 8 inches; orange 7 inches by 8½ inches; red 8 inches by 9 inches. Wrap the plastic wrap around the whole log then refrigerate for 8 hours or overnight or place in the freezer for 1 hour.
  5. Preheat the oven to 375 degrees F. Line 2 baking sheets with parchment paper and set aside.
  6. Cut the ends off of the log. Slice into ⅜-inch thick rounds then slice each round in half. If any of the cookies have a slight gap between the layers in spots just gently press them together. Place the rainbow cookies about 1 inch apart on the prepared baking sheets then place them in the fridge for at least 15 minutes. This helps prevent spreading when they bake.
  7. Take one pan out of the fridge and bake the cookies for 10-13 minutes. The cookies will be just set around the edges. When you take them out of the oven, if the bottoms of the rainbow have puffed out a little, carefully use a spatula to help press the bottom of the cookie to be flat. You have to do this while they’re right out of the oven because once they cool their shape will be set. Let the cookies cool on the pan for 5 minutes then transfer to a wire cooling rack to cool completely. Remove the second baking sheet from the fridge and repeat the baking and cooling instructions.
  8. Once the cookies are completely cooled, melt the candy melts in a microwave safe bowl for 30 seconds, stir, then continue microwave and stirring in 20 second intervals until smooth. Place the melted candy melts into a pastry bag fitted with a small round tip or in a resealable plastic bag with the corner snipped. Pipe the little clouds on the ends of each rainbow cookie then let set for at least 5 minutes.

 Recipe from January/February 2019 issue of Food Network Magazine.

Some of the links above are affiliate links, which means I may receive a small commission for my referral. This does not affect the retail cost of the item. Thank you for supporting Lemon & Mocha!

Chocolate Tahini Banana “Soft Serve”

Chocolate Tahini Banana Soft Serve  |  Lemon & Mocha

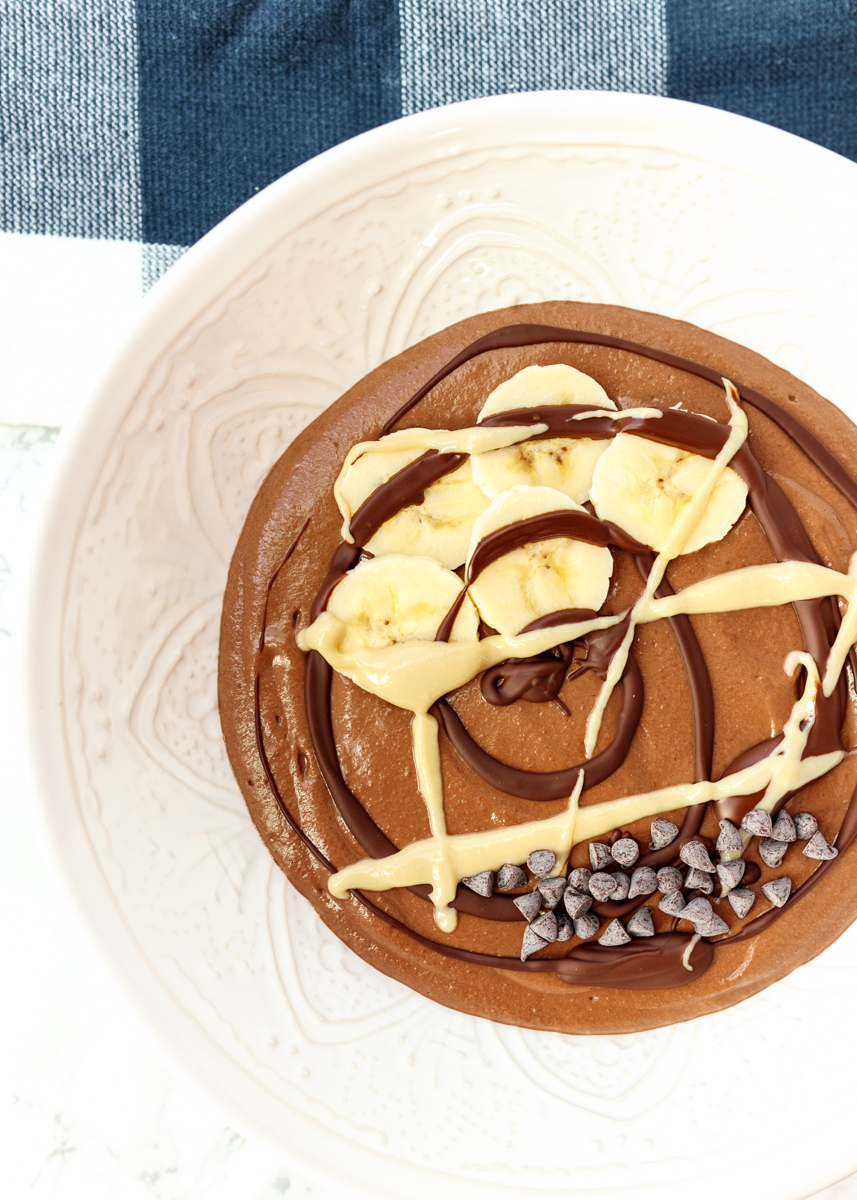
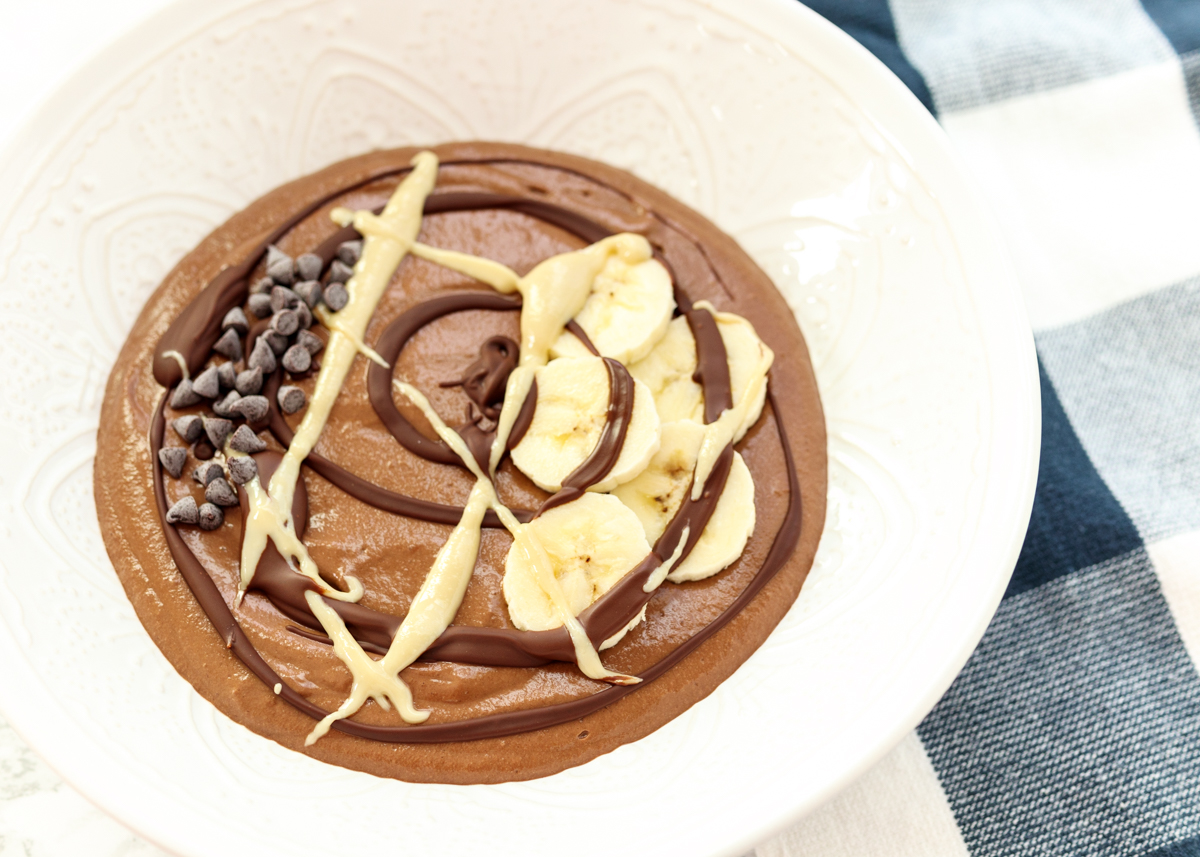
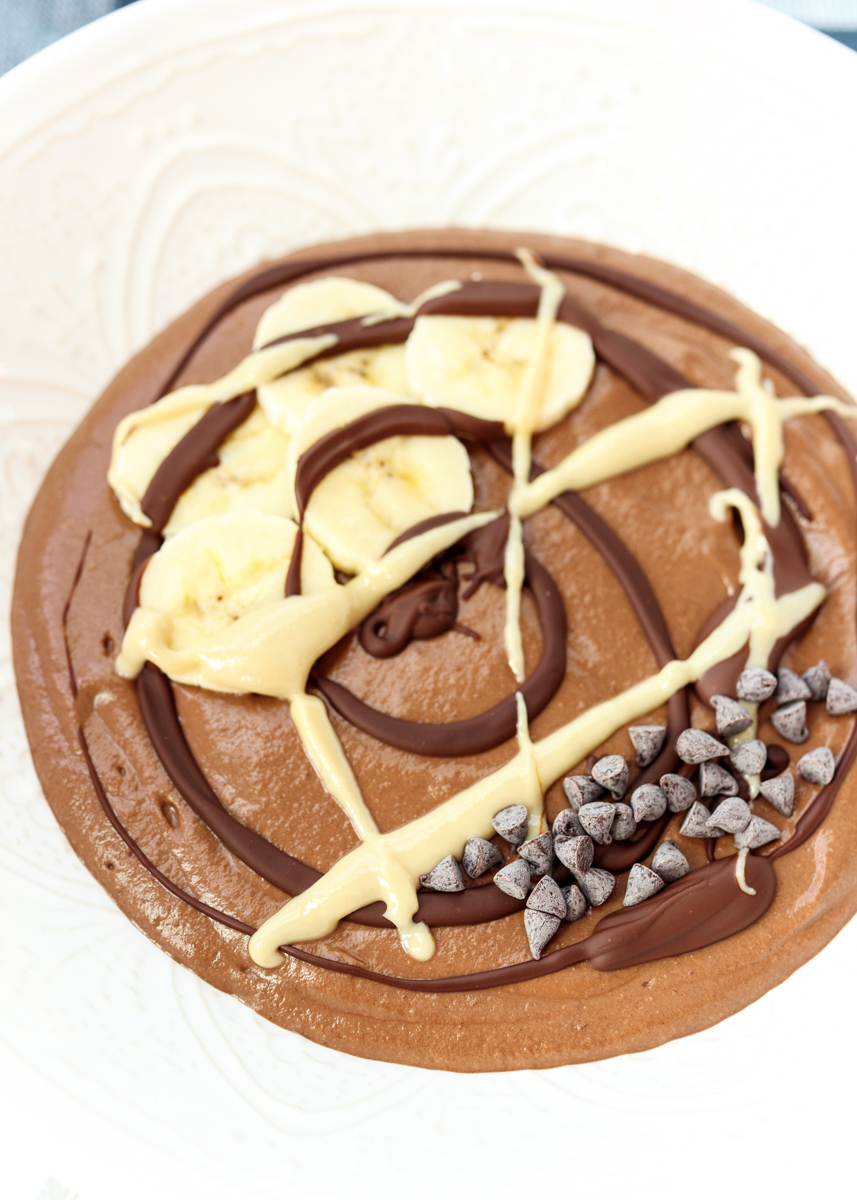
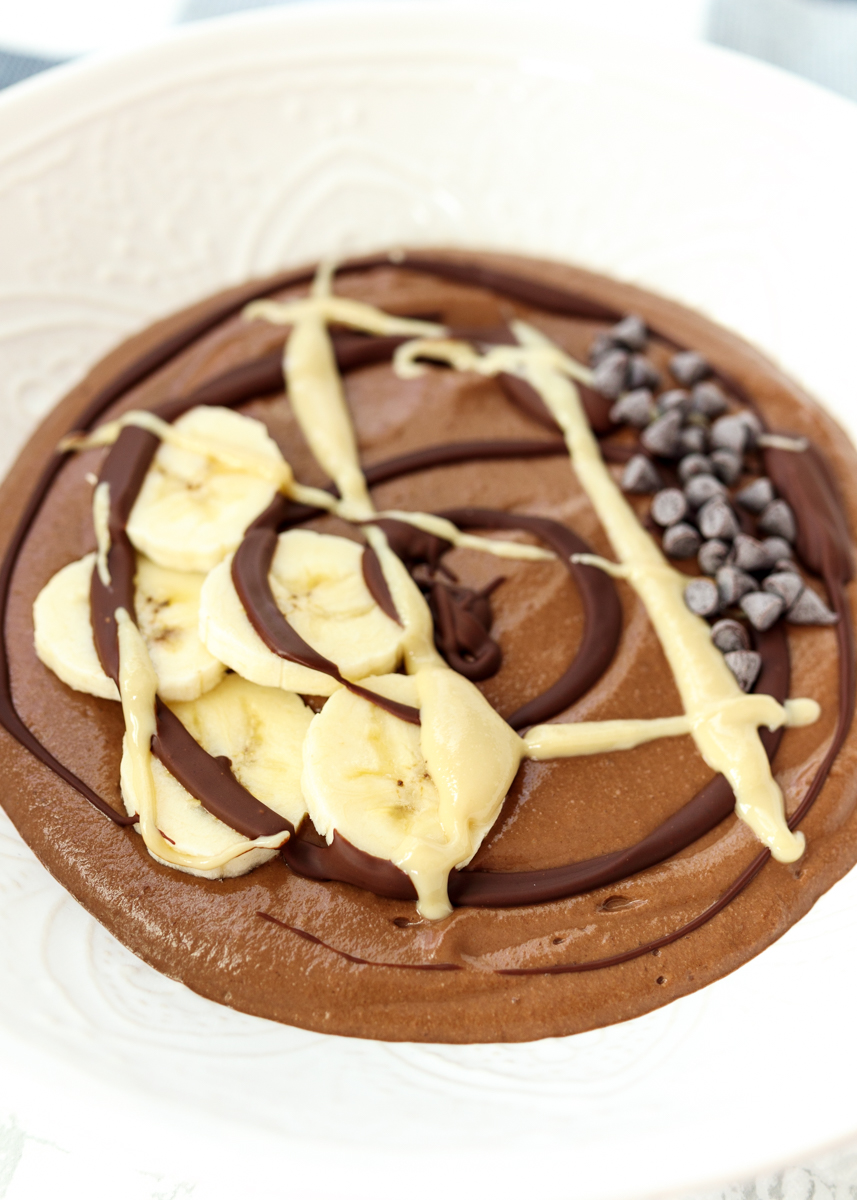
Happy Friday, everyone! Today I’m sharing a chocolate-packed tasty treat with you all. This Chocolate Tahini Banana “Soft Serve” is creamy, smooth and topped with a quick chocolate magic shell. If the magic shell sounds familiar it’s because that’s what I used to top the Pistachio Semifreddo I posted last summer. It’s no secret that I love using tahini in the kitchen. I use it to make hummus, turn it into a dressing and drizzle it over lettuce wraps. However, I had only ever used it savory dishes and lately I’ve seen a lot of sweet recipes popping up with tahini listed as an ingredient.

Chocolate Tahini Banana Soft Serve  |  Lemon & Mocha

At first I thought using tahini in a sweet recipe sounded really strange. But then when I thought about it more, tahini is very similar to peanut butter. They’re both creamy, nutty and rich in flavor. Considering I love peanut butter in sweet desserts, it’s not too much of a stretch to think I might also enjoy tahini swapped in. Clearly, since I’m posting this recipe now, the verdict is that I enjoyed it very, very much!

Chocolate Tahini Banana Soft Serve  |  Lemon & Mocha

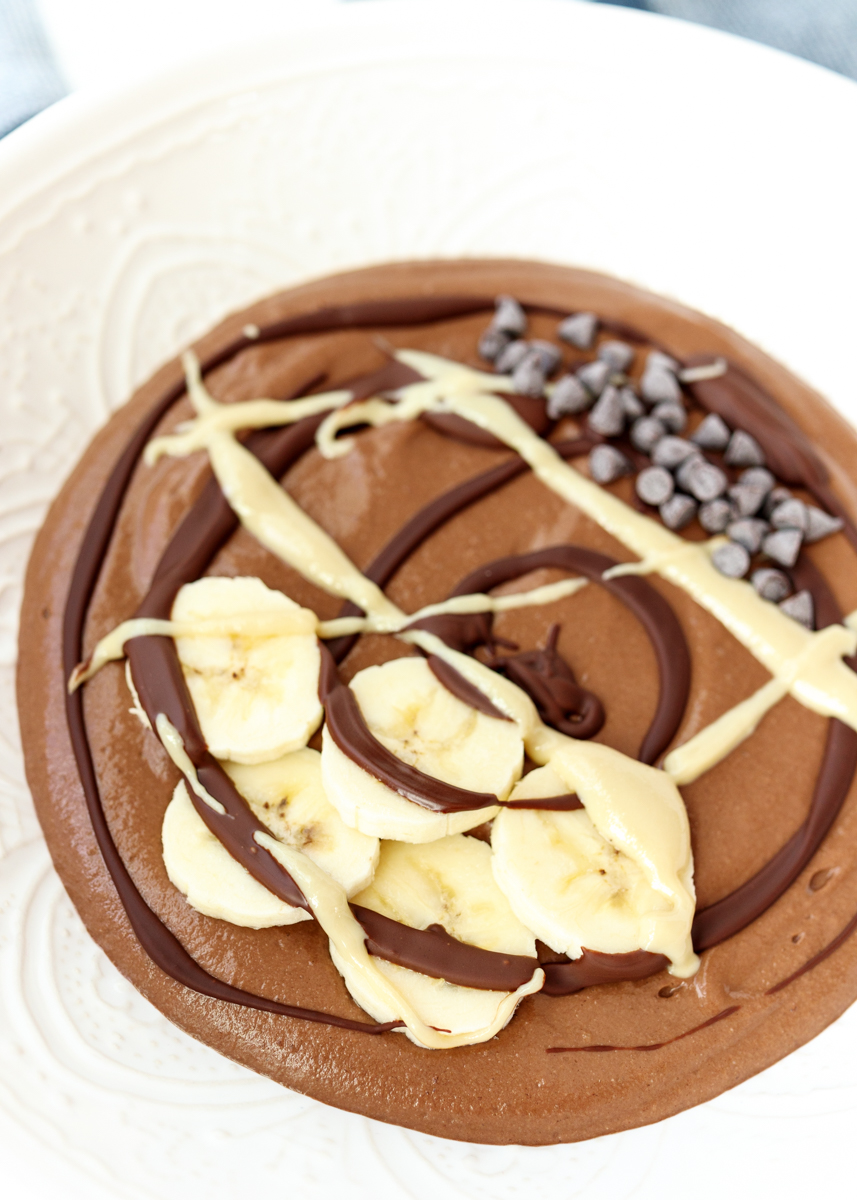
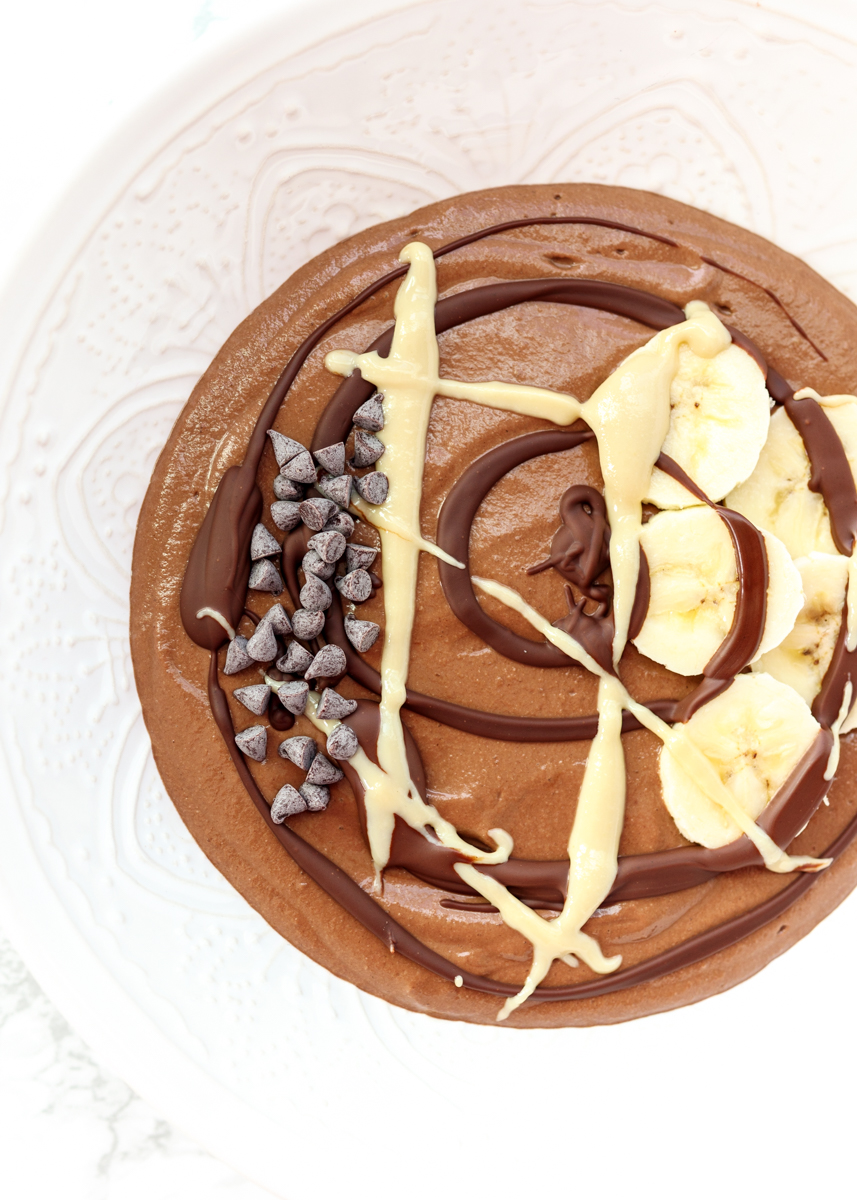
I swirled it into my chocolate banana “soft serve” and drizzled a little more on top for good measure. Have you ever had banana “soft serve?” I’ve also heard it called nice cream. There’s probably many different ways it’s described, but I think of it as a dessert smoothie bowl without the yogurt. It has the texture of partially melted ice cream and thanks to the cocoa powder it’s super chocolatey. You make it by blending frozen bananas, which bring the sweetness and that semi-frozen texture.

Chocolate Tahini Banana Soft Serve  |  Lemon & Mocha

I added frozen cauliflower florets as an experiment and it was a big success! It didn’t change the flavor at all, but secretly added some veggies to this sweet treat. The creamy tahini added the right amount of nuttiness, which pairs so well with chocolate and banana. Of course it wouldn’t truly be a chocolate treat if I didn’t find a way to add chocolate on top of my chocolate so I drizzled some magic shell on top. You can make magic shell by melting chocolate chips with coconut oil then drizzling over something cold, like this Chocolate Tahini Banana “Soft Serve,” which makes it harden into fun chocolate swirls that you can crack with your spoon and eat with each bite.

Chocolate Tahini Banana Soft Serve  |  Lemon & Mocha

I love making this when I want to eat some dessert, but I don’t already have anything made. A few bursts in my high-speed blender and it’s time to eat!

Chocolate Tahini Banana Soft Serve  |  Lemon & Mocha

Chocolate Tahini Banana "Soft Serve"
 
Yield: 2 servings
Ingredients
  • 1½ cups frozen ripe banana slices (about 1½ bananas)
  • 1 cup frozen cauliflower florets
  • 3 tablespoons cocoa powder
  • 1 tablespoon agave
  • 1 teaspoon vanilla
  • 2 tablespoons chocolate chips
  • ½ teaspoon coconut oil
  • Sliced bananas and tahini, for topping
Directions
  1. Add the frozen banana slices, cauliflower florets, cocoa powder, agave and vanilla to a high-speed blender. Blend until smooth. Taste for sweetness and add more agave if needed. Divide the mixture between 2 bowls.
  2. Melt the chocolate chips and the coconut oil in a microwave safe bowl. Microwave for 30 seconds, then stir. Continue to microwave for 15 second increments, stirring after each, until melted and smooth. Carefully drizzle over the “soft serve” to harden and top with banana slices and a tahini drizzle.
Notes
I've also made this using 88 Acres Watermelon Seed Butter instead of tahini using a 1-1 substitution.