About Lauren

Posts by Lauren :

Chicken Piccata over Creamy Lemon Orzo

Chicken Piccata over Creamy Lemon Orzo  |  Lemon & Mocha

Dinner has arrived! While not quite as you still need to cook it, but this Chicken Piccata over Creamy Lemon Orzo is the perfect recipe for an easy and cozy meal that everyone will love. We’re sautéing chicken cutlets and coating them with a fresh lemon and caper sauce. The best part is that the juicy chicken cutlets are sitting over a warm orzo and leek dish that’s bursting with lemon flavor.

Chicken Piccata over Creamy Lemon Orzo  |  Lemon & Mocha

The smell of this meal cooking is going to have you sneaking bites off the stove. And by sneaking bites I mean scooping out a bowlful of the orzo and shoving it into your mouth like you haven’t eaten in five days.

Chicken Piccata over Creamy Lemon Orzo  |  Lemon & Mocha

This is my favorite savory dish I’ve made in a while and I plan on making it many more times. It’s simple enough that I can whip it up for Matt and I on a weeknight, but I would also totally make this for company. Add in a green salad and your meal is complete!

Chicken Piccata over Creamy Lemon Orzo  |  Lemon & Mocha

Matt and I like to have Valentine’s Day dinner at home, so if you’re like us and staying in tonight then I recommend making a quick trip to the store to get everything to make this Chicken Piccata over Creamy Lemon Orzo. Other than the bright lemon flavor, my favorite part of this dish is that it tastes rich and indulgent, but feels very light. You would never guess there’s less than two tablespoons of butter across all four servings!

Chicken Piccata over Creamy Lemon Orzo  |  Lemon & Mocha

I hope you all enjoy this one and have a lovely Valentine’s Day weekend!

Chicken Piccata over Creamy Lemon Orzo  |  Lemon & Mocha

Chicken Piccata over Creamy Lemon Orzo
 
Yield: 4 servings
Ingredients
  • 4 boneless skinless chicken breasts, sliced in half lengthwise to have 8 cutlets
  • ½ cup all-purpose flour
  • 3 cups low sodium chicken broth, divided
  • 1 bay leaf
  • 1½ tablespoons butter, divided
  • 5 tablespoons olive oil, divided
  • 1 leek (white and light green parts), halved lengthwise and thinly sliced (see note)
  • 1 cup orzo
  • ¼ cup half and half
  • 1 clove garlic, minced
  • 3½ tablespoons lemon juice, divided
  • 3 tablespoons white wine
  • 2 tablespoons capers
  • 2 tablespoons chopped fresh parsley
  • Zest from ½ a lemon
Directions
  1. Season the chicken cutlets with salt and pepper. Add the flour to a shallow bowl then coat the chicken cutlets completely, shaking off the excess. Put aside until ready to use.
  2. In a small saucepan over medium heat or in the microwave, heat 2 cups of the chicken broth, ½ cup of water and the bay leaf until simmering.
  3. Melt ½ tablespoon of the butter and 1 tablespoon of the olive oil in a medium saucepan over medium heat. Add the sliced leeks and cook for 4 minutes, stirring occasionally. Add the orzo then season with salt and pepper. Add the warmed broth mixture and bring it to a simmer. Add the half and half then keep at a simmer, stirring occasionally, for 8-10 minutes, or until most of the liquid is absorbed.
  4. While the orzo is simmering, start the chicken. Heat 3 tablespoons of the olive oil in a large skillet over medium heat. Add the chicken and cook for 4-5 minutes per side, or until an internal temperature of 165 degrees F is reached. If your skillet is not big enough you will have to do this in two batches, just remove the pan from the heat and let cool slightly in between the batches. Remove the chicken once it’s been cooked and set aside.
  5. Heat 1 tablespoon of the butter and a tablespoon of the olive oil over medium heat in the skillet from the chicken. Sauté the garlic until fragrant, about 30 seconds, then add the remaining cup of the chicken broth, 3 tablespoons of the lemon juice and the white wine. Season with salt to taste. Whisk together and let come to a simmer. Add the capers. Add the chicken back to the skillet and let simmer for 5 more minutes.
  6. When the orzo is done, remove the bay leaf. Stir in the remaining ½ tablespoon of butter, parsley and lemon zest. Serve with the chicken and sauce poured overtop.
Notes
Leeks harbor a lot of dirt so they need to be cleaned really well. Add the sliced leeks to a medium mixing bowl filled with water to separate and move around so the dirt sinks to the bottom and the leeks stay floating on the top. Scoop the sliced leeks out with your hand and place in a colander to lightly drain before putting in the saucepan.

 Orzo recipe adapted from December 2019 issue of Food Network Magazine.

Recipe adapted from Eat This, Not That!.

Some of the links above are affiliate links, which means I may receive a small commission for my referral. This does not affect the retail cost of the item. Thank you for supporting Lemon & Mocha!

Red Velvet Swirl Cheesecake

Red Velvet Swirl Cheesecake  |  Lemon & Mocha

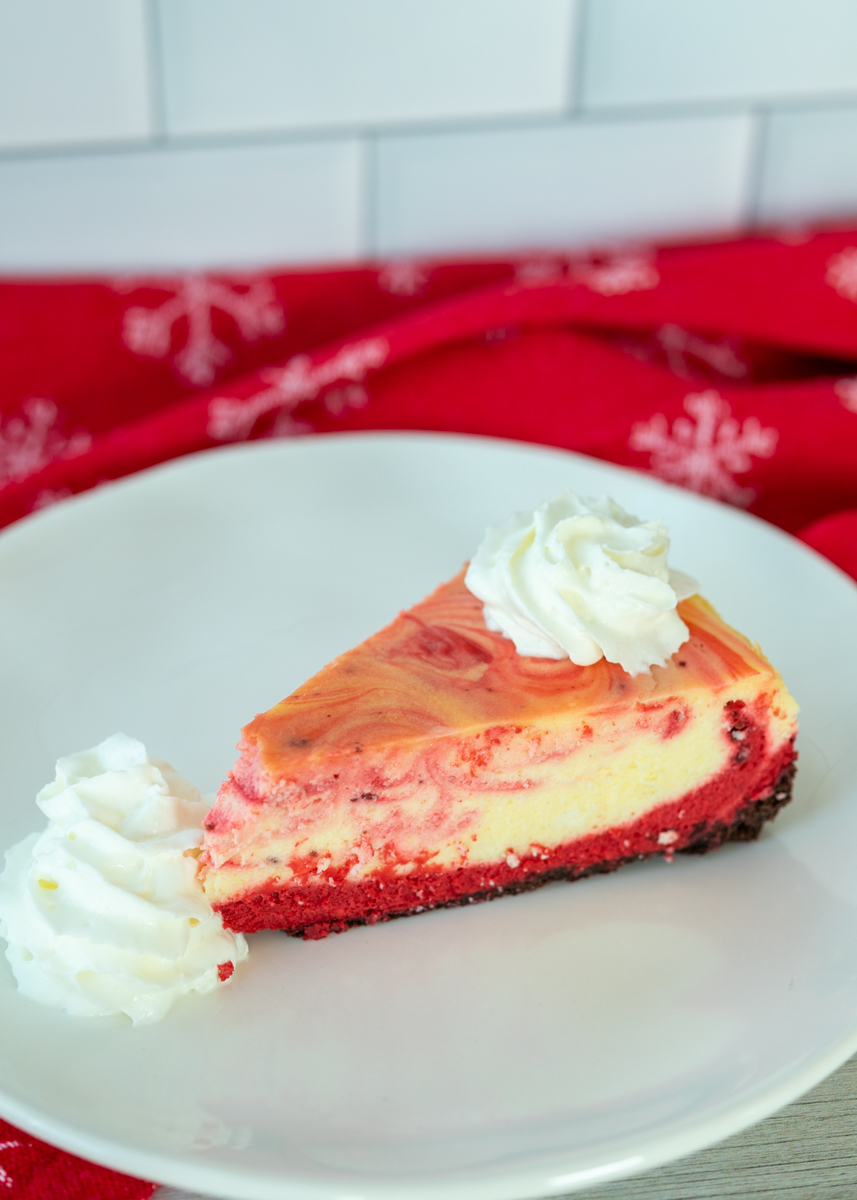
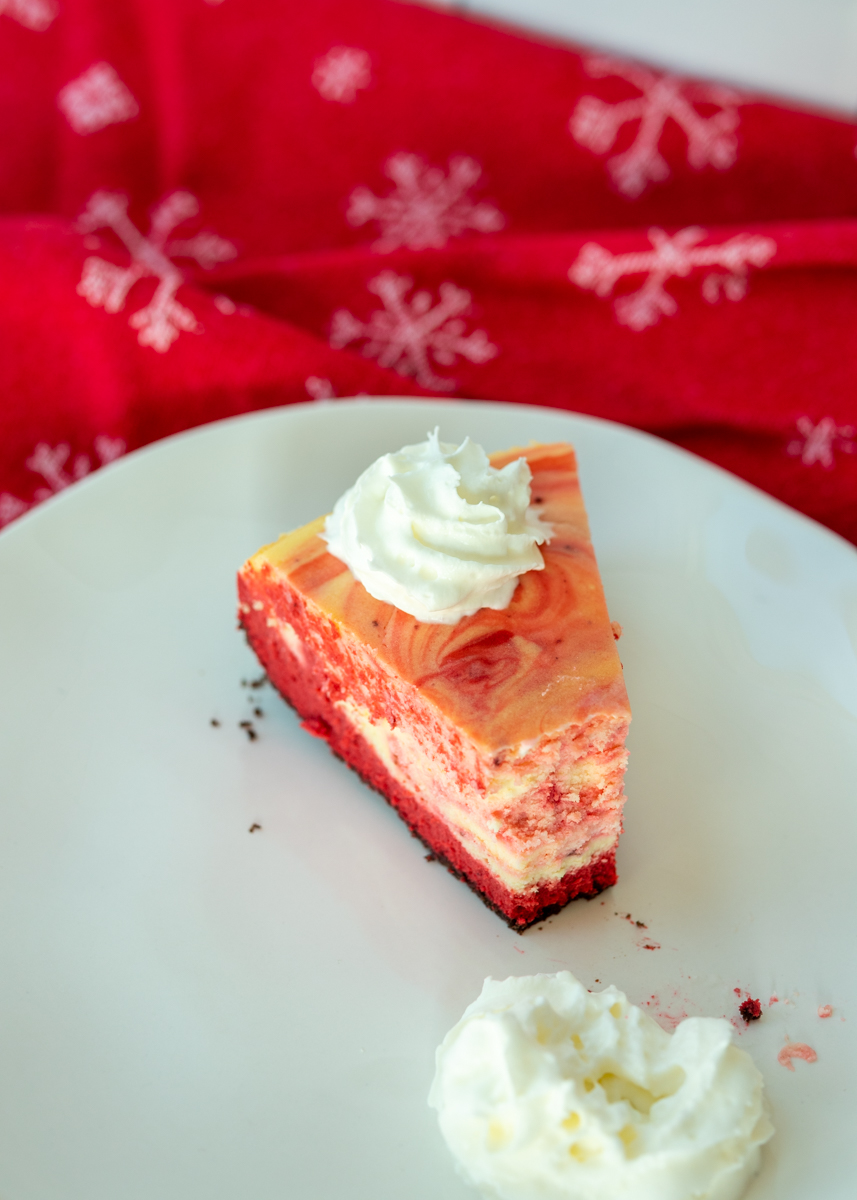
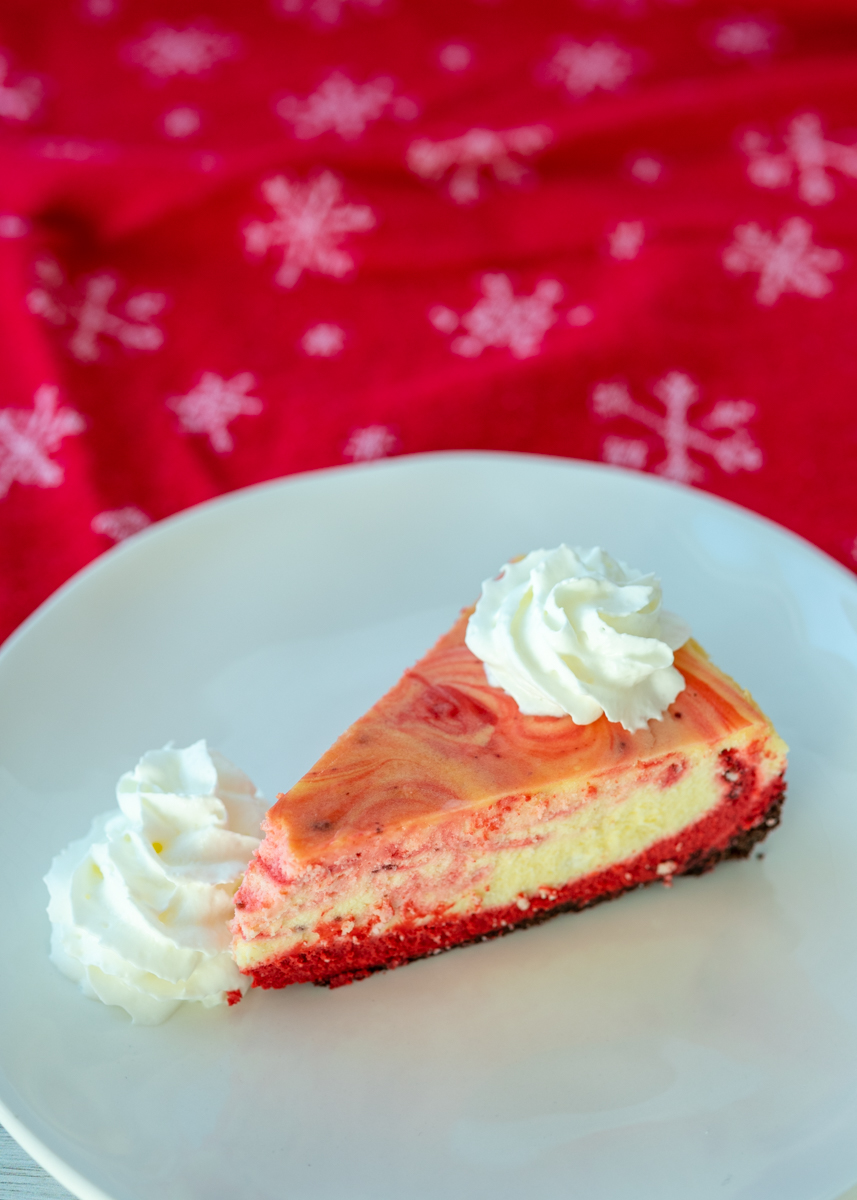
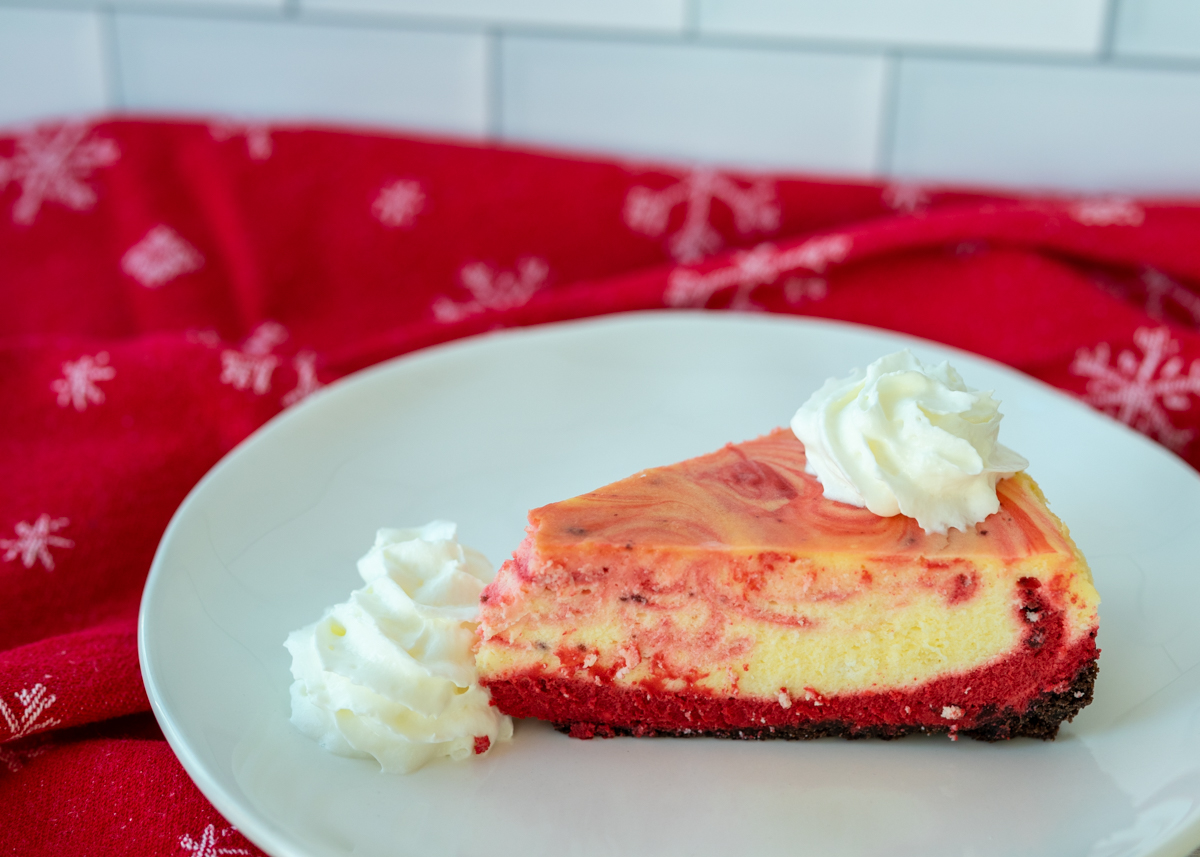
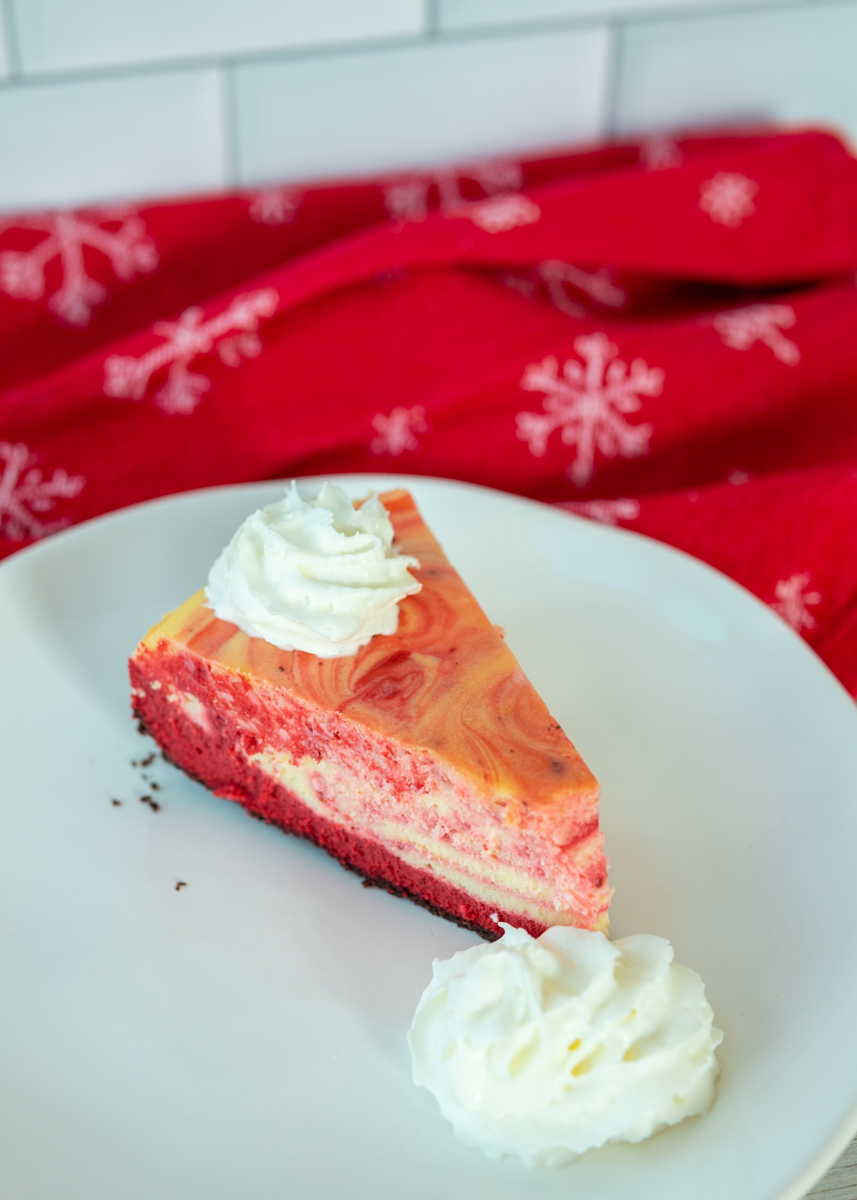
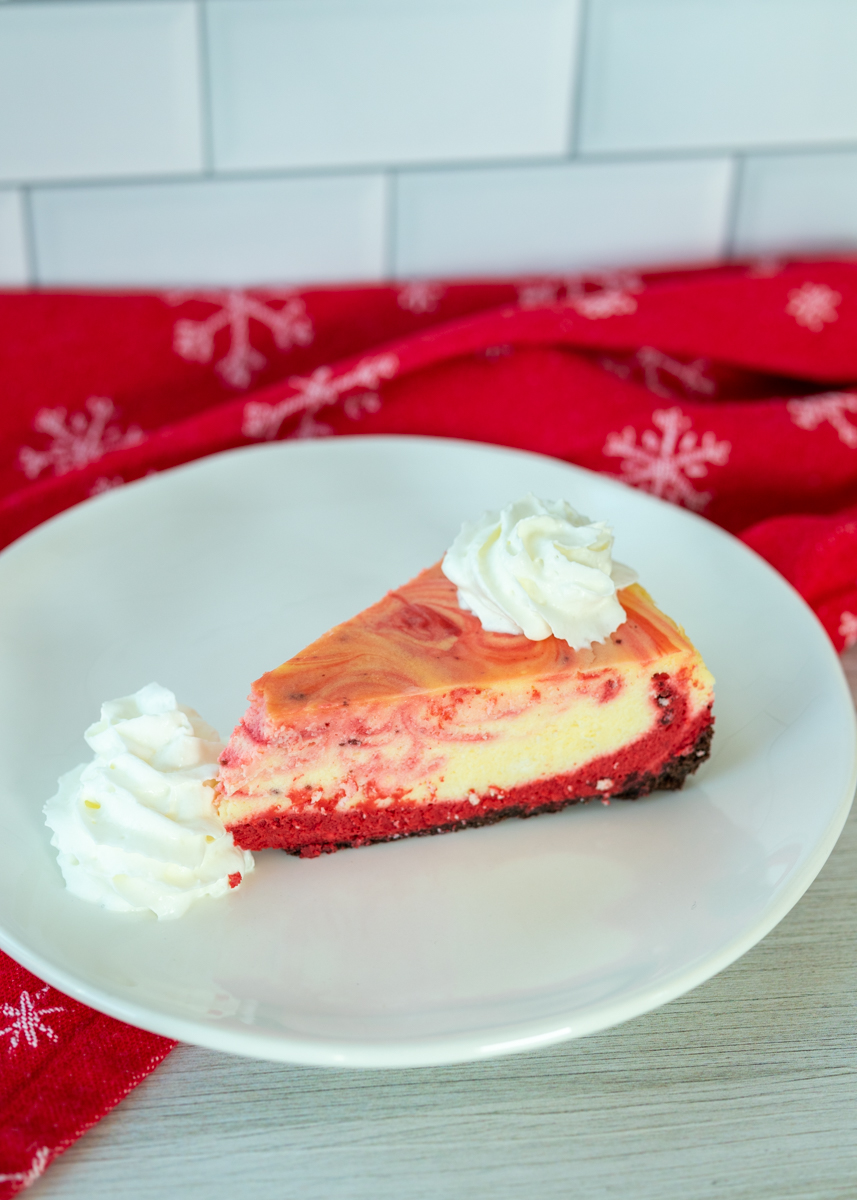
It’s time for this month’s cheesecake recipe! Of course with Valentine’s Day coming up this Friday it only made sense to bust out this Red Velvet Swirl Cheesecake for February. How fun is this cheesecake pattern?

Red Velvet Swirl Cheesecake  |  Lemon & Mocha

I’ve never made a swirled cheesecake before so I’m definitely going to have to work on my technique. I guess it’s more of a pink velvet swirl cheesecake!

Red Velvet Swirl Cheesecake  |  Lemon & Mocha

Red, pink, swirled, semi-swirled – either way it still looks pretty and cute for Valentine’s Day.

Red Velvet Swirl Cheesecake  |  Lemon & Mocha

This is a creamy classic cheesecake with a chocolate graham cracker crust. Red velvet seems to reference the appearance of the cheesecake more than anything since there’s only a tablespoon of cocoa powder so you don’t really get that hint of chocolate that you think of with a red velvet cake, but it is still a really tasty cheesecake.

Red Velvet Swirl Cheesecake  |  Lemon & Mocha

I’m a big fan of Valentine’s Day so I have all kinds of fun treats posted on the blog, like these Strawberry Chocolate Ganache Cake Balls or these Red Velvet Oreo Truffle Chocolate Crunch Brownies. You can find them all the festive treats in the Valentine’s Day section of the recipe index. Are you making any sweets this Valentine’s Day?

Red Velvet Swirl Cheesecake  |  Lemon & Mocha

Red Velvet Swirl Cheesecake
 
Yield: 12 servings
Ingredients
  • 16 chocolate graham cracker squares
  • 5 tablespoons unsalted butter, melted
  • ¼ teaspoon salt
  • 2 pounds cream cheese (4 8-ounce packages), room temperature
  • 1¼ cups granulated sugar
  • 1 tablespoon lemon juice
  • 1 teaspoon vanilla extract
  • 2 tablespoons all-purpose flour
  • 4 large eggs, room temperature
  • 1 tablespoon cocoa powder
  • 2 teaspoons red food coloring
Directions
  1. Preheat oven to 350 degrees F. Spray a 9-inch springform pan with cooking spray then tightly wrap aluminum foil around the bottom and up the sides. This is to keep the water coming in from the water bath the cheesecake will be sitting in while cooking.
  2. Turn the graham crackers into fine crumbs using a food processor or whacking with a rolling pin. In a medium mixing bowl, combine the chocolate crumbs, melted butter and salt until it resembles coarse sand. Pour the mixture into the prepared pan and press it into the bottom and up the sides in an even layer. Bake for 8 minutes then let cool completely.
  3. To make the filling, beat the cream cheese, sugar, lemon juice and vanilla extract in a large bowl with a hand mixer or in the bowl of a stand mixer with the paddle attachment. Beat on medium speed then increase to medium-high and continue to beat until super smooth, scraping down the sides as needed. Add the flour then beat until combined. Add the eggs one at a time, beating until just combined after each addition. Spoon 2 cups of the filling into a mixing bowl. Add the cocoa powder and food coloring then mix until combined. Pour the red filling into the crust then pour the white batter over top. Use a spoon to pull up some of the red batter from the bottom and swirl it, being careful not to pull up any of the crust.
  4. Reduce oven to 325 degrees F. Place the springform pan on a baking pan then place in the oven. Carefully pour water into the baking pan so the water comes about ½-inch to 1-inch up the side of the springform pan. Bake for 1 hour and 15 minutes to an hour and 30 minutes. It is done when there is a 2-3” wobble in the center. Turn the oven off and crack it open, leaving the cheesecake inside. I usually wedge a wooden spoon in the door to leave it cracked. After the hour, carefully remove from the water bath and place on a cooling rack to cool completely. Once cool, cover with plastic wrap and place in the fridge for at least 6 hours or overnight.

 Recipe slightly adapted from January/February 2012 issue of Food Network Magazine.

Some of the links above are affiliate links, which means I may receive a small commission for my referral. This does not affect the retail cost of the item. Thank you for supporting Lemon & Mocha!

Raspberry Sorbet and Frozen Chocolate Mousse Domes

Raspberry Sorbet and Frozen Chocolate Mousse Domes  |  Lemon & Mocha

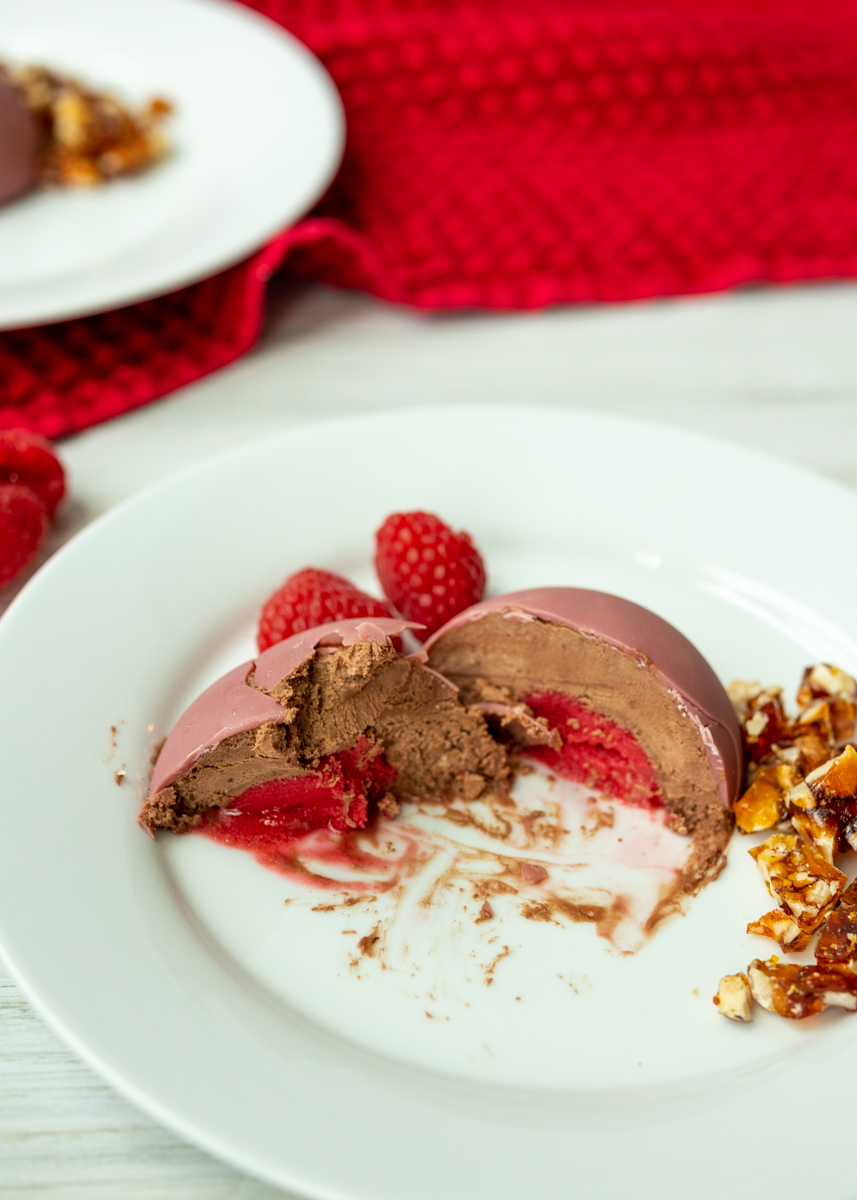
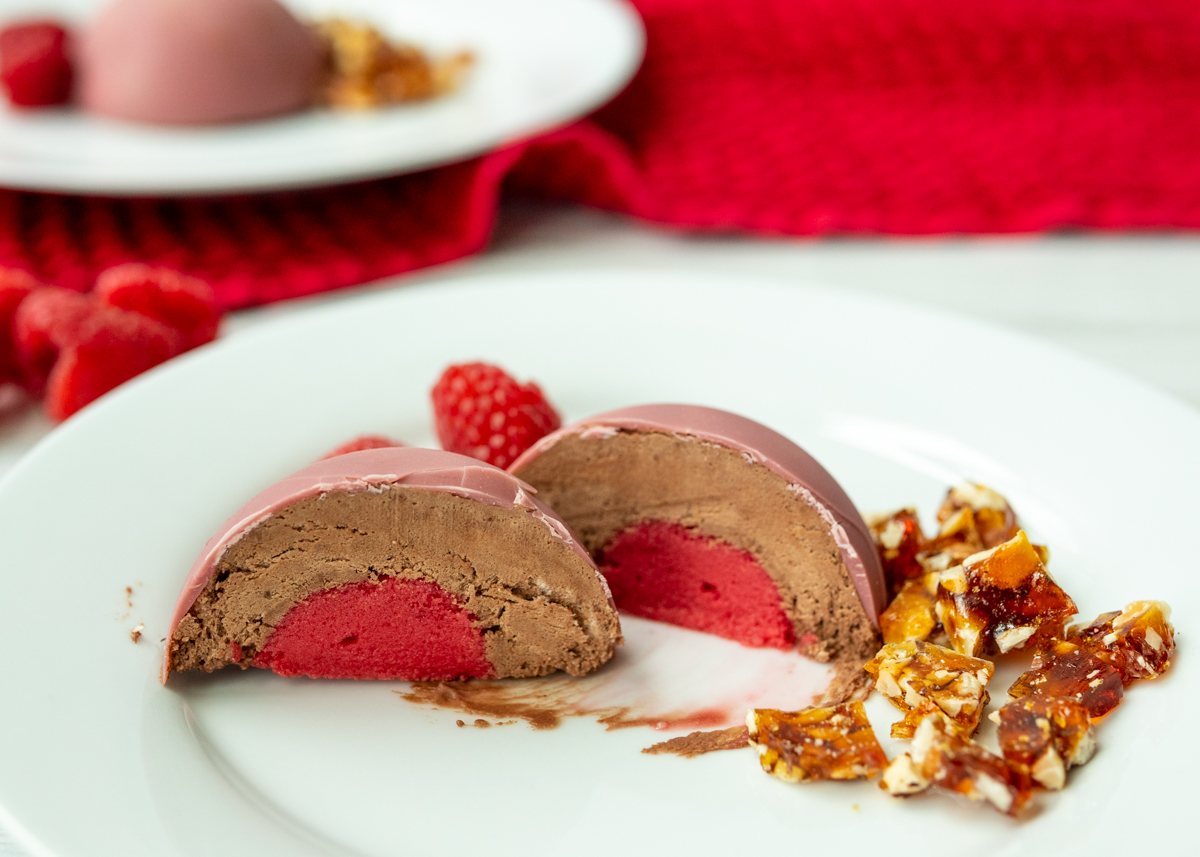
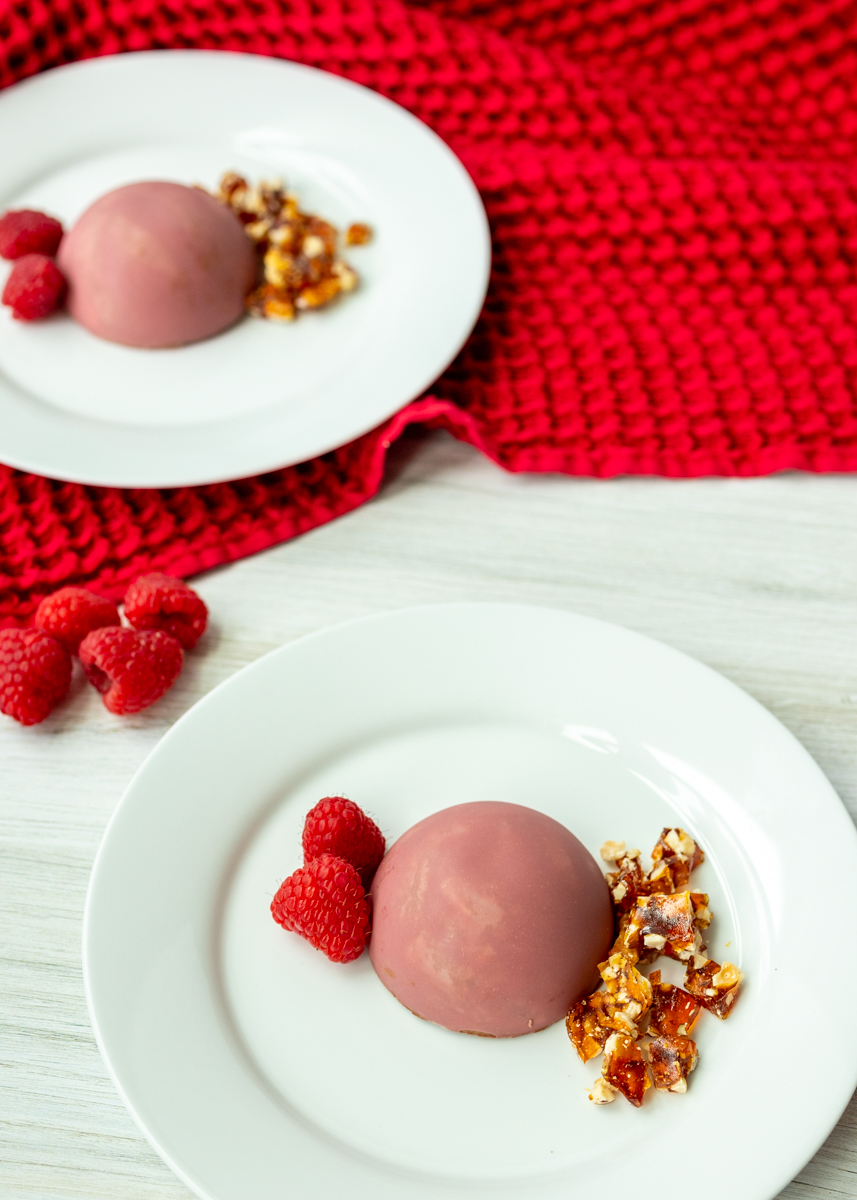
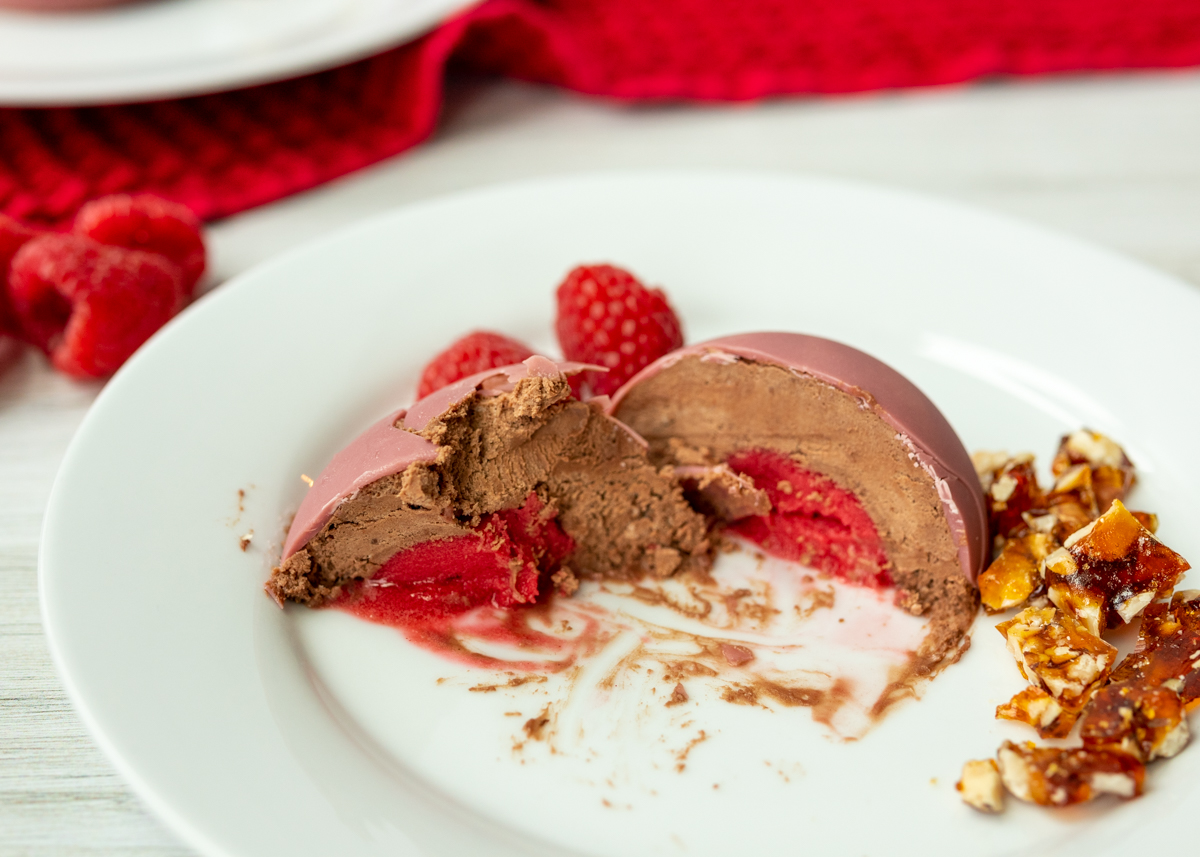
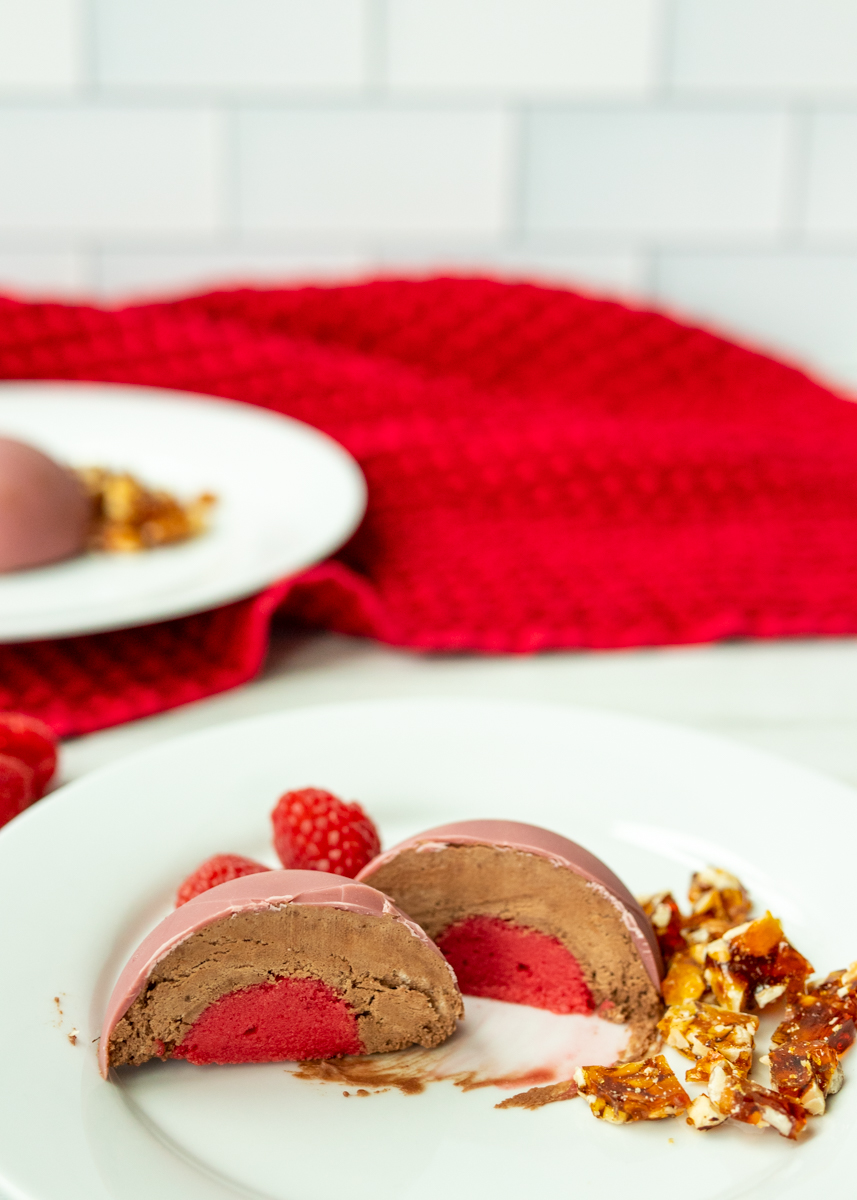
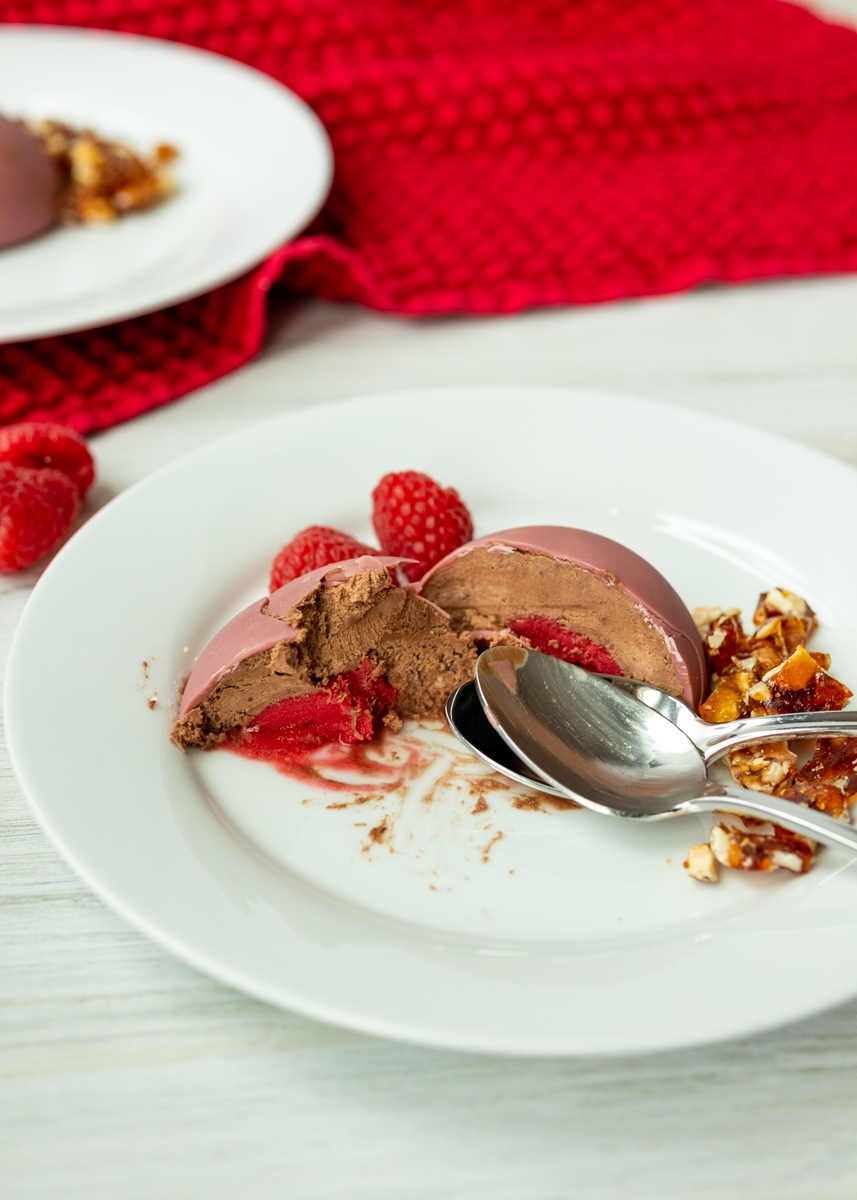
Today I am posting the best easy dessert to impress your valentine! Or to impress yourself and feel like you just nailed the confection round of Sugar Rush. Yes, I did use the word ‘easy!’ These Raspberry Sorbet and Frozen Chocolate Mousse Domes look fancy schmancy, but it’s really a few simple steps and the magic of silicone demi sphere molds. The dessert is the perfect balance of creamy, crunchy, decadent and tart. If you didn’t want to use molds you could make a deconstructed version that I’ll get into at the bottom of the post.

Raspberry Sorbet and Frozen Chocolate Mousse Domes  |  Lemon & Mocha

Ok, step one: spoon raspberry sorbet into the small mold and freeze until firm. Yep, that’s it! Step two: melt some ruby chocolate in the microwave then spoon it into the bigger mold and use your finger to spread it all around. Have you had ruby chocolate yet? It’s slightly fruity and so yummy! Plus it’s naturally a pretty pink color – perfect for Valentine’s Day! Trader Joe’s sells bags of it and a bunch of chocolate brands, like Chocolove, sell bars of it you could melt. Otherwise just use your favorite type of chocolate for the outside shell, but I highly recommend using ruby chocolate for this.

Raspberry Sorbet and Frozen Chocolate Mousse Domes  |  Lemon & Mocha

Step three: make the two ingredient chocolate mousse. I love this mousse recipe! Heat some heavy cream in the microwave then stir in chocolate chips until melted. While it’s cooling, beat some more heavy cream until stiff peaks form and gently fold into the chocolate mixture. See! Easy! Step four: assembly! Spoon the mousse into the ruby chocolate covered mold leaving a little room in the center to press in the raspberry sorbet half sphere. Smooth it out then pop in the freezer until you’re ready to serve.

Raspberry Sorbet and Frozen Chocolate Mousse Domes  |  Lemon & Mocha

Now initially I was planning on sharing this recipe and saying that the hazelnut crunch candy was an optional bonus, but after eating the finished dessert I want to stress to you that you need to make it! It adds the best textural crunch and flavor component, plus it’s also easy so why not?! Let water and sugar cook on your stovetop for eight minutes then pour over chopped toasted hazelnuts and let harden. Done!

Raspberry Sorbet and Frozen Chocolate Mousse Domes  |  Lemon & Mocha

Now if you’re interested in the silicone molds I have this bigger one and I just got this smaller one. I love using the bigger one to make mousse and ice cream desserts look fancy for when we have friends and family over for dinner. If you don’t want to experiment with the molds you could totally still make this dessert and just serve the mousse straight from the fridge instead of frozen in individual dishes with the hazelnut crunch candy and a small scoop of raspberry sorbet on top. I might even need to make the mousse with the candy its own post. Okay, I really hope you all try this one so you can feel all chefy and proud of yourselves! Let me know if you do try it!

Raspberry Sorbet and Frozen Chocolate Mousse Domes  |  Lemon & Mocha

Raspberry Sorbet and Frozen Chocolate Mousse Domes
 
Yield: 6 mousse domes
Ingredients
  • 6 tablespoons raspberry sorbet
  • ¼ cup ruby chocolate wafers, or 1½ ounces of ruby chocolate broken into pieces
  • 1 teaspoon coconut oil or vegetable oil
  • 1½ cups heavy cream, divided
  • 1 cup semisweet chocolate chips (I recommend Ghiradelli, Guittard or Trader Joe’s)
  • ⅔ cup chopped toasted hazelnuts (see note)
  • ⅔ cup granulated sugar
  • ½ cup water
Directions
  1. Let the raspberry sorbet soften slightly then spoon into 6 cavities of the smaller mold (each cavity should hold about 1 tablespoon). Press into the mold then smooth with an offset spatula or the straight back of a knife. Cover with plastic wrap and place in the freezer until firm, at least 2½ hours. Tip: placing the silicone molds on small baking sheets makes it easier to move.
  2. Place the ruby chocolate and coconut oil (or vegetable oil) in a microwave safe bowl. Microwave for 30 seconds, stir, then continue to microwave in 15 second increments, stirring after each increment, until melted. Spoon a bit into one of the cavities of the larger mold. Use your finger to spread the chocolate and completely coat the inside of the demi sphere. It should be thick enough that you can’t see the silicone through, but not too thick. Repeat for 5 more cavities. Place in the fridge to firm up for at least 15 minutes.
  3. Heat ½ cup of the heavy cream in a large microwave safe mixing bowl for 45 seconds to 1 minute. Add the chocolate chips then stir. Let sit for 5 minutes. Whisk the mixture together until smooth then let cool. While the chocolate mixture is cooling, whip the remaining 1 cup of the cream. Using a mixture, whip the cold cream on medium speed, slowly increasing to medium high. Continue to whip until stiff peaks form, which means when you lift up the beater the peaks of the cream stay exactly in place. Tip: whip in a metal bowl and place both the bowl and the whisk in the freezer 5-10 minutes before whipping the cream. Gently fold the whipped cream into the chocolate mixture in 3 additions. It’s okay if there’s still some streaks. If you’re ready to assemble the mousse domes move to the next step, otherwise cover and place in the fridge until ready to use.
  4. Spoon the chocolate mousse into the ruby chocolate coated mold. Fill all the way to the top, leaving a bit of space in the center for the raspberry sorbet. One at a time, gently pop the raspberry sorbet out of the silicone mold and press into the center of the chocolate mousse, flat side facing up. It’s okay if the sorbet doesn’t pop out in a perfect demi sphere. Smooth the top with an offset spatula or the straight back of a knife. Place in the freezer until firm; I usually leave in overnight.
  5. To make the hazelnut crunch candy, place the chopped hazelnuts on a parchment lined baking sheet close together. Add the sugar and water to a small saucepan and heat over medium-high heat, stirring until the sugar dissolves. Once the sugar dissolves, stop stirring. Let come to a boil then cook until it reaches a light brown color, about 6-8 minutes. Remove from the heat and wait until it stops bubbling then pour over the chopped hazelnuts. Place in the fridge for 30 minutes then break the candy in pieces. Store at room temperature in an airtight container until ready to serve. When ready to serve the mousse domes, carefully pop them out of the silicone mold. Alternatively, you could pop them out of the molds ahead of time and just keep them in the freezer on a lined baking sheet covered in plastic wrap until ready to serve.
Notes
To toast the chopped hazelnuts, bake them in a 350 degree F oven for 3-4 minutes.

Some of the links above are affiliate links, which means I may receive a small commission for my referral if you purchase something. This does not affect the retail cost of the item. Thank you for supporting Lemon & Mocha!

Olive Oil Mashed Potatoes and Kale

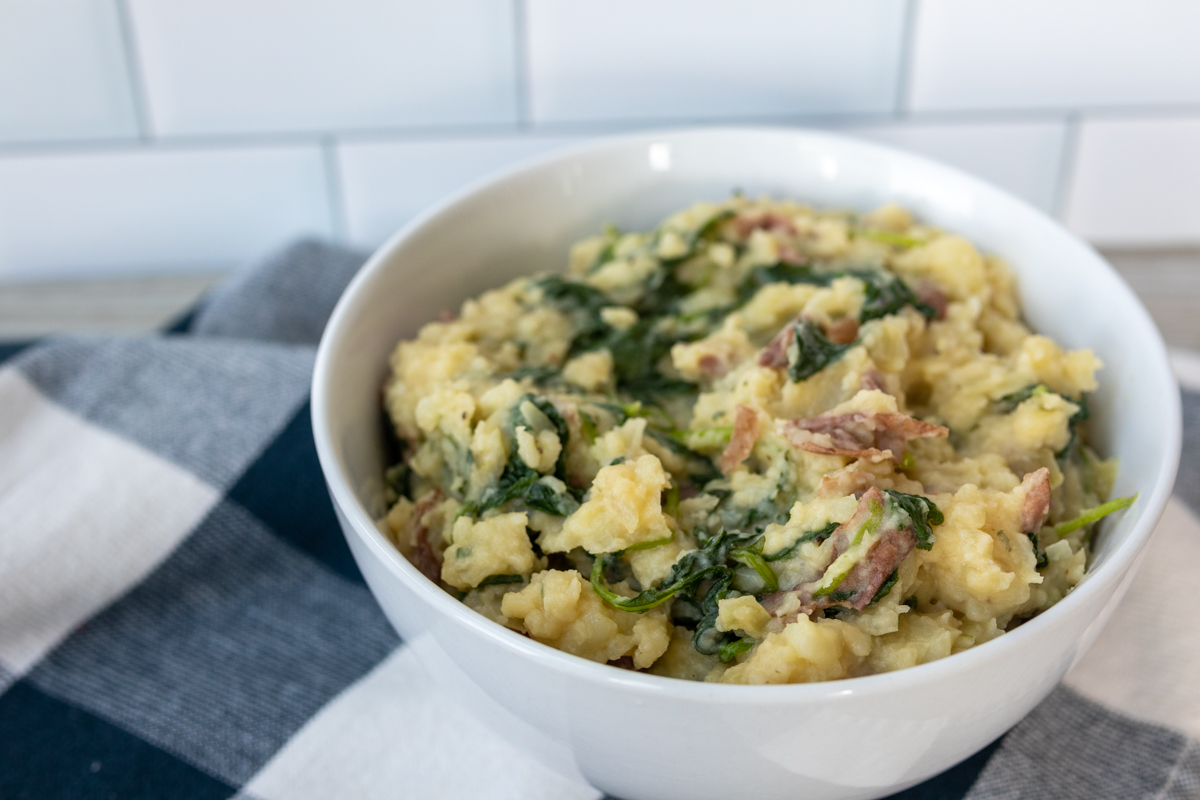
Olive Oil Mashed Potatoes and Kale  |  Lemon & Mocha

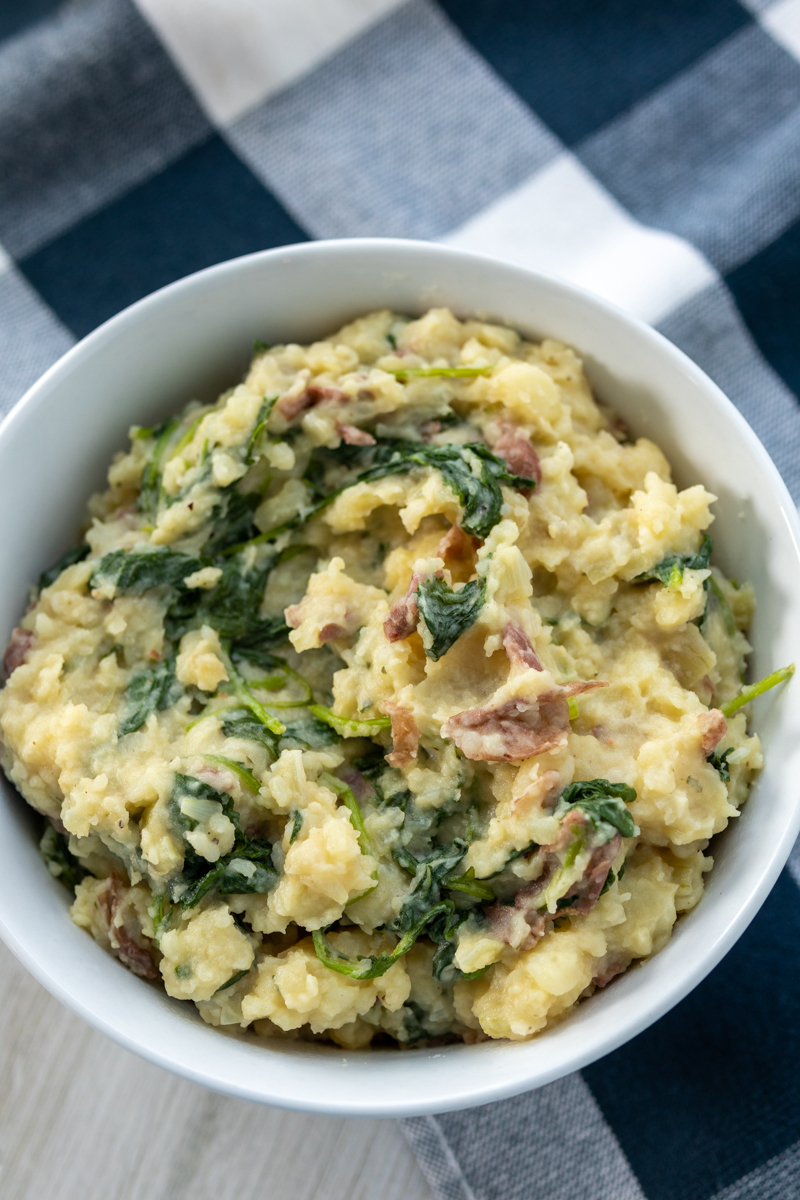
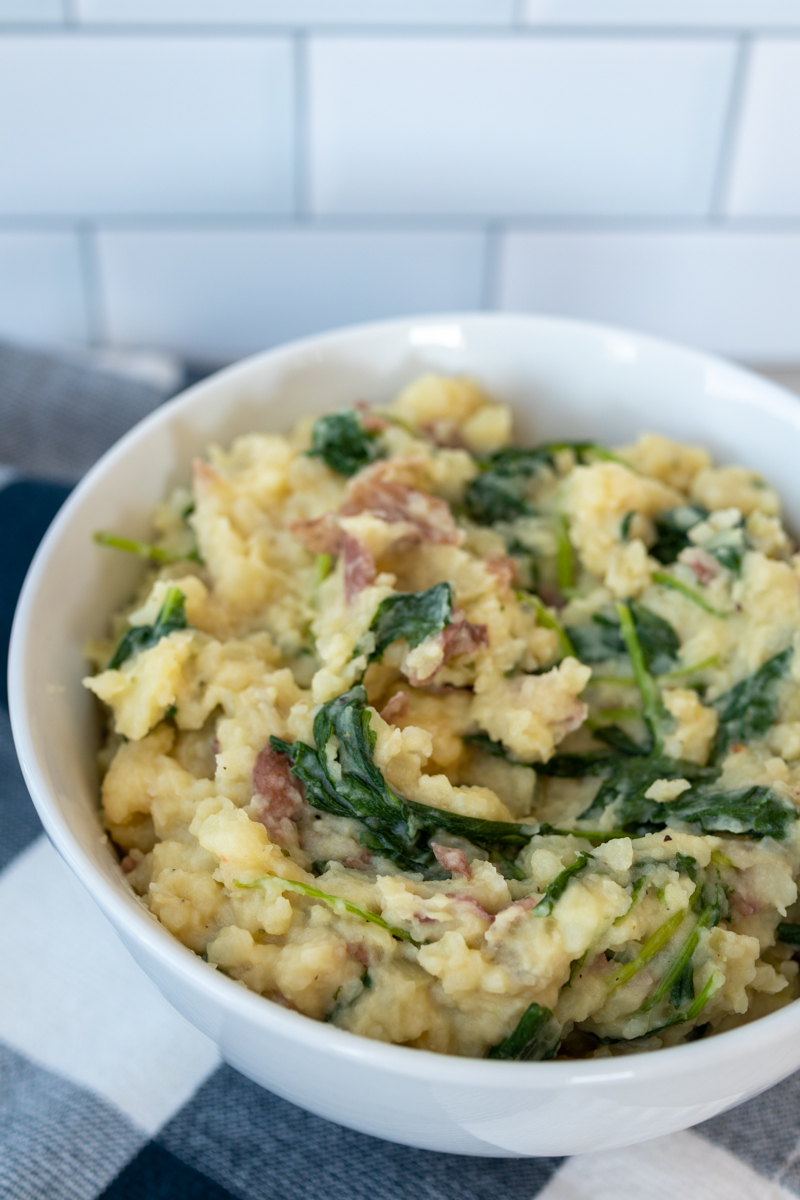
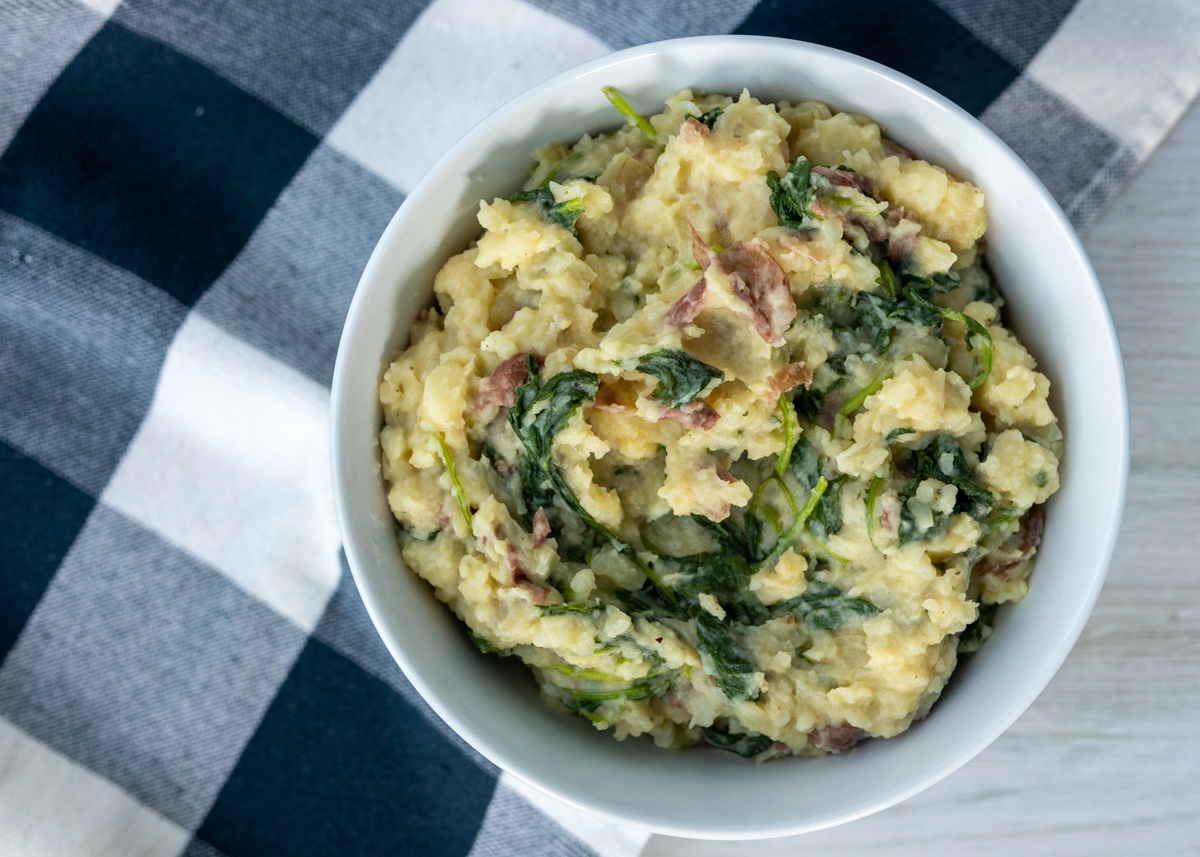
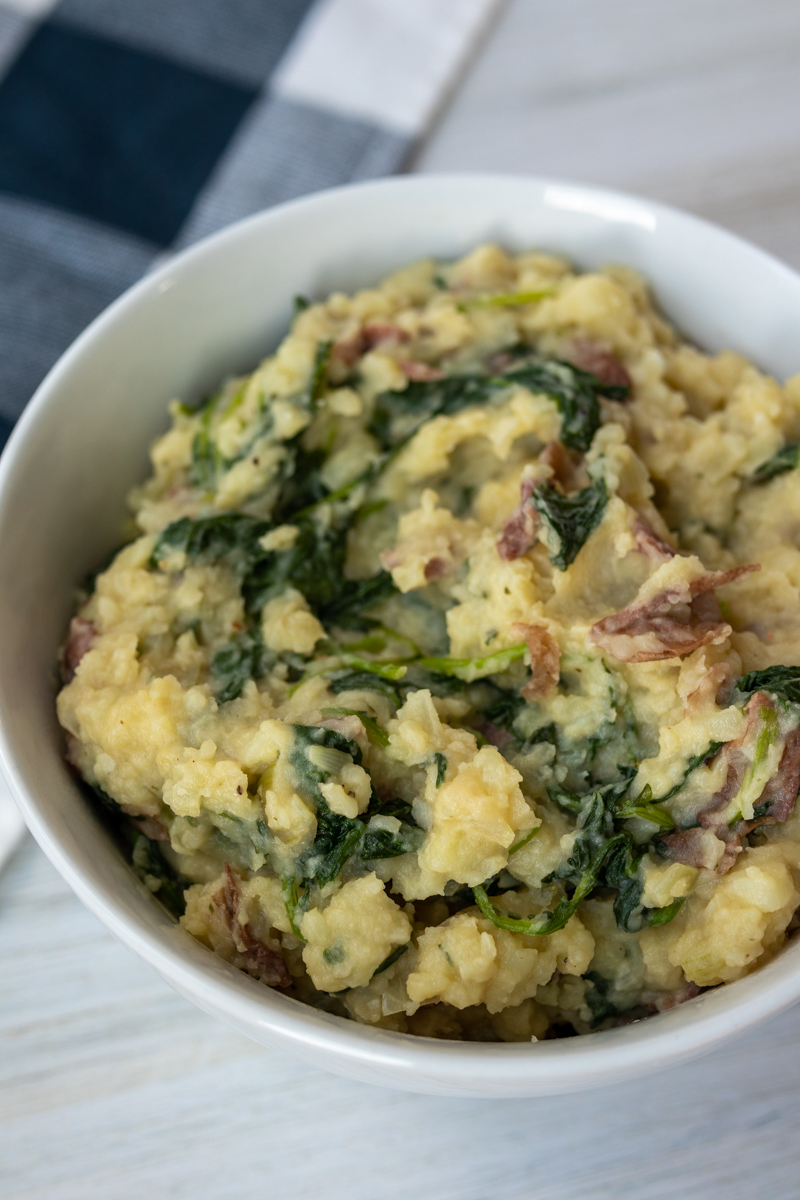
I promised more easy dinners and side dishes in 2020 so here we are with these Olive Oil Mashed Potatoes and Kale. Even though Matt and I love mashed potatoes (who doesn’t?!), it’s rare that we have them for dinner. I typically don’t want to make something so rich with butter on a regular basis and all the peeling and chopping of the potatoes can be time consuming. These Olive Oil Mashed Potatoes and Kale solve both those weeknight dilemmas and the first solution is right in the name of the recipe.

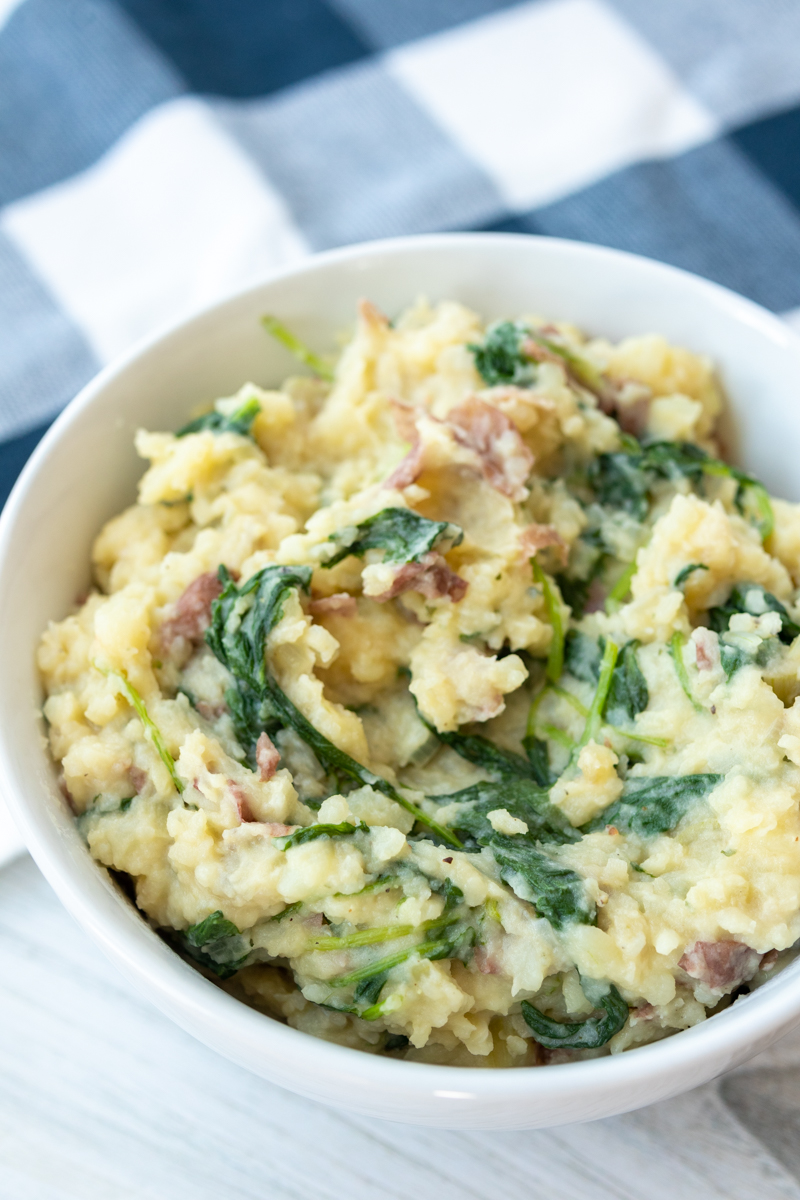
Olive Oil Mashed Potatoes and Kale  |  Lemon & Mocha

Mashed potatoes without butter sounds like a crazy concept, but the olive oil and boldness of the sautéed shallots and garlic won’t have you missing it one bit.

Olive Oil Mashed Potatoes and Kale  |  Lemon & Mocha

To solve the next dilemma, we’re using small red potatoes so there’s no peeling or chopping involved. Red potatoes are slightly sweeter and creamier that your classic russet potato. Creamier and quicker mashed potatoes? Life is good!

Olive Oil Mashed Potatoes and Kale  |  Lemon & Mocha

The recipe calls for half a cup of milk and you can use any fat percentage you prefer or already have in the fridge. I used nonfat milk as that is what we always have stocked and it tasted delicious, but of course the higher fat percentage you use the richer the mashed potatoes will taste.

Olive Oil Mashed Potatoes and Kale  |  Lemon & Mocha

I loved these easy mashed potatoes and using the small red potatoes, olive oil, shallots, garlic and milk as a base, I see plenty more weeknight mashed potato variations in our future!

Olive Oil Mashed Potatoes and Kale  |  Lemon & Mocha

Olive Oil Mashed Potatoes and Kale
 
Yield: 4-6 servings
Ingredients
  • 1½ pounds small red potatoes, scrubbed
  • ¼ cup olive oil, divided
  • 2 shallots, minced
  • 2 cloves garlic, minced
  • 4 cups baby kale
  • ½ cup milk
  • ¼ cup fresh parsley, chopped
  • Salt and ground black pepper
Directions
  1. Bring a large pot of salted water to a boil. Add the potatoes and cook until tender, about 15 minutes. Reserve 1 cup of the cooking liquid then drain the potatoes.
  2. Lightly wipe the pot dry then heat 1 tablespoon of the olive oil over medium-high heat. Add the shallots and garlic and cook until softened, about 2 minutes. Season with salt and pepper. Add the kale and ½ cup of the reserved cooking liquid. Cook for 5 minutes, stirring occasionally. Add the milk and once warm, remove from the heat. Add the potatoes, the remaining 3 tablespoons of olive oil and the chopped parsley. Mash, adding more reserved cooking liquid if needed. Season with salt and pepper to taste.

 Recipe from April 2019 issue of Food Network Magazine.

Some of the links above are affiliate links, which means I may receive a small commission for my referral. This does not affect the retail cost of the item. Thank you for supporting Lemon & Mocha!

Chocolate Chip Cookie Butter Cheesecake

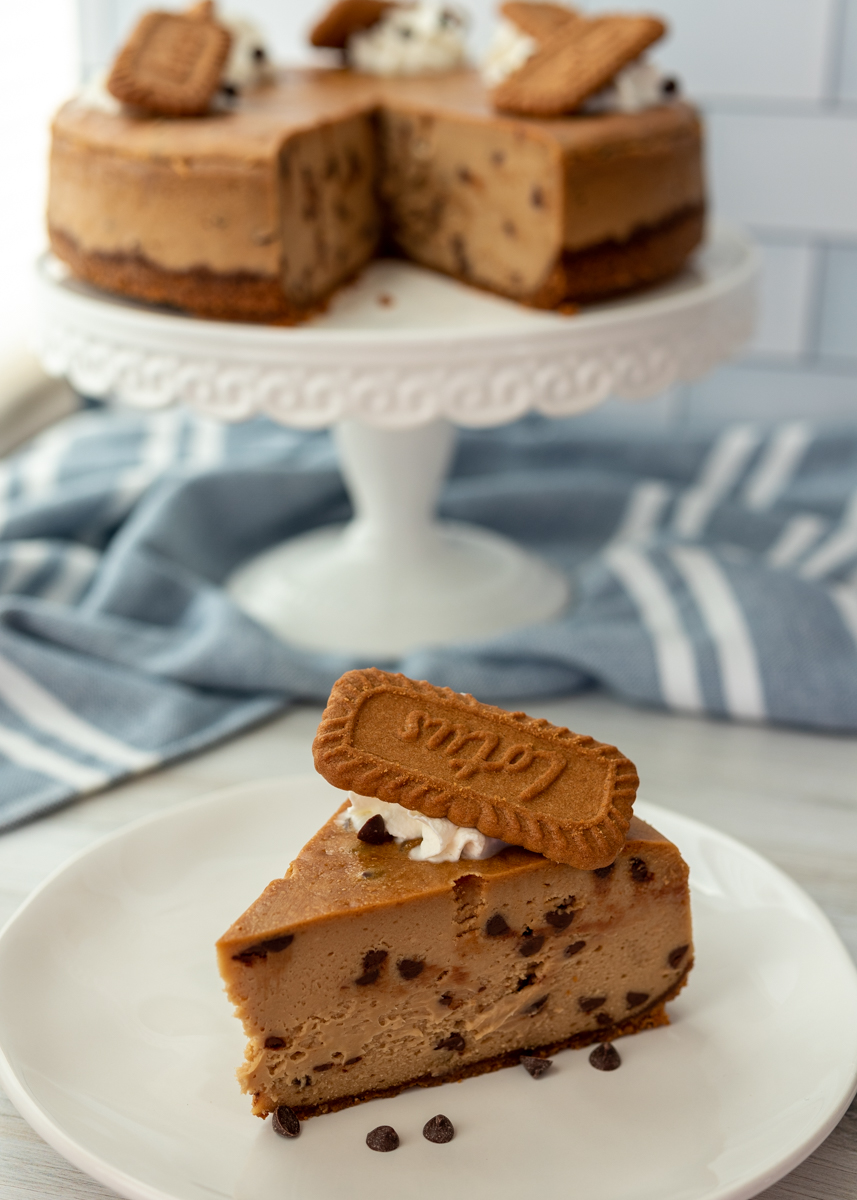
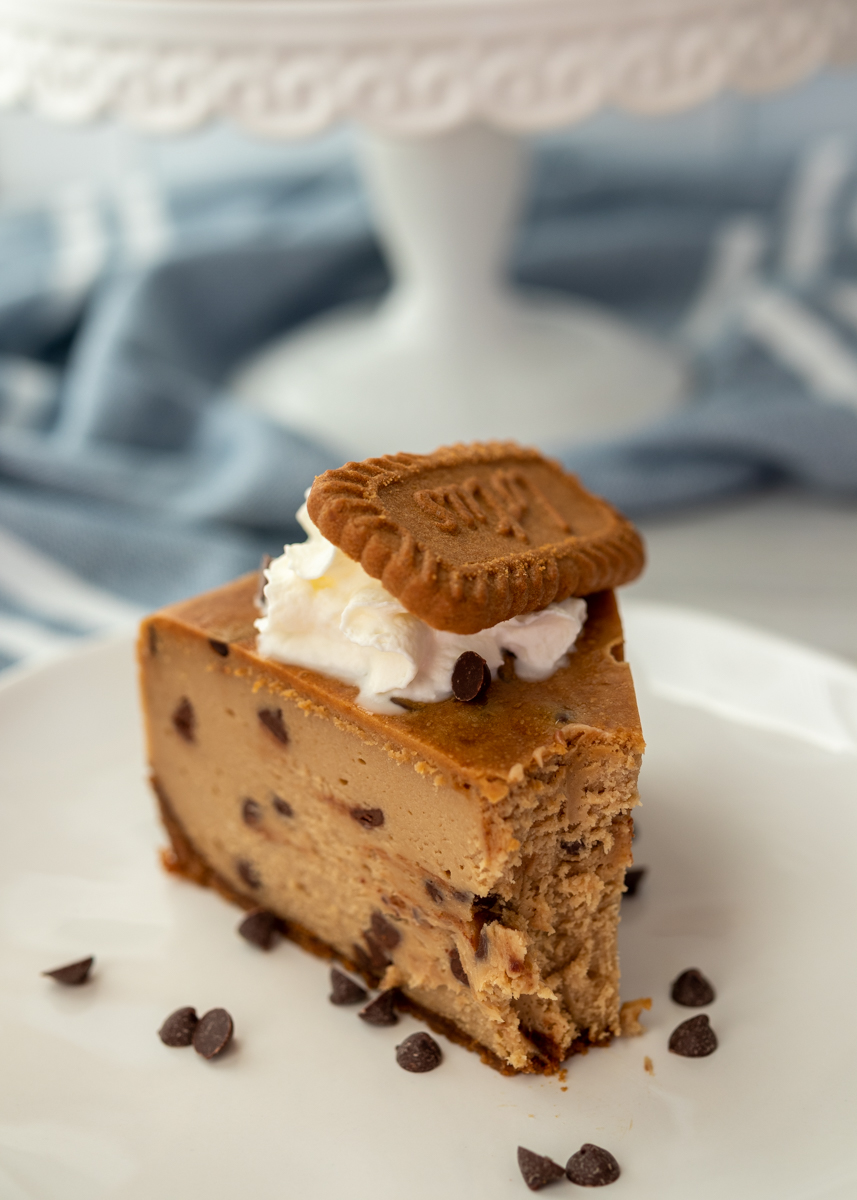
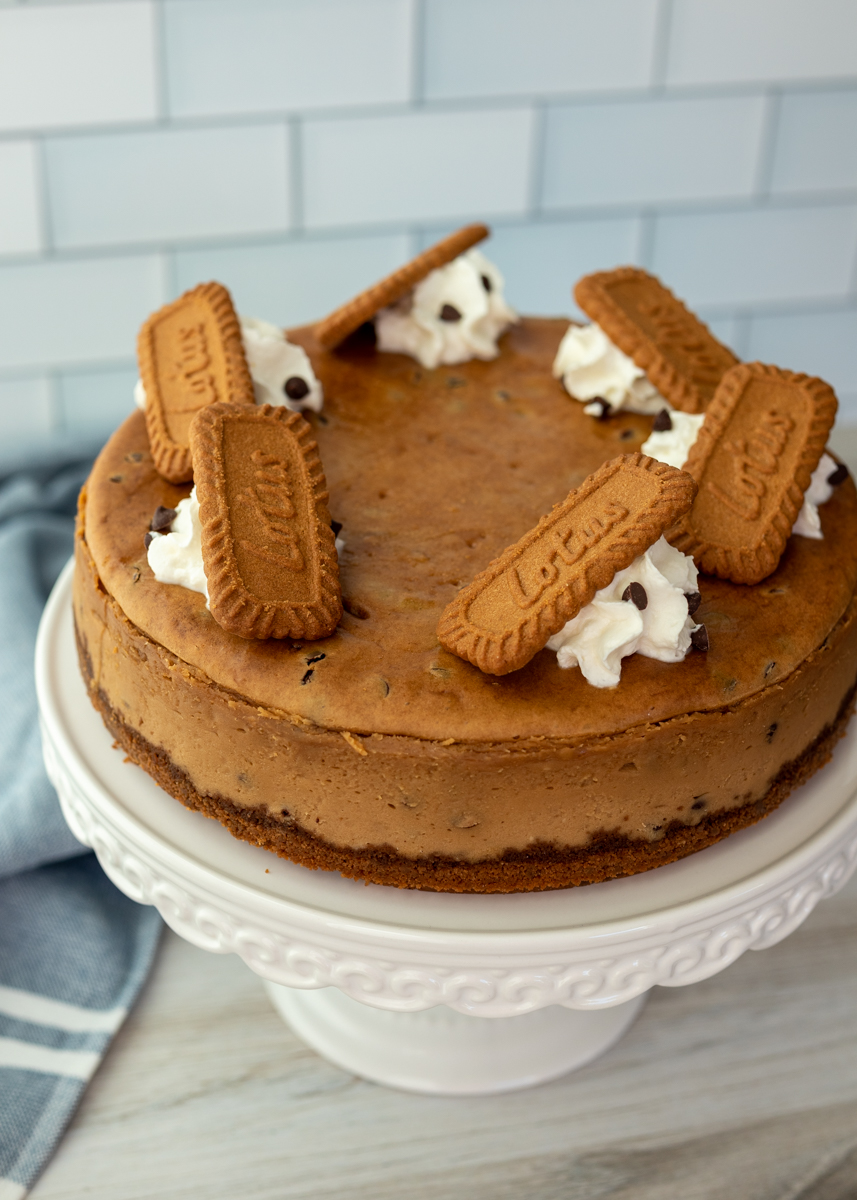
Chocolate Chip Cookie Butter Cheesecake  |  Lemon & Mocha

I’m declaring 2020 the year of cheesecake! Every year the January issue of the Food Network Magazine does a baking calendar article where they post a recipe in a certain category for each month of the year. Last year it was all about the cookies. This year, the recipes were brownies, but although some of them looked good I didn’t feel compelled to participate. So since I’ve been craving cheesecake lately I decided I’m making my own year of cheesecake and posting a special cheesecake recipe for you all each month this year!

Chocolate Chip Cookie Butter Cheesecake  |  Lemon & Mocha

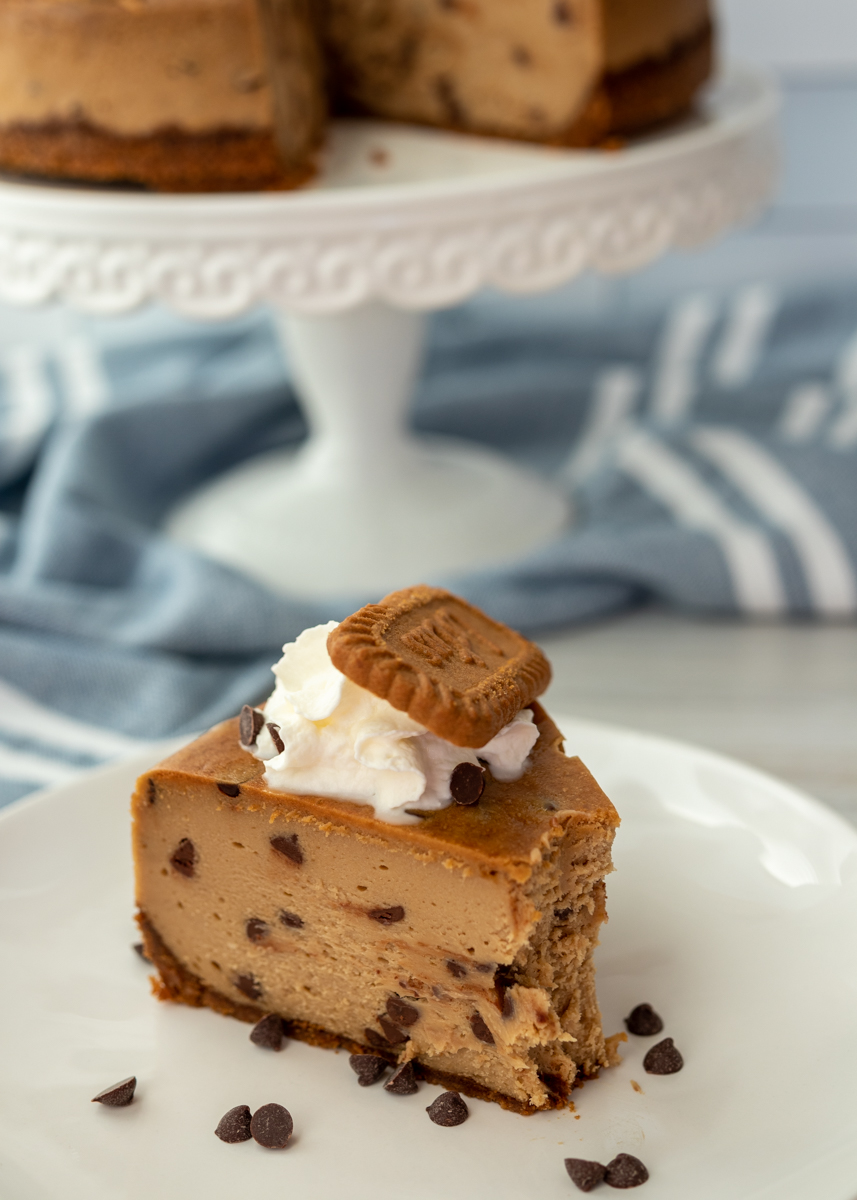
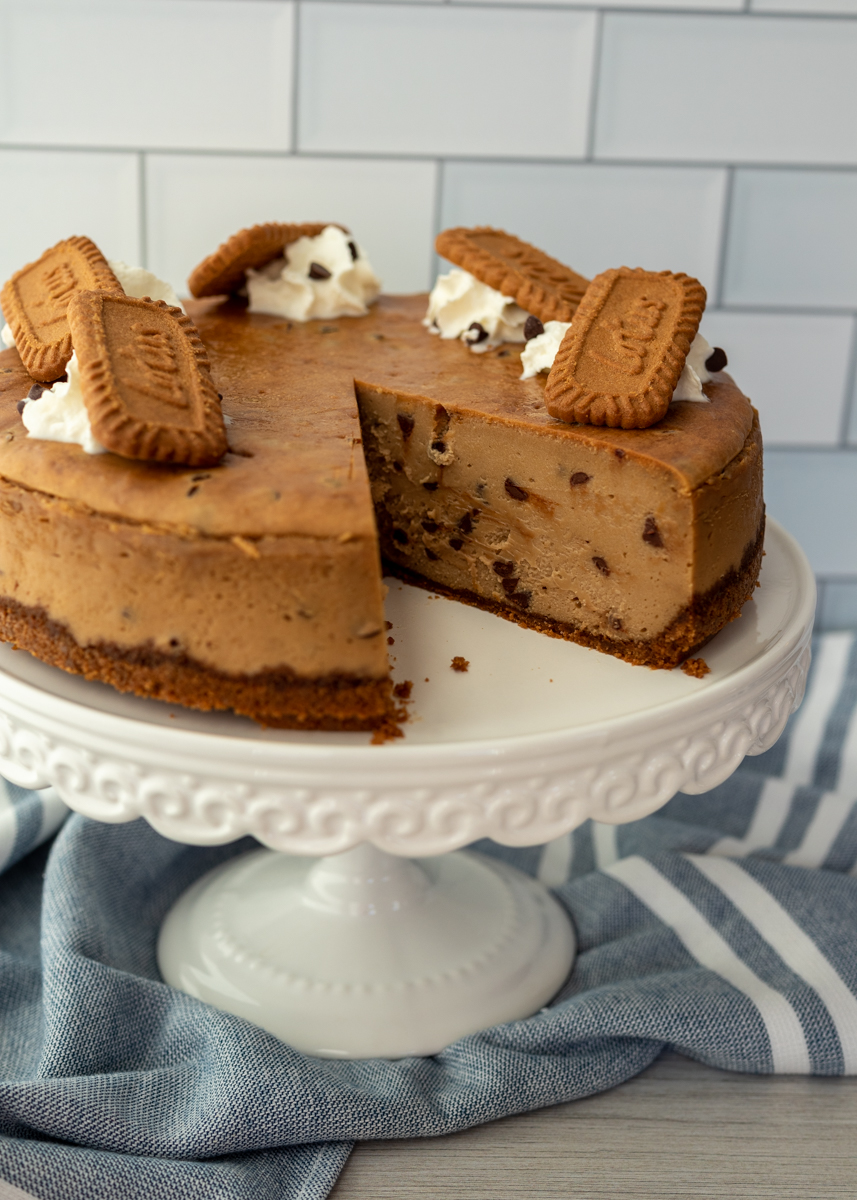
To kick things off I have this decadent Chocolate Chip Cookie Butter Cheesecake. This is one of those recipe ideas that I had written on a little note a long time ago so I’m always excited when I finally get around to experimenting with them. I’m obsessed with my Cookie Butter Cheesecake Stuffed Pumpkin Bread (I even made a loaf before Sam was born so Matt and I would be able to snack on slices) so I knew cookie butter and cheesecake were a match meant to be.

Chocolate Chip Cookie Butter Cheesecake  |  Lemon & Mocha

The cheesecake has a biscoff cookie crust, which are the cookies used to make cookie butter. I used Lotus brand for both the cookies and the cookie butter, which you can find at plenty of grocery stores, and Trader Joe’s also sells their version of cookie butter and the cookies, which they call speculoos.

Chocolate Chip Cookie Butter Cheesecake  |  Lemon & Mocha

This cheesecake is super creamy and perfectly decadent. My favorite part ended up being the mini chocolate chips sprinkled throughout the cheesecake filling. I wrote this into the recipe, but if you really want the cookie butter flavor to come through then lightly frost the top with some of the extra cookie butter.

Chocolate Chip Cookie Butter Cheesecake  |  Lemon & Mocha

I snuck January’s cheesecake in with mere hours to spare, but I can’t wait to share the rest of the year’s cheesecakes with you all! I will also start sharing some cheesecake baking tips that I learn as I go so stay tuned.

Chocolate Chip Cookie Butter Cheesecake
 
Yield: 12 servings
Ingredients
  • 32 biscoff / speculoos cookies (about 1 package of cookies), divided
  • 4 tablespoons unsalted butter, melted
  • ¼ teaspoon salt
  • 2 pounds cream cheese (that’s 4 8-ounce packages), room temperature
  • 1½ cups brown sugar
  • 1 cup cookie butter, plus more for topping if desired
  • 2 teaspoons vanilla, divided
  • 1½ cups heavy cream, divided
  • 4 large eggs
  • 1 cup mini semisweet chocolate chips
  • ¼ cup confectioners sugar
Directions
  1. Preheat oven to 350 degrees F. Spray a 9-inch springform pan with cooking spray then tightly wrap aluminum foil around the bottom and up the sides. This is to keep the water coming in from the water bath the cheesecake will be sitting in while cooking.
  2. Turn 26 of the speculoos cookies into fine crumbs using a food processor or whacking with a rolling pin. In a medium mixing bowl, combine the cookie crumbs, melted butter and salt until it resembles coarse sand. Pour the mixture into the prepared pan and press it into the bottom and up the sides in an even layer. Bake for 8 minutes then let cool completely.
  3. To make the filling, beat the cream cheese, brown sugar and cookie butter in a large bowl with a hand mixer or in the bowl of a stand mixer with the paddle attachment. Beat on medium speed then increase to medium-high and continue to beat until super smooth, scraping down the sides as needed. Add 1 teaspoon of the vanilla and heavy cream then beat until combined. Add the eggs one at a time, beating until just combined after each addition. Fold in the mini chocolate chips then pour the filling onto the cooled crust.
  4. Reduce oven to 325 degrees F. Place the springform pan on a baking pan then place in the oven. Carefully pour water into the baking pan so the water comes about ½-inch to 1-inch up the side of the springform pan. Bake for 1 hour and 15 minutes to an hour and 30 minutes. It is done when there is a 2-3” wobble in the center. Turn the oven off and crack it open, leaving the cheesecake inside. I usually wedge a wooden spoon in the door to leave it cracked. After the hour, carefully remove from the water bath and place on a cooling rack to cool completely. Once cool, cover with plastic wrap and place in the fridge for at least 6 hours or overnight.
  5. When ready to serve, make the whipped cream. Place the metal mixing bowl or the metal bowl of a stand mixer back in the freezer along with the metal beaters or beater for 5-10 minutes. Remove and add the remaining cup of the heavy cream (make sure your cream is cold), confectioners sugar and the remaining teaspoon of vanilla extract. Beat on medium-high until stiff peaks form. Remove the cheesecake from the springform pan and top with additional cookie butter if desired. Pipe the whipped cream on top then add the remaining 6 cookies and serve.